Package Contents Support and Documentation Notice A ... · Ethernet dell'unità a uno switch di...
2
VP2730 7 x 3 Presentation Matrix Switch con Streaming, HDBaseT www.aten.com A Revisione Hardware Vista anteriore 1 Pulsanti per la selezione del display: Premere per mettere a fuoco un display. Il pulsante relativo al display a fuoco si illumina di ambra. 2 Pulsanti per la selezione della sorgente: Premere per designare una sorgente per il display a fuoco. Il pulsante selezionato si illumina di verde. Premere per eseguire lo streaming in una sorgente su Internet. 3 LED sorgenti: Indicano le sorgenti selezionate per Sorgente (1) e (2). 4 LED Go Live: Indicano il display 5 Pulsanti delle funzioni: Premere per accedere alla multiview, alle impostazioni go-live e alle impostazioni di disattivazione audio. 6 Pulsanti di navigazione: Premere per navigare e configurare le impostazioni tramite l'OSD. 7 Pulsanti di accensione/spegnimento: Premere per accendere l'unità: Nota: Per accendere l'unità, assicurarsi che anche l'interruttore di alimentazione sia nella posizione ON. Telecomando a infrarossi 1 Accensione/Spegnimento 2 Sorgente 3 Navigazione Vista posteriore 1 Sorgente (1) • DisplayPort In • HDMI In 2 Sorgente (2) • VGA In • Stereo Audio In • HDMI In 3 Sorgente (3), (4) e (5) • HDMI In 4 HDMI Out 5 HDBaseT Out 6 Interruttore dell'alimentazione Phantom 7 MIC In 8 Balanced Audio In 4 Inserire un microfono nella porta Audio In. 4 5 Inserire un altoparlante nella porta Digital Audio Out o Stereo Audio Out. 6 Per configurare le impostazioni dell'unità tramite interfaccia RS-232, collegare un controller hardware o software alla porta seriale RS-232. 7 Per consentire lo streaming tramite IP, usare un cavo RJ-45 per collegare la porta Ethernet dell'unità a uno switch di rete. 8 Per usare il telecomando a infrarossi, collegare il ricevitore a infrarossi alla porta apposita. 9 Inserire il cavo di alimentazione nella presa, mettere l'interruttore sulla posizione ON e premere il pulsanti di accensione/spegnimento. 10 Accendere tutti i dispositivi collegati. Nota: 1. Non saltare questo passaggio. La messa a terra adeguata aiuta a prevenire danni all'unità dovuti a sovraccarico o elettricità statica. 2. Le Sorgenti (1) e (2) possono ricevere due input video, ma possono visualizzarne solo uno alla volta. 3. Usare un cavo Cat 5e/6 per trasmettere segnali 1080p fino a 60m oppure un cavo Cat 6a/ATEN 2L-2910 Cat 6a per estendere la trasmissione a 70m. 4. Se si utilizza un microfono a condensatore, posizionare l'interruttore dell'alimentazione Phantom su ON. Funzionamento È possibile azionare l'unità localmente usando i pulsanti del pannello anteriore e il telecomando a infrarossi ; e da remoto tramite un'interfaccia Web con connessione TCP/IP standard o un controller seriale RS-232. Vedere il manuale utente per ulteriori dettagli. Pulsante pannello anteriore • Per selezionare una sorgente, premere il pulsante di selezione del display, quindi premere il pulsante di selezione della sorgente che corrisponde all'input che si desidera visualizzare. Il pulsante del display selezionato si illumina di ambra, e la sorgente selezionata si illumina di verde. • Per bloccare o sbloccare i pulsanti del pannello anteriore, tenere premuto il pulsante di navigazione su per cinque secondi. Quando il pannello anteriore è bloccato, l'icona di blocco ( ) si illumina di rosso. Telecomando a infrarossi Per selezionare una sorgente, premere il pulsante Display per mettere a fuoco il display, quindi premere il pulsante Sorgente che corrisponde alla sorgente che si desidera emettere. Web GUI Usare la Web GUI per configurare le impostazioni di sistema o per eseguire lo streaming delle schermate. Per accedere alla Web GUI, seguire questi passaggi. 1. Premere sul telecomando a infrarossi per visualizzare l'OSD. L'indirizzo IP dell'unità appare nell'angolo in alto a sinistra. 2. Accedere con l'indirizzo IP e le seguenti credenziali: • Nome utente: amministratore • Password: password 9 Digital Audio Out • Optical Audio Out • Coaxial Audio Out 10 Stereo Audio Out 11 Porta seriale RS-232 12 Porta Ethernet 13 Porte USB tipo A (2.0) 14 Porte USB tipo A (3.0) 15 Porta ricevitore IR 16 Presa per l’alimentazione 17 Interruttore di accensione 18 Terminale di messa a terra B Installazione Hardware Fare riferimento allo scherma di installazione indicato sopra ed eseguire questi passaggi: 1 Usare un cavo di messa a terra per mettere a terra l'unità collegandone un'estremità al terminale di messa a terra e l'altra estremità a un oggetto messo a terra idoneo. 1 2 Collegare l'unità alle sorgenti. 2 3 Collegare l'unità ai display. (a) Usare i cavi HDMI per collegare i display HDMI alle porte HDMI Out. (b) Usare un cavo Cat 5e/6/6a per collegare un display HDBaseT alla porta HDBaseT Out. 3 4 Notifica 5 Display 6 Funzione VP2730 7 x 3 Conmutador de matriz de presentación con transmisión, HDBaseT www.aten.com A Revisión del hardware Vista frontal 1 Botones de selección de pantalla: Presione para enfocar una pantalla. El botón para la pantalla enfocada se ilumina en ámbar. 2 Botones de selección de fuente: Presione para designar una fuente a la pantalla enfocada. El botón seleccionado se ilumina en naranja. Presione para transmitir en una fuente a través de Internet. 3 LEDs de fuente: Indique las fuentes seleccionadas para Fuente (1) y (2). 4 LEDs Go Live: Indican la pantalla que está siendo transmitida. 5 Botones de función: Presione para acceder a la vista múltiple, el menú, la configuración go-live y la configuración de silencio. 6 Botones de navegación: Presione para navegar y realizar la configuración a través del OSD. 7 Botón de encendido/apagado: Presionar para encender la unidad. Nota: Para encender la unidad, también asegúrese de que el interruptor de encendido esté en ON. Mando a distancia IR 1 Encendido/Apagado 2 Fuente 3 Navegación Vista posterior 1 Fuente (1) • Entrada DisplayPort • Entrada HDMI 2 Fuente (2) • Entrada VGA • Entrada de audio estéreo • Entrada HDMI 3 Fuente (3), (4) y (5) • Entrada HDMI 4 Salida HDMI 5 Salida HDBaseT 6 Interruptor de alimentación fantasma 7 Entrada MIC 8 Entrada de audio balanceado 4 Conecte un micrófono al puerto de entrada de audio. 4 5 Conecte un altavoz a los puertos de salida de audio digital o de salida de audio estéreo. 6 Para configurar los ajustes de la unidad a través de una interfaz RS-232, conecte un controlador de hardware o software al puerto serie del RS-232. 7 Para permitir la transmisión por IP, utilice un cable RJ-45 para conectar el puerto Ethernet de la unidad a un interruptor de red. 8 Conecte el receptor IR al puerto del receptor IR para el mando a distancia IR. 9 Enchufe el cable de alimentación a la toma de corriente, coloque el interruptor de alimentación en la posición de ENCENDIDO y luego presione el botón de Encendido/Apagado. 10 Encienda todos los dispositivos conectados. Nota: 1. No omita este paso. Una conexión a tierra adecuada ayuda a prevenir daños a la unidad por subidas de tensión o electricidad estática. 2. Las fuentes (1) y (2) pueden recibir dos entradas de vídeo, pero sólo pueden mostrar una a la vez. 3. Utilice un cable Cat 5e/6 para transmitir señales de 1080p hasta 60m o un cable Cat 6a/ATEN 2L-2910 para extender la transmisión a 70m. 4. Si está utilizando un micrófono condensador (condensador), coloque el interruptor de alimentación fantasma en la posición de ENCENDIDO. Funcionamiento Puede utilizar la unidad localmente usando los botones del panel frontal y el mando a distancia IR; remotamente a través de una interfaz web sobre una conexión TCP/IP estándar o un controlador serie RS-232. Consulte el manual del usuario para más detalles. Botones del panel frontal • Para seleccionar una fuente, pulse el botón de selección de pantalla y, a continuación, pulse el botón de selección de fuente que corresponda a la entrada que desea visualizar. El botón de la pantalla seleccionada se ilumina en ámbar y la fuente seleccionada se ilumina en verde. • Para bloquear o desbloquear los botones del panel frontal, mantenga presionado el botón Arriba durante cinco segundos. Cuando el panel frontal está bloqueado, el icono del candado ( ) se ilumina en rojo. Mando a distancia IR Para seleccionar una fuente, presione el botón de visualización para enfocar una pantalla y, a continuación, presione el botón de fuente que corresponda a la fuente que desea mostrar. GUI de Web Use la GUI de web para configurar los ajustes del sistema o mostrar las pantallas. Para acceder a la GUI de web, siga estos pasos. 1. Presione en el mando a distancia IR para mostrar el menú en pantalla (OSD). La dirección IP de la unidad aparece en la esquina superior izquierda. 2. Inicie sesión con la dirección IP y las siguientes credenciales: • Nombre de usuario: administrator • Contraseña: password 9 Salida de audio digital • Salida de audio óptica • Salida de audio coaxial 10 Salida de audio estéreo 11 Puerto serie RS-232 12 Puerto Ethernet 13 Puertos USB tipo A (2.0) 14 Puerto USB tipo A (3.0) 15 Puerto receptor IR 16 Toma de corriente 17 Botón de encendido 18 Terminal de conexión a tierra B Instalación del hardware Consulte el diagrama de instalación anterior y haga lo siguiente: 1 Utilice un cable de tierra para conectar la unidad a tierra conectando un extremo al terminal de tierra y el otro extremo a un objeto conectado a tierra correctamente. 1 2 Conectar la unidad a fuentes. 2 3 Conectar la unidad a pantallas. (a) Utilice cables HDMI para conectar las pantallas HDMI a los puertos de salida HDMI. (b) Utilice un cable Cat 5e/6/6a para conectar una pantalla HDBaseT al puerto de salida HDBaseT. 3 4 Notificación 5 Pantalla 6 Función VP2730 7 x 3 Präsentations-Matrix Switch mit Streaming, HDBaseT www.aten.com A Hardware Übersicht Ansicht von vorne 1 Anzeigeauswahl-Drucktasten: Drücken, um eine Anzeige zu fokussieren. Die Drucktaste für die fokussierte Anzeige leuchtet gelb. 2 Quellenauswahl-Drucktasten: Drücken, um eine Quelle für die fokussierte Anzeige zu bestimmen. Die ausgewählte Drucktaste leuchtet grün. Drücken Sie , um eine Quelle über das Internet zu streamen. 3 Quellen-LEDs: Geben Sie die ausgewählten Quellen für Quelle (1) und (2) an. 4 Go Live LEDs: Geben Sie die Anzeige an, die gestreamt wird. 5 Funktionsdrucktasten: Drücken Sie diese Taste, um auf die Einstellungen für Multiview, Menü, Go-Live und Stummschaltung zuzugreifen. 6 Navigationsdrucktasten: Drücken Sie diese Tasten, um über das OSD-Display zu navigieren und Einstellungen vorzunehmen. 7 Ein/Aus Drucktaste: Zum Einschalten des Geräts drücken. Hinweis: Um das Gerät einzuschalten, stellen Sie ebenfalls sicher, dass der Ein/ Aus-Schalter auf EIN gestellt ist. IR-Fernbedienung 1 Ein/Aus 2 Quelle 3 Navigation Ansicht von hinten 1 Quelle (1) • DisplayPort-Eingang • HDMI-Eingang 2 Quelle (2) • VGA-Eingang • Stereo Audio-Eingang • HDMI-Eingang 3 Quelle (3), (4) und (5) • HDMI-Eingang 4 HDMI-Ausgang 5 HDBaseT-Ausgang 6 Phantom Ein/Aus-Schalter 7 MIC-Eingang 8 Symmetrischer Audio-Eingang 4 Schließen Sie ein Mikrofon an den Audio-Eingang an. 4 5 Schließen Sie einen Lautsprecher an den Digital Audio-Ausgang oder den Stereo Audio-Ausgang an. 6 Zur Konfiguration der Einstellungen über eine RS-232-Schnittstelle schließen Sie einen Hardware- oder Software-Controller an die serielle RS-232 Schnittstelle an. 7 Um das Streaming über IP zu ermöglichen, verwenden Sie ein RJ-45 Kabel, um den Ethernet-Anschluss des Geräts mit einem Netzwerk-Switch zu verbinden. 8 Verbinden Sie den IR-Empfänger mit dem IR-Empfängeranschluss für die IR- Fernbedienung. 9 Stecken Sie das Netzkabel in die Steckdose, stellen Sie den Netzschalter auf EIN und drücken Sie dann die Ein/Aus Drucktaste. 10 Schalten Sie alle angeschlossenen Geräte ein. Hinweis: 1. Lassen Sie diesen Schritt nicht aus. Eine angemessene Erdung hilft bei der Verhinderung von Geräteschäden durch Spannungsspitzen oder statische Elektrizität. 2. Die Quellen (1) und (2) können jeweils zwei Videoeingänge empfangen, aber nur jeweils eine anzeigen. 3. Verwenden Sie ein Cat 5e/6 Kabel, um Signale von 1080p bis zu 60m zu übertragen, oder ein Cat 6a/ATEN 2L-2910 Cat 6a Kabel, um die Übertragung auf 70m zu verlängern. 4. Wenn Sie ein Kondensatormikrofon verwenden, stellen Sie den Phantom Ein/Aus-Schalter auf EIN. Bedienung Sie können das Gerät lokal über die Fronttasten und die IR-Fernbedienung bedienen; ferngesteuert über eine Webschnittstelle über eine Standard TCP/IP-Verbindung oder einen seriellen RS-232 Controller. Einzelheiten finden Sie im Benutzerhandbuch. Drucktasten an der Vorderseite • Um eine Quelle auszuwählen, drücken Sie die Drucktaste zur Auswahl des Bildschirms und dann die Drucktaste zur Auswahl der Quelle, die dem angezeigten Eingang entspricht. Die Drucktaste der ausgewählten Anzeige leuchtet gelb und die ausgewählte Quelle grün. • Zum Ver- oder Entriegeln der Drucktasten an der Vorderseite drücken und halten Sie die Navigationstaste nach oben fünf Sekunden lang gedrückt. Wenn die Vorderseite verriegelt ist, leuchtet das Schloss-Symbol ( ) rot. IR-Fernbedienung Um eine Quelle auszuwählen, drücken Sie die Anzeige-Taste, um eine Anzeige zu fokussieren, und drücken Sie dann die Quelle-Taste, die der Quelle entspricht, die Sie ausgeben möchten. Web GUI Verwenden Sie die Web GUI, um Systemeinstellungen zu konfigurieren oder Bildschirme zu streamen. Um auf das Web GUI zuzugreifen, befolgen Sie die folgenden Schritte. 1. Drücken Sie auf der IR-Fernbedienung, um das OSD anzuzeigen. Die IP- Adresse des Geräts erscheint oben links. 2. Melden Sie sich mit der IP-Adresse und den folgenden Zugangsdaten an: • Benutzername: administrator • Passwort: password 9 Digital Audio-Ausgang • Optischer Audio-Ausgang • Koaxial Audio-Ausgang 10 Stereo Audio-Ausgang 11 Serielle RS-232 Schnittstelle 12 Ethernet-Port 13 USB Typ-A Anschlüsse (2.0) 14 USB Typ-A Anschluss (3.0) 15 IR Empfangsanschluss 16 Netzbuchse 17 Netzschalter 18 Erdungsanschluss B Hardware Installation Halten Sie sich an die obige Installationsabbildung und gehen Sie wie folgt vor: 1 Verwenden Sie ein Erdungskabel, um das Gerät zu erden, indem Sie ein Ende mit der Erdungsklemme und das andere Ende mit einem geeigneten geerdeten Objekt verbinden. 1 2 Verbinden Sie das Gerät mit den Quellen. 2 3 Verbinden Sie das Gerät mit den Anzeigen. (a) Verwenden Sie HDMI-Kabel, um HDMI-Bildschirme an die HDMI-Ausgänge anzuschließen. (b) Verwenden Sie ein Cat 5e/6/6a-Kabel, um eine HDBaseT-Anzeige an den HDBaseT-Ausgang anzuschließen. 3 4 Benachrichtigung 5 Anzeige 6 Funktion VP2730 7 x 3 Commutateur matriciel de présentation avec streaming, HDBaseT www.aten.com A Présentation du matériel Vue de devant 1 Boutons de sélection de l'affichage : Appuyez pour cibler un affichage. Le bouton de l'affichage ciblé s'allume en ambre. 2 Boutons de sélection de la source : Appuyez pour désigner une source pour l'affichage ciblé. Le bouton sélectionné s'allume en vert. Appuyez sur pour diffuser une source sur Internet. 3 Voyants LED de source : Indiquez les sources sélectionnées pour Source (1) et (2). 4 Voyants LED En direct : Indiquent l'affichage diffusé. 5 Boutons de fonction : Appuyez sur cette touche pour accéder aux réglages multivue, menu, en-direct et muet. 6 Boutons de navigation : Appuyez pour parcourir et configurer les paramètres via l'OSD. 7 Bouton Marche/Arrêt : Appuyez sur cette touche pour mettre l'appareil sous tension. Remarque : Pour mettre l'appareil sous tension, assurez-vous également que l'interrupteur d'alimentation est en position ON. Télécommande IR 1 Marche/Arrêt 2 Source 3 Navigation Vue de derrière 1 Source (1) • Entrée DisplayPort • Entrée HDMI 2 Source (2) • Entrée VGA • Entrée audio stéréo • Entrée HDMI 3 Source (3), (4), et (5) • Entrée HDMI 4 HDMI Out (Sortie HDMI) 5 Sortie HDBaseT 6 Interrupteur d'alimentation fantôme 7 Entrée MIC 8 Entrée audio équilibrée (b) Utilisez un câble Cat 5e/6/6a pour connecter un affichage HDBaseT au port de sortie HDBaseT. 3 4 Connectez un microphone au port d'entrée audio. 4 5 Connectez un haut-parleur au port de sortie audio numérique ou au port de sortie audio stéréo. 6 Pour configurer les paramètres de l'appareil via une interface RS-232, connectez un contrôleur matériel ou logiciel au port série RS-232. 7 Pour permettre la diffusion en continu sur IP, utilisez un câble RJ-45 pour connecter le port Ethernet de l'appareil à un commutateur réseau. 8 Connectez le récepteur IR au port récepteur IR pour la télécommande IR. 9 Branchez le cordon d'alimentation à la prise de courant, mettez l'interrupteur d'alimentation sur ON, puis appuyez sur le bouton Marche/Arrêt. 10 Allumez tous les appareils connectés. Remarque : 1. N'ignorez pas cette étape. Une mise à la terre appropriée permet d'éviter que l'appareil ne soit endommagé par des surtensions ou de l'électricité statique. 2. Les sources (1) et (2) peuvent chacune recevoir deux entrées vidéo, mais ne peuvent en afficher qu'une à la fois. 3. Utilisez un câble Cat 5e/6 pour transmettre des signaux de 1080p jusqu'à 60m, ou un câble Cat 6a/ATEN 2L-2910 Cat 6a pour étendre la transmission à 70m. 4. Si vous utilisez un microphone à condensateur, mettez l'interrupteur d'alimentation fantôme sur ON. Fonctionnement Vous pouvez utiliser l'appareil localement grâce aux boutons du panneau avant et à la télécommande IR; à distance via une interface web via une connexion TCP/IP standard ou un contrôleur série RS-232. Consultez le manuel d'utilisation pour plus de détails. Boutons du panneau avant • Pour sélectionner une source, appuyez sur le bouton de sélection d'affichage, puis appuyez sur le bouton de sélection de source correspondant à l'entrée que vous souhaitez afficher. Le bouton de l'affichage sélectionné s'allume en ambre et la source sélectionnée s'allume en vert. • Pour verrouiller ou déverrouiller les boutons du panneau avant, appuyez et maintenez enfoncé le bouton de navigation Haut pendant cinq secondes. Lorsque le panneau avant est verrouillé, l'icône de verrouillage ( ) s'allume en rouge. Télécommande IR Pour sélectionner une source, appuyez sur le bouton Affichage pour cibler un affichage, puis appuyez sur le bouton Source correspondant à la source que vous souhaitez afficher. Interface graphique Web Utilisez l'interface graphique Web pour configurer les paramètres système ou les écrans de diffusion en continu. Pour accéder à l'interface graphique Web, suivez les étapes ci-dessous. 1. Appuyez sur sur la télécommande IR pour afficher l'OSD. L'adresse IP de l'appareil apparaît dans le coin supérieur gauche. 2. Connectez-vous avec l'adresse IP et les informations d'identification suivantes : • Nom d'utilisateur : administrator • Mot de passe : password 9 Digital Audio Out (Sortie audio numérique) • Sortie audio optique • Sortie audio coaxiale 10 Stereo Audio Out (Sortie audio stéréo) 11 Port série RS-232 12 Port Ethernet 13 Ports USB de type A (2.0) 14 Port USB de type A (3.0) 15 Port récepteur IR 16 Prise d'alimentation 17 Bouton marche/arrêt 18 Prise de terre B Installation matérielle Consultez le schéma d'installation ci-dessus et procédez comme suit : 1 Utilisez un fil de mise à la terre pour mettre l'appareil à la terre en connectant une extrémité à la borne de mise à la terre et l'autre extrémité à un objet approprié mis à la terre. 1 2 Connectez l'appareil aux sources. 2 3 Connectez l'appareil aux affichages. (a) Utilisez des câbles HDMI pour connecter les affichages HDMI aux ports de sortie HDMI. 4 Notification 5 Affichage 6 Fonction 6 1 2 5 7 4 3 16 17 18 1 2 3 11 15 10 12 13 9 4 5 7 8 14 6 © Copyright 2018 ATEN ® International Co., Ltd. ATEN and the ATEN logo are trademarks of ATEN International Co., Ltd. All rights reserved. All other trademarks are the property of their respective owners. Part No. PAPE-1223-L70G Printing Date: 07/2018 7 x 3 Presentation Matrix Switch with Streaming, HDBaseT Quick Start Guide VP2730 VP2730 7 x 3 Presentation Matrix Switch with Streaming, HDBaseT www.aten.com ATEN VanCryst ™ Support and Documentation Notice All information, documentation, firmware, software utilities, and specifications contained in this package are subject to change without prior notification by the manufacturer. To reduce the environmental impact of our products, ATEN documentation and software can be found online at http://www.aten.com/download/ Technical Support www.aten.com/support 이 기기는 업무용(A급) 전자파적합기기로서 판매자 또는 사용자는 이 점을 주의하시기 바라며, 가정외의 지역에 서 사용하는 것을 목적으로 합니다. Scan for more information EMC Information FEDERAL COMMUNICATIONS COMMISSION INTERFERENCE STATEMENT: This equipment has been tested and found to comply with the limits for a Class A digital device, pursuant to Part 15 of the FCC Rules. These limits are designed to provide reasonable protection against harmful interference when the equipment is operated in a commercial environment. This equipment generates, uses, and can radiate radio frequency energy and, if not installed and used in accordance with the instruction manual, may cause harmful interference to radio communications. Operation of this equipment in a residential area is likely to cause harmful interference in which case the user will be required to correct the interference at his own expense. FCC Caution: Any changes or modifications not expressly approved by the party responsible for compliance could void the user's authority to operate this equipment. Warning: Operation of this equipment in a residential environment could cause radio interference. Suggestion: Shielded twisted pair (STP) cables must be used with the unit to ensure compliance with FCC & CE standards. This device complies with Part 15 of the FCC Rules. Operation is subject to the following two conditions: (1) this device may not cause harmful interference, and (2) this device must accept any interference received, including interference that may cause undesired operation. B Package Contents 1 VP2730 7 x 3 Presentation Matrix Switch with Streaming, HDBaseT 1 IR Receiver 1 IR Remote Control 1 Power Cord 2 Terminal Blocks 4 Foot Pads 1 User Instructions Hardware Installation Front View Rear View IR Remote Control A Hardware Review A Hardware Review Front View 1 Display Selection Pushbuttons: Press to focus a display. The pushbutton for the focused display lights amber. 2 Source Selection Pushbuttons: Press to designate a source for the focused display. The selected pushbutton lights green. Press to stream in a source over the Internet. 3 Source LEDs: Indicate the selected sources for Source (1) and (2). 4 Go Live LEDs: Indicate the display that is streamed out. 5 Function Pushbuttons: Press to access multiview, menu, go-live settings, and mute settings. 6 Navigation Pushbuttons: Press to navigate and configure settings via the OSD. 7 On/Off Pushbutton: Press to power on the unit. Note: To power on the unit, also make sure that the Power Switch is put to ON. IR Remote Control 1 On/Off 2 Source 3 Navigation Rear View 1 Source (1) • DisplayPort In • HDMI In 2 Source (2) • VGA In • Stereo Audio In • HDMI In 3 Source (3), (4), and (5) • HDMI In 4 HDMI Out 5 HDBaseT Out 6 Phantom Power Switch 7 MIC In 8 Balanced Audio In 5 Connect a speaker to the Digital Audio Out or Stereo Audio Out ports. 6 To configure the unit’s settings via an RS-232 interface, connect a hardware or software controller to the RS-232 Serial Port. 7 To allow for streaming over IP, use an RJ-45 cable to connect the Ethernet port of the unit to a network switch. 8 Connect the IR receiver to the IR Receiver Port for IR remote control. 9 Plug the Power Cord to the power socket, put the power switch to ON, and then press the On/Off pushbutton. 10 Power on all the connected devices. Note: 1. Do not omit this step. Proper grounding helps prevent damage to the unit from surges or static electricity. 2. Source (1) and (2) can each receive two video inputs, but can only display one at a time. 3. Use a Cat 5e/6 cable to transmit signals of 1080p up to 60m, or a Cat 6a/ATEN 2L-2910 Cat 6a cable to extend the transmission to 70m. 4. If you are using a condenser (capacitor) microphone, put the Phantom Power Switch to ON. Operation You can operate the unit locally using the front-panel pushbuttons and IR remote control; remotely via a web interface over a standard TCP/IP connection or an RS-232 serial controller. See the user manual for details. Front-panel Pushbuttons • To select a source, press the Display Selection pushbutton, and then press the Source Selection pushbutton that corresponds to the input you wish to display. The pushbutton of the selected display lights amber, and the selected source lights green. • To lock or unlock the front-panel pushbuttons, press and hold the Up Navigation Pushbutton for five seconds. When the front panel is locked, the lock icon ( ) lights red. IR Remote Control To select a source, press the Display button to focus a display, and then press the Source button that corresponds to the source you wish to output. Web GUI Use the web GUI to configure system settings or stream out screens. To access the web GUI, follow the steps below. 1. Press on the IR remote control to display the OSD. The unit's IP address appears at the top-left corner. 2. Log in with the IP address and the following credentials: • Username: administrator • Password: password 9 Digital Audio Out • Optical Audio Out • Coaxial Audio Out 10 Stereo Audio Out 11 RS-232 Serial Port 12 Ethernet Port 13 USB Type-A Ports (2.0) 14 USB Type-A Port (3.0) 15 IR Receiver Port 16 Power Socket 17 Power Switch 18 Grounding Terminal 4 Notification 5 Display 6 Function B Hardware Installation Refer to the installation diagram above and do the following: 1 Use a grounding wire to ground the unit by connecting one end to the grounding terminal, and the other end to a suitable grounded object. 1 2 Connect the unit to sources. 2 3 Connect the unit to displays. (a) Use HDMI cables to connect HDMI displays to the HDMI Out ports. (b) Use a Cat 5e/6/6a cable to connect an HDBaseT display to the HDBaseT Out port. 3 4 Connect a microphone to the Audio In port. 4 5 6 4 3 2 1 1 2 3 4 5 6 7 8 A B C Internet/ LAN Streaming 1 Streaming 2
Transcript of Package Contents Support and Documentation Notice A ... · Ethernet dell'unità a uno switch di...
VP2730 7 x 3 Presentation Matrix Switch con Streaming, HDBaseT www.aten.com
A Revisione Hardware Vista anteriore1 Pulsanti per la selezione del display: Premere per mettere a fuoco un display.
Il pulsante relativo al display a fuoco si illumina di ambra.2 Pulsanti per la selezione della sorgente: Premere per designare una sorgente
per il display a fuoco. Il pulsante selezionato si illumina di verde. Premere per eseguire lo streaming in una sorgente su Internet.
3 LED sorgenti: Indicano le sorgenti selezionate per Sorgente (1) e (2).4 LED Go Live: Indicano il display 5 Pulsanti delle funzioni: Premere per accedere alla multiview, alle impostazioni
go-live e alle impostazioni di disattivazione audio.6 Pulsanti di navigazione: Premere per navigare e confi gurare le impostazioni
tramite l'OSD.7 Pulsanti di accensione/spegnimento: Premere per accendere l'unità:
Nota: Per accendere l'unità, assicurarsi che anche l'interruttore di alimentazione sia nella posizione ON.
Telecomando a infrarossi1 Accensione/Spegnimento2 Sorgente3 Navigazione
Vista posteriore1 Sorgente (1)
• DisplayPort In• HDMI In
2 Sorgente (2)• VGA In• Stereo Audio In• HDMI In
3 Sorgente (3), (4) e (5)• HDMI In
4 HDMI Out5 HDBaseT Out 6 Interruttore dell'alimentazione
Phantom7 MIC In8 Balanced Audio In
4 Inserire un microfono nella porta Audio In.45 Inserire un altoparlante nella porta Digital Audio Out o Stereo Audio Out.6 Per confi gurare le impostazioni dell'unità tramite interfaccia RS-232, collegare
un controller hardware o software alla porta seriale RS-232.7 Per consentire lo streaming tramite IP, usare un cavo RJ-45 per collegare la porta
Ethernet dell'unità a uno switch di rete.8 Per usare il telecomando a infrarossi, collegare il ricevitore a infrarossi alla porta
apposita.9 Inserire il cavo di alimentazione nella presa, mettere l'interruttore sulla posizione
ON e premere il pulsanti di accensione/spegnimento. 10 Accendere tutti i dispositivi collegati.Nota:1. Non saltare questo passaggio. La messa a terra adeguata aiuta a prevenire danni
all'unità dovuti a sovraccarico o elettricità statica.2. Le Sorgenti (1) e (2) possono ricevere due input video, ma possono visualizzarne
solo uno alla volta.3. Usare un cavo Cat 5e/6 per trasmettere segnali 1080p fi no a 60m oppure un cavo
Cat 6a/ATEN 2L-2910 Cat 6a per estendere la trasmissione a 70m.4. Se si utilizza un microfono a condensatore, posizionare l'interruttore
dell'alimentazione Phantom su ON.
FunzionamentoÈ possibile azionare l'unità localmente usando i pulsanti del pannello anteriore e il telecomando a infrarossi ; e da remoto tramite un'interfaccia Web con connessione TCP/IP standard o un controller seriale RS-232. Vedere il manuale utente per ulteriori dettagli.
Pulsante pannello anteriore• Per selezionare una sorgente, premere il pulsante di selezione del display, quindi
premere il pulsante di selezione della sorgente che corrisponde all'input che si desidera visualizzare. Il pulsante del display selezionato si illumina di ambra, e la sorgente selezionata si illumina di verde.
• Per bloccare o sbloccare i pulsanti del pannello anteriore, tenere premuto il pulsante di navigazione su per cinque secondi. Quando il pannello anteriore è bloccato, l'icona di blocco ( ) si illumina di rosso.
Telecomando a infrarossiPer selezionare una sorgente, premere il pulsante Display per mettere a fuoco il display, quindi premere il pulsante Sorgente che corrisponde alla sorgente che si desidera emettere.
Web GUIUsare la Web GUI per confi gurare le impostazioni di sistema o per eseguire lo streaming delle schermate. Per accedere alla Web GUI, seguire questi passaggi.1. Premere sul telecomando a infrarossi per visualizzare l'OSD. L'indirizzo IP dell'unità appare nell'angolo in alto a sinistra.2. Accedere con l'indirizzo IP e le seguenti credenziali:
• Nome utente: amministratore• Password: password
9 Digital Audio Out• Optical Audio Out• Coaxial Audio Out
10 Stereo Audio Out11 Porta seriale RS-23212 Porta Ethernet13 Porte USB tipo A (2.0)14 Porte USB tipo A (3.0)15 Porta ricevitore IR16 Presa per l’alimentazione 17 Interruttore di accensione18 Terminale di messa a terra
B Installazione HardwareFare riferimento allo scherma di installazione indicato sopra ed eseguire questi passaggi:1 Usare un cavo di messa a terra per mettere a terra l'unità collegandone
un'estremità al terminale di messa a terra e l'altra estremità a un oggetto messo a terra idoneo.1
2 Collegare l'unità alle sorgenti.23 Collegare l'unità ai display.
(a) Usare i cavi HDMI per collegare i display HDMI alle porte HDMI Out.(b) Usare un cavo Cat 5e/6/6a per collegare un display HDBaseT alla porta
HDBaseT Out.3
4 Notifi ca5 Display6 Funzione
VP2730 7 x 3 Conmutador de matriz de presentación con transmisión, HDBaseT www.aten.com
A Revisión del hardware Vista frontal1 Botones de selección de pantalla: Presione para enfocar una pantalla. El botón
para la pantalla enfocada se ilumina en ámbar.2 Botones de selección de fuente: Presione para designar una fuente a la
pantalla enfocada. El botón seleccionado se ilumina en naranja. Presione para transmitir en una fuente a través de Internet.
3 LEDs de fuente: Indique las fuentes seleccionadas para Fuente (1) y (2).4 LEDs Go Live: Indican la pantalla que está siendo transmitida.5 Botones de función: Presione para acceder a la vista múltiple, el menú, la
confi guración go-live y la confi guración de silencio.6 Botones de navegación: Presione para navegar y realizar la confi guración a
través del OSD.7 Botón de encendido/apagado: Presionar para encender la unidad.
Nota: Para encender la unidad, también asegúrese de que el interruptor de encendido esté en ON.
Mando a distancia IR1 Encendido/Apagado2 Fuente3 Navegación
Vista posterior1 Fuente (1)
• Entrada DisplayPort• Entrada HDMI
2 Fuente (2)• Entrada VGA• Entrada de audio estéreo• Entrada HDMI
3 Fuente (3), (4) y (5)• Entrada HDMI
4 Salida HDMI5 Salida HDBaseT 6 Interruptor de alimentación
fantasma7 Entrada MIC8 Entrada de audio balanceado
4 Conecte un micrófono al puerto de entrada de audio.45 Conecte un altavoz a los puertos de salida de audio digital o de salida de audio
estéreo.6 Para confi gurar los ajustes de la unidad a través de una interfaz RS-232, conecte
un controlador de hardware o software al puerto serie del RS-232.7 Para permitir la transmisión por IP, utilice un cable RJ-45 para conectar el puerto
Ethernet de la unidad a un interruptor de red.8 Conecte el receptor IR al puerto del receptor IR para el mando a distancia IR.9 Enchufe el cable de alimentación a la toma de corriente, coloque el interruptor
de alimentación en la posición de ENCENDIDO y luego presione el botón de Encendido/Apagado.
10 Encienda todos los dispositivos conectados.Nota:1. No omita este paso. Una conexión a tierra adecuada ayuda a prevenir daños a la
unidad por subidas de tensión o electricidad estática.2. Las fuentes (1) y (2) pueden recibir dos entradas de vídeo, pero sólo pueden
mostrar una a la vez.3. Utilice un cable Cat 5e/6 para transmitir señales de 1080p hasta 60m o un cable
Cat 6a/ATEN 2L-2910 para extender la transmisión a 70m.4. Si está utilizando un micrófono condensador (condensador), coloque el
interruptor de alimentación fantasma en la posición de ENCENDIDO.
FuncionamientoPuede utilizar la unidad localmente usando los botones del panel frontal y el mando a distancia IR; remotamente a través de una interfaz web sobre una conexión TCP/IP estándar o un controlador serie RS-232. Consulte el manual del usuario para más detalles.
Botones del panel frontal• Para seleccionar una fuente, pulse el botón de selección de pantalla y, a
continuación, pulse el botón de selección de fuente que corresponda a la entrada que desea visualizar. El botón de la pantalla seleccionada se ilumina en ámbar y la fuente seleccionada se ilumina en verde.
• Para bloquear o desbloquear los botones del panel frontal, mantenga presionado el botón Arriba durante cinco segundos. Cuando el panel frontal está bloqueado, el icono del candado ( ) se ilumina en rojo.
Mando a distancia IRPara seleccionar una fuente, presione el botón de visualización para enfocar una pantalla y, a continuación, presione el botón de fuente que corresponda a la fuente que desea mostrar.
GUI de WebUse la GUI de web para confi gurar los ajustes del sistema o mostrar las pantallas. Para acceder a la GUI de web, siga estos pasos.1. Presione en el mando a distancia IR para mostrar el menú en pantalla (OSD). La dirección IP de la unidad aparece en la esquina superior izquierda.2. Inicie sesión con la dirección IP y las siguientes credenciales:
• Nombre de usuario: administrator• Contraseña: password
9 Salida de audio digital• Salida de audio óptica• Salida de audio coaxial
10 Salida de audio estéreo11 Puerto serie RS-23212 Puerto Ethernet13 Puertos USB tipo A (2.0)14 Puerto USB tipo A (3.0)15 Puerto receptor IR16 Toma de corriente 17 Botón de encendido18 Terminal de conexión a tierra
B Instalación del hardwareConsulte el diagrama de instalación anterior y haga lo siguiente:1 Utilice un cable de tierra para conectar la unidad a tierra conectando un
extremo al terminal de tierra y el otro extremo a un objeto conectado a tierra correctamente.1
2 Conectar la unidad a fuentes.23 Conectar la unidad a pantallas.
(a) Utilice cables HDMI para conectar las pantallas HDMI a los puertos de salida HDMI.
(b) Utilice un cable Cat 5e/6/6a para conectar una pantalla HDBaseT al puerto de salida HDBaseT.3
4 Notifi cación5 Pantalla6 Función
VP2730 7 x 3 Präsentations-Matrix Switch mit Streaming, HDBaseT www.aten.com
A Hardware Übersicht Ansicht von vorne1 Anzeigeauswahl-Drucktasten: Drücken, um eine Anzeige zu fokussieren. Die
Drucktaste für die fokussierte Anzeige leuchtet gelb.2 Quellenauswahl-Drucktasten: Drücken, um eine Quelle für die fokussierte
Anzeige zu bestimmen. Die ausgewählte Drucktaste leuchtet grün. Drücken Sie , um eine Quelle über das Internet zu streamen.
3 Quellen-LEDs: Geben Sie die ausgewählten Quellen für Quelle (1) und (2) an.4 Go Live LEDs: Geben Sie die Anzeige an, die gestreamt wird.5 Funktionsdrucktasten: Drücken Sie diese Taste, um auf die Einstellungen für
Multiview, Menü, Go-Live und Stummschaltung zuzugreifen.6 Navigationsdrucktasten: Drücken Sie diese Tasten, um über das OSD-Display zu
navigieren und Einstellungen vorzunehmen.7 Ein/Aus Drucktaste: Zum Einschalten des Geräts drücken.
Hinweis: Um das Gerät einzuschalten, stellen Sie ebenfalls sicher, dass der Ein/Aus-Schalter auf EIN gestellt ist.
IR-Fernbedienung1 Ein/Aus2 Quelle3 Navigation
Ansicht von hinten1 Quelle (1)
• DisplayPort-Eingang• HDMI-Eingang
2 Quelle (2)• VGA-Eingang• Stereo Audio-Eingang• HDMI-Eingang
3 Quelle (3), (4) und (5)• HDMI-Eingang
4 HDMI-Ausgang5 HDBaseT-Ausgang 6 Phantom Ein/Aus-Schalter7 MIC-Eingang8 Symmetrischer Audio-Eingang
4 Schließen Sie ein Mikrofon an den Audio-Eingang an.45 Schließen Sie einen Lautsprecher an den Digital Audio-Ausgang oder den Stereo
Audio-Ausgang an.6 Zur Konfi guration der Einstellungen über eine RS-232-Schnittstelle schließen Sie
einen Hardware- oder Software-Controller an die serielle RS-232 Schnittstelle an.7 Um das Streaming über IP zu ermöglichen, verwenden Sie ein RJ-45 Kabel, um
den Ethernet-Anschluss des Geräts mit einem Netzwerk-Switch zu verbinden.8 Verbinden Sie den IR-Empfänger mit dem IR-Empfängeranschluss für die IR-
Fernbedienung.9 Stecken Sie das Netzkabel in die Steckdose, stellen Sie den Netzschalter auf EIN
und drücken Sie dann die Ein/Aus Drucktaste. 10 Schalten Sie alle angeschlossenen Geräte ein.Hinweis:1. Lassen Sie diesen Schritt nicht aus. Eine angemessene Erdung hilft bei der
Verhinderung von Geräteschäden durch Spannungsspitzen oder statische Elektrizität.
2. Die Quellen (1) und (2) können jeweils zwei Videoeingänge empfangen, aber nur jeweils eine anzeigen.
3. Verwenden Sie ein Cat 5e/6 Kabel, um Signale von 1080p bis zu 60m zu übertragen, oder ein Cat 6a/ATEN 2L-2910 Cat 6a Kabel, um die Übertragung auf 70m zu verlängern.
4. Wenn Sie ein Kondensatormikrofon verwenden, stellen Sie den Phantom Ein/Aus-Schalter auf EIN.
BedienungSie können das Gerät lokal über die Fronttasten und die IR-Fernbedienung bedienen; ferngesteuert über eine Webschnittstelle über eine Standard TCP/IP-Verbindung oder
einen seriellen RS-232 Controller. Einzelheiten fi nden Sie im Benutzerhandbuch.Drucktasten an der Vorderseite• Um eine Quelle auszuwählen, drücken Sie die Drucktaste zur Auswahl des
Bildschirms und dann die Drucktaste zur Auswahl der Quelle, die dem angezeigten Eingang entspricht. Die Drucktaste der ausgewählten Anzeige leuchtet gelb und die ausgewählte Quelle grün.
• Zum Ver- oder Entriegeln der Drucktasten an der Vorderseite drücken und halten Sie die Navigationstaste nach oben fünf Sekunden lang gedrückt. Wenn die Vorderseite verriegelt ist, leuchtet das Schloss-Symbol ( ) rot.
IR-FernbedienungUm eine Quelle auszuwählen, drücken Sie die Anzeige-Taste, um eine Anzeige zu fokussieren, und drücken Sie dann die Quelle-Taste, die der Quelle entspricht, die Sie ausgeben möchten.
Web GUIVerwenden Sie die Web GUI, um Systemeinstellungen zu konfi gurieren oder Bildschirme zu streamen. Um auf das Web GUI zuzugreifen, befolgen Sie die folgenden Schritte.1. Drücken Sie auf der IR-Fernbedienung, um das OSD anzuzeigen. Die IP-Adresse des Geräts erscheint oben links.2. Melden Sie sich mit der IP-Adresse und den folgenden Zugangsdaten an:
• Benutzername: administrator• Passwort: password
9 Digital Audio-Ausgang• Optischer Audio-Ausgang• Koaxial Audio-Ausgang
10 Stereo Audio-Ausgang11 Serielle RS-232 Schnittstelle12 Ethernet-Port13 USB Typ-A Anschlüsse (2.0)14 USB Typ-A Anschluss (3.0)15 IR Empfangsanschluss16 Netzbuchse 17 Netzschalter18 Erdungsanschluss
B Hardware InstallationHalten Sie sich an die obige Installationsabbildung und gehen Sie wie folgt vor:1 Verwenden Sie ein Erdungskabel, um das Gerät zu erden, indem Sie ein Ende
mit der Erdungsklemme und das andere Ende mit einem geeigneten geerdeten Objekt verbinden.1
2 Verbinden Sie das Gerät mit den Quellen.23 Verbinden Sie das Gerät mit den Anzeigen.
(a) Verwenden Sie HDMI-Kabel, um HDMI-Bildschirme an die HDMI-Ausgänge anzuschließen.
(b) Verwenden Sie ein Cat 5e/6/6a-Kabel, um eine HDBaseT-Anzeige an den HDBaseT-Ausgang anzuschließen.3
4 Benachrichtigung5 Anzeige6 Funktion
VP2730 7 x 3 Commutateur matriciel de présentation avec streaming, HDBaseT www.aten.com
A Présentation du matériel Vue de devant1 Boutons de sélection de l'affi chage : Appuyez pour cibler un affi chage. Le
bouton de l'affi chage ciblé s'allume en ambre.2 Boutons de sélection de la source : Appuyez pour désigner une source pour
l'affi chage ciblé. Le bouton sélectionné s'allume en vert. Appuyez sur pour diffuser une source sur Internet.
3 Voyants LED de source : Indiquez les sources sélectionnées pour Source (1) et (2).4 Voyants LED En direct : Indiquent l'affi chage diffusé.5 Boutons de fonction : Appuyez sur cette touche pour accéder aux réglages
multivue, menu, en-direct et muet.6 Boutons de navigation : Appuyez pour parcourir et confi gurer les paramètres via l'OSD.7 Bouton Marche/Arrêt : Appuyez sur cette touche pour mettre l'appareil sous
tension. Remarque : Pour mettre l'appareil sous tension, assurez-vous également que
l'interrupteur d'alimentation est en position ON.
Télécommande IR1 Marche/Arrêt2 Source3 Navigation
Vue de derrière1 Source (1)
• Entrée DisplayPort• Entrée HDMI
2 Source (2)• Entrée VGA• Entrée audio stéréo• Entrée HDMI
3 Source (3), (4), et (5)• Entrée HDMI
4 HDMI Out (Sortie HDMI)5 Sortie HDBaseT 6 Interrupteur d'alimentation
fantôme
7 Entrée MIC8 Entrée audio équilibrée
(b) Utilisez un câble Cat 5e/6/6a pour connecter un affi chage HDBaseT au port de sortie HDBaseT.3
4 Connectez un microphone au port d'entrée audio.4
5 Connectez un haut-parleur au port de sortie audio numérique ou au port de sortie audio stéréo.
6 Pour confi gurer les paramètres de l'appareil via une interface RS-232, connectez un contrôleur matériel ou logiciel au port série RS-232.
7 Pour permettre la diffusion en continu sur IP, utilisez un câble RJ-45 pour connecter le port Ethernet de l'appareil à un commutateur réseau.
8 Connectez le récepteur IR au port récepteur IR pour la télécommande IR.9 Branchez le cordon d'alimentation à la prise de courant, mettez l'interrupteur
d'alimentation sur ON, puis appuyez sur le bouton Marche/Arrêt. 10 Allumez tous les appareils connectés.Remarque :1. N'ignorez pas cette étape. Une mise à la terre appropriée permet d'éviter que
l'appareil ne soit endommagé par des surtensions ou de l'électricité statique.2. Les sources (1) et (2) peuvent chacune recevoir deux entrées vidéo, mais ne
peuvent en affi cher qu'une à la fois.3. Utilisez un câble Cat 5e/6 pour transmettre des signaux de 1080p jusqu'à 60m,
ou un câble Cat 6a/ATEN 2L-2910 Cat 6a pour étendre la transmission à 70m.4. Si vous utilisez un microphone à condensateur, mettez l'interrupteur
d'alimentation fantôme sur ON.
FonctionnementVous pouvez utiliser l'appareil localement grâce aux boutons du panneau avant et à la télécommande IR; à distance via une interface web via une connexion TCP/IP
standard ou un contrôleur série RS-232. Consultez le manuel d'utilisation pour plus de détails.Boutons du panneau avant• Pour sélectionner une source, appuyez sur le bouton de sélection d'affi chage, puis
appuyez sur le bouton de sélection de source correspondant à l'entrée que vous souhaitez affi cher. Le bouton de l'affi chage sélectionné s'allume en ambre et la source sélectionnée s'allume en vert.
• Pour verrouiller ou déverrouiller les boutons du panneau avant, appuyez et maintenez enfoncé le bouton de navigation Haut pendant cinq secondes. Lorsque le panneau avant est verrouillé, l'icône de verrouillage ( ) s'allume en rouge.
Télécommande IRPour sélectionner une source, appuyez sur le bouton Affi chage pour cibler un affi chage, puis appuyez sur le bouton Source correspondant à la source que vous souhaitez affi cher.
Interface graphique WebUtilisez l'interface graphique Web pour confi gurer les paramètres système ou les écrans de diffusion en continu. Pour accéder à l'interface graphique Web, suivez les étapes ci-dessous.1. Appuyez sur sur la télécommande IR pour affi cher l'OSD. L'adresse IP de l'appareil apparaît dans le coin supérieur gauche.2. Connectez-vous avec l'adresse IP et les informations d'identifi cation suivantes :
• Nom d'utilisateur : administrator• Mot de passe : password
9 Digital Audio Out (Sortie audio numérique)• Sortie audio optique• Sortie audio coaxiale
10 Stereo Audio Out (Sortie audio stéréo)
11 Port série RS-23212 Port Ethernet13 Ports USB de type A (2.0)14 Port USB de type A (3.0)15 Port récepteur IR16 Prise d'alimentation 17 Bouton marche/arrêt18 Prise de terre
B Installation matérielleConsultez le schéma d'installation ci-dessus et procédez comme suit :1 Utilisez un fi l de mise à la terre pour mettre l'appareil à la terre en connectant
une extrémité à la borne de mise à la terre et l'autre extrémité à un objet approprié mis à la terre.1
2 Connectez l'appareil aux sources.2
3 Connectez l'appareil aux affi chages.(a) Utilisez des câbles HDMI pour connecter les affi chages HDMI aux ports de
sortie HDMI.
4 Notifi cation5 Affi chage6 Fonction
61 2 5 7
43
16 17
18
1 2
3
11 15
10 12 13
9
4 5 7 8 14
6
© Copyright 2018 ATEN® International Co., Ltd.
ATEN and the ATEN logo are trademarks of ATEN International Co., Ltd. All rights reserved. All
other trademarks are the property of their respective owners.
Part No. PAPE-1223-L70G Printing Date: 07/2018
7 x 3 Presentation Matrix Switch with Streaming, HDBaseTQuick Start Guide
VP2730
VP2730 7 x 3 Presentation Matrix Switch with Streaming, HDBaseT www.aten.com
ATEN VanCryst™
Support and Documentation NoticeAll information, documentation, fi rmware, software utilities, and specifi cations contained in this package are subject to change without prior notifi cation by the manufacturer. To reduce the environmental impact of our products, ATEN documentation and software can be found online at http://www.aten.com/download/
Technical Supportwww.aten.com/support
이 기기는 업무용(A급) 전자파적합기기로서 판매자 또는 사용자는 이 점을 주의하시기 바라며, 가정외의 지역에서 사용하는 것을 목적으로 합니다.
Scan for more information
EMC InformationFEDERAL COMMUNICATIONS COMMISSION INTERFERENCE STATEMENT:This equipment has been tested and found to comply with the limits for a Class A digital device, pursuant to Part 15 of the FCC Rules. These limits are designed to provide reasonable protection against harmful interference when the equipment is operated in a commercial environment. This equipment generates, uses, and can radiate radio frequency energy and, if not installed and used in accordance with the instruction manual, may cause harmful interference to radio communications. Operation of this equipment in a residential area is likely to cause harmful interference in which case the user will be required to correct the interference at his own expense.FCC Caution: Any changes or modifi cations not expressly approved by the party responsible for compliance could void the user's authority to operate this equipment. Warning: Operation of this equipment in a residential environment could cause radio interference.Suggestion:Shielded twisted pair (STP) cables must be used with the unit to ensure compliance with FCC & CE standards.
This device complies with Part 15 of the FCC Rules. Operation is subject to the following two conditions: (1) this device may not cause harmful interference, and (2) this device must accept any interference received, including interference that may cause undesired operation.
B
Package Contents1 VP2730 7 x 3 Presentation Matrix Switch with Streaming, HDBaseT1 IR Receiver1 IR Remote Control1 Power Cord2 Terminal Blocks
4 Foot Pads1 User Instructions
Hardware Installation
Front View
Rear View
IR Remote Control
A Hardware Review
A Hardware Review Front View1 Display Selection Pushbuttons: Press to focus a display. The pushbutton for the
focused display lights amber.
2 Source Selection Pushbuttons: Press to designate a source for the focused display. The selected pushbutton lights green. Press to stream in a source over the Internet.
3 Source LEDs: Indicate the selected sources for Source (1) and (2).4 Go Live LEDs: Indicate the display that is streamed out.5 Function Pushbuttons: Press to access multiview, menu, go-live settings, and
mute settings.
6 Navigation Pushbuttons: Press to navigate and confi gure settings via the OSD.7 On/Off Pushbutton: Press to power on the unit.
Note: To power on the unit, also make sure that the Power Switch is put to ON.
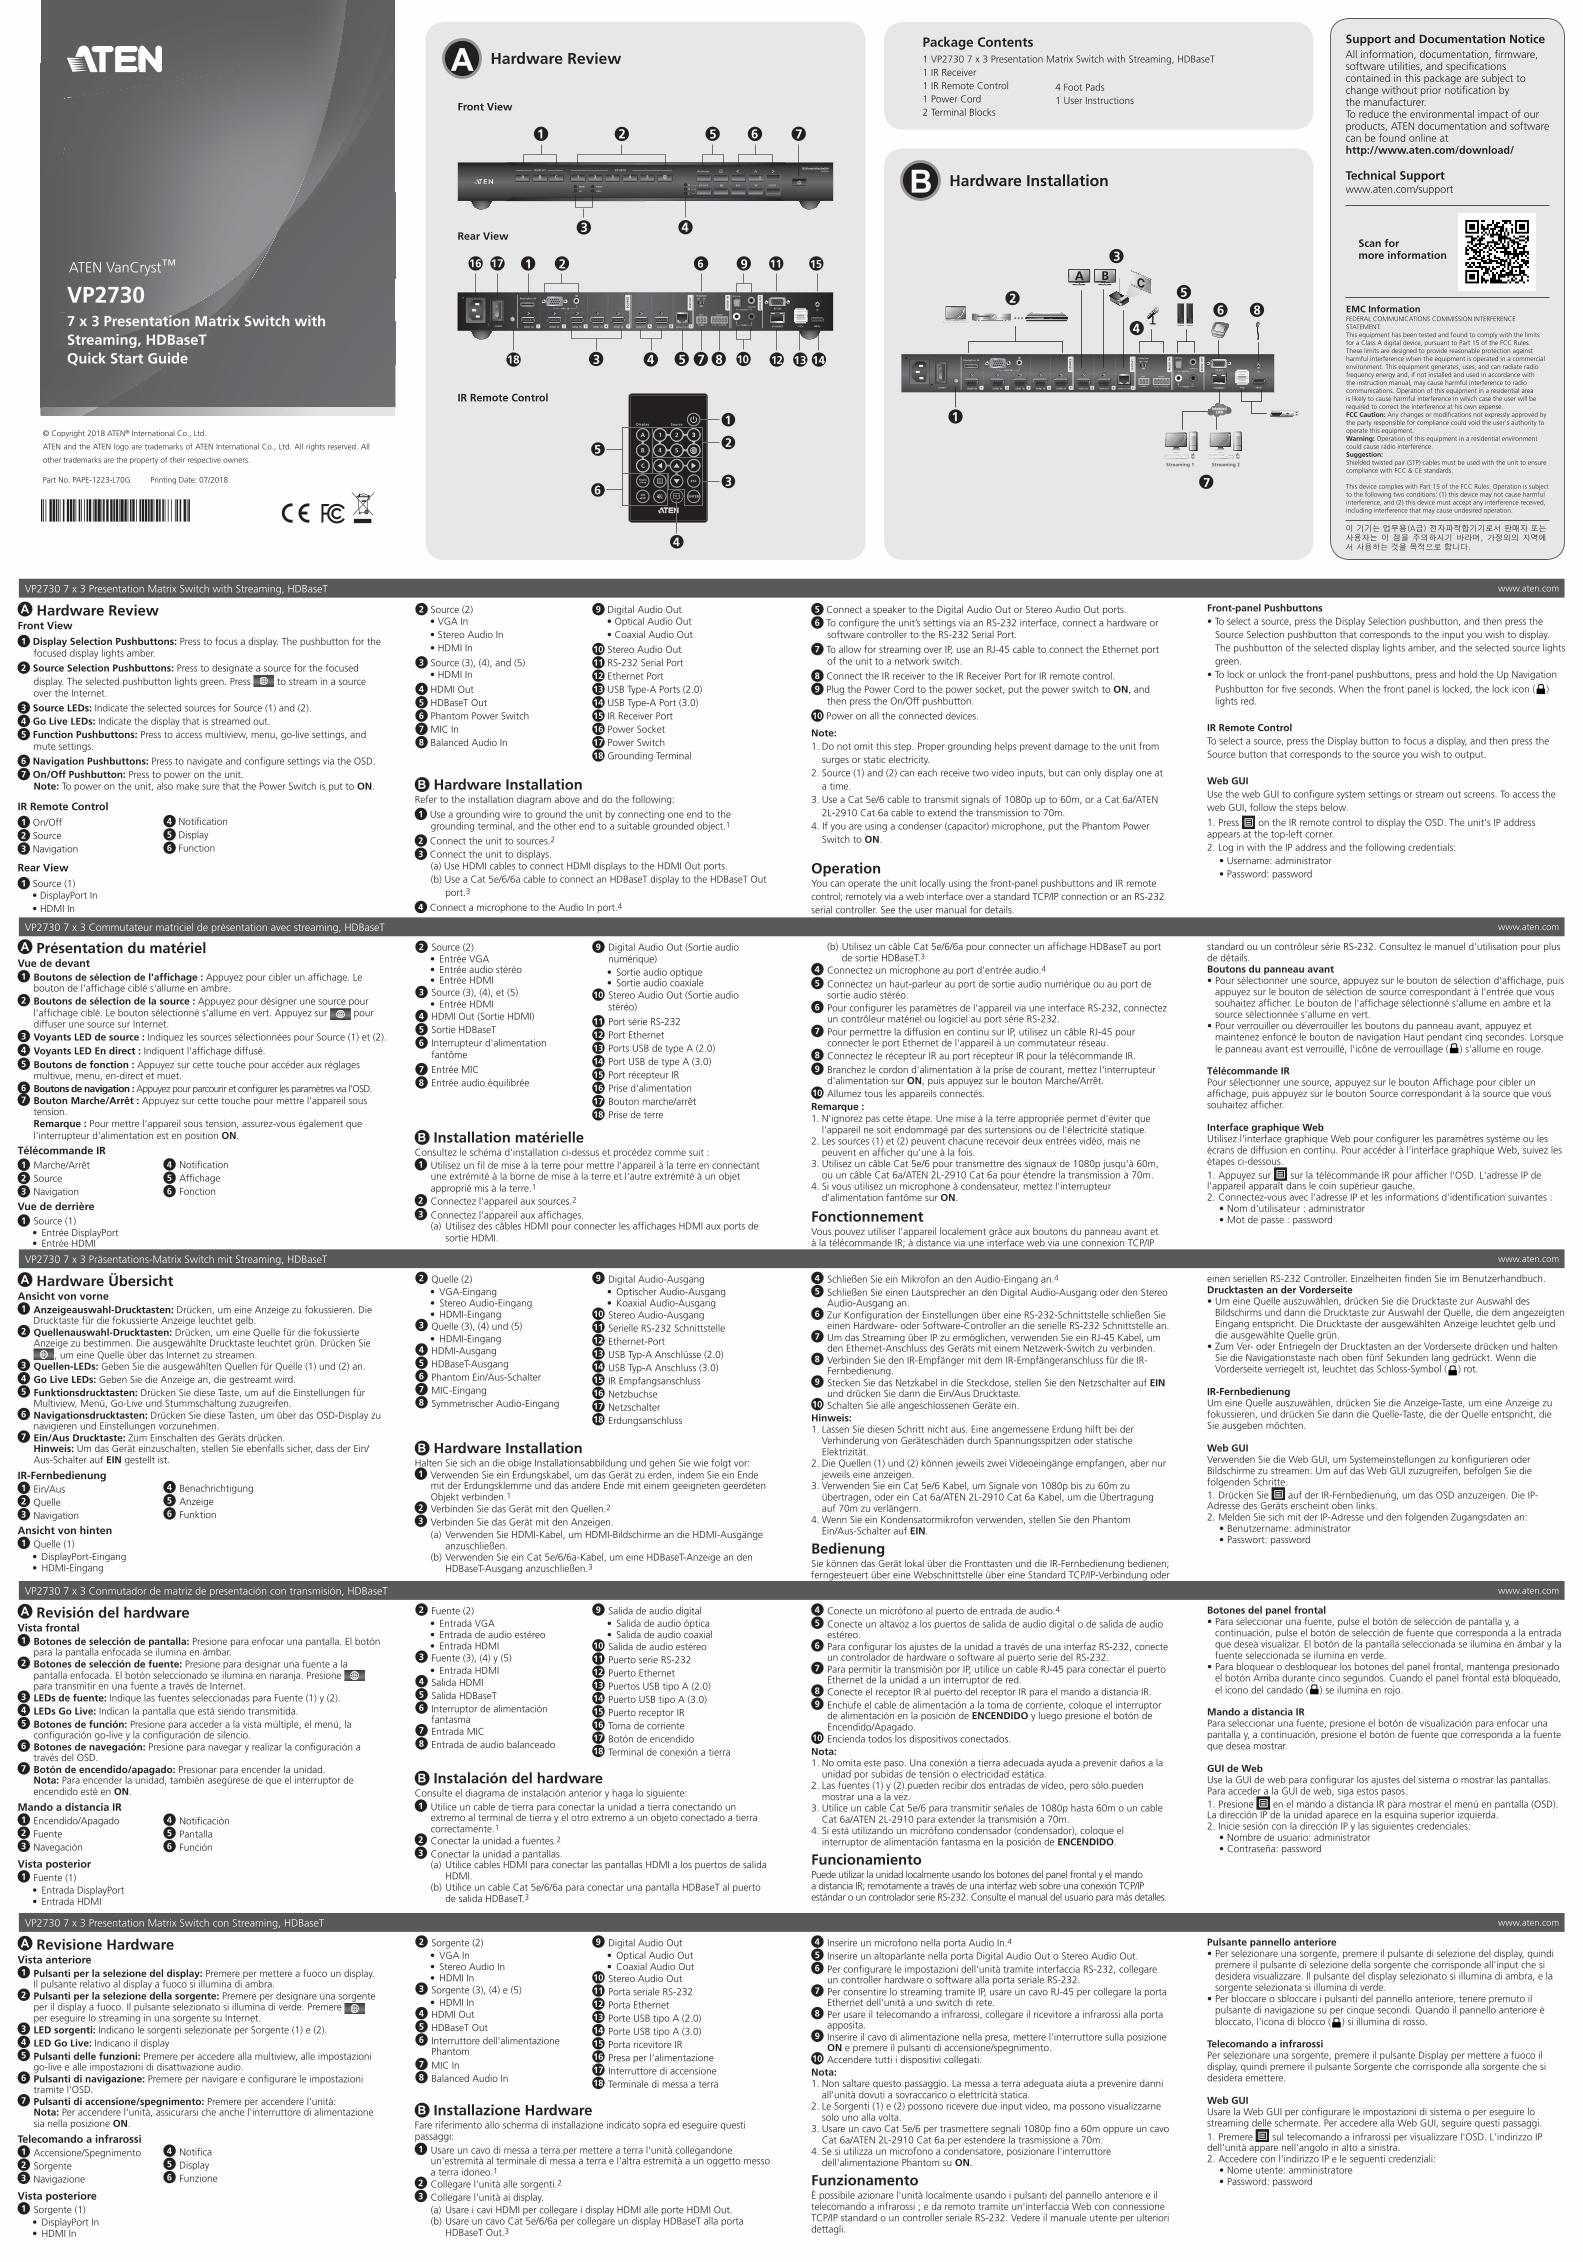
IR Remote Control1 On/Off2 Source3 Navigation
Rear View1 Source (1)
• DisplayPort In• HDMI In
2 Source (2)• VGA In• Stereo Audio In• HDMI In
3 Source (3), (4), and (5)• HDMI In
4 HDMI Out5 HDBaseT Out 6 Phantom Power Switch7 MIC In8 Balanced Audio In
5 Connect a speaker to the Digital Audio Out or Stereo Audio Out ports.6 To confi gure the unit’s settings via an RS-232 interface, connect a hardware or
software controller to the RS-232 Serial Port.
7 To allow for streaming over IP, use an RJ-45 cable to connect the Ethernet port of the unit to a network switch.
8 Connect the IR receiver to the IR Receiver Port for IR remote control.9 Plug the Power Cord to the power socket, put the power switch to ON, and
then press the On/Off pushbutton.
10 Power on all the connected devices.
Note:1. Do not omit this step. Proper grounding helps prevent damage to the unit from
surges or static electricity.2. Source (1) and (2) can each receive two video inputs, but can only display one at
a time.3. Use a Cat 5e/6 cable to transmit signals of 1080p up to 60m, or a Cat 6a/ATEN
2L-2910 Cat 6a cable to extend the transmission to 70m.4. If you are using a condenser (capacitor) microphone, put the Phantom Power
Switch to ON.
OperationYou can operate the unit locally using the front-panel pushbuttons and IR remote control; remotely via a web interface over a standard TCP/IP connection or an RS-232 serial controller. See the user manual for details.
Front-panel Pushbuttons• To select a source, press the Display Selection pushbutton, and then press the
Source Selection pushbutton that corresponds to the input you wish to display. The pushbutton of the selected display lights amber, and the selected source lights green.
• To lock or unlock the front-panel pushbuttons, press and hold the Up Navigation
Pushbutton for fi ve seconds. When the front panel is locked, the lock icon ( ) lights red.
IR Remote ControlTo select a source, press the Display button to focus a display, and then press the Source button that corresponds to the source you wish to output.
Web GUIUse the web GUI to confi gure system settings or stream out screens. To access the web GUI, follow the steps below.
1. Press on the IR remote control to display the OSD. The unit's IP address appears at the top-left corner.2. Log in with the IP address and the following credentials:
• Username: administrator• Password: password
9 Digital Audio Out• Optical Audio Out• Coaxial Audio Out
10 Stereo Audio Out11 RS-232 Serial Port12 Ethernet Port13 USB Type-A Ports (2.0)14 USB Type-A Port (3.0)15 IR Receiver Port16 Power Socket 17 Power Switch18 Grounding Terminal
4 Notifi cation5 Display6 Function
B Hardware InstallationRefer to the installation diagram above and do the following:
1 Use a grounding wire to ground the unit by connecting one end to the grounding terminal, and the other end to a suitable grounded object.1
2 Connect the unit to sources.2
3 Connect the unit to displays.(a) Use HDMI cables to connect HDMI displays to the HDMI Out ports.(b) Use a Cat 5e/6/6a cable to connect an HDBaseT display to the HDBaseT Out
port.3
4 Connect a microphone to the Audio In port.4
5
6
4
3
2
1 1
2
3
4
56
7
8
A B C
Internet/LAN
Streaming 1 Streaming 2

ストリーミング配信 HDBaseT搭載 7×3 プレゼンテーションスイッチ
A 製品各部名称フロントパネル1 ディスプレイ選択ボタン: ディスプレイを選択します。選択されたディスプレイのボタンはオレンジに点灯します。
2 ソース選択ボタン: 選択されたディスプレイのソースを指定します。選択されたボタンはグリーンに点灯します。 を押すとインターネットを通じてソースが配信されます。
3 ソースLED: ソース(1)と(2)用に選択されたソースを示します。4 ライブ開始LED: 配信されているディスプレイを示します。5 機能ボタン: マルチビュー、メニュー、ライブ開始設定、ミュート設定へアクセスします。6 ナビゲーションボタン: OSD経由で設定へナビゲートし、変更できます。7 ON/OFFボタン:本製品の電源をONにします。
注意:本製品をONにする前に、電源スイッチが既にONになっていることを確かめてください。
IRリモート制御1 ON/OFF2 ソース3 ナビゲーションリアパネル1 ソース(1)
• DisplayPort入力• HDMI入力
2 ソース(2)• VGA入力• ステレオオーディオ入力• HDMI入力
3 ソース(3)、(4)、(5)• HDMI入力
4 HDMI出力5 HDBaseT出力6 ファンタム電源スイッチ7 マイク入力8 バランスオーディオ入力
4 マイクをオーディオ入力ポートへ接続してください。4
5 スピーカーをデジタルオーディオ出力またはステレオオーディオ出力ポートへ接続してください。
6 RS-232インターフェースを通じて本製品の設定を行う場合は、ハードウェアまたはソフトウェアコントローラーをRS-232シリアルポートへ接続してください。
7 IPを通じて配信する場合は、RJ-45ケーブルを使用して本製品のイーサネットポートをネットワークスイッチへ接続してください。
8 IRリモート制御を行う場合は、IR受信器をIR受信器ポートへ接続してください。9 電源コードを電源ソケットに差し込み、電源スイッチをONにして、ON/OFFボタンを押してください。
10 全ての接続された機器の電源をONにしてください。注意:1. この手順を省略しないでください。サージや静電気によって本製品が破損するのを防ぐため、適切な接地をしてください。
2. ソース(1)と(2)はそれぞれ2つの映像入力を受信できますが、一度に表示できる映像ソースは1つのみです。
3. Cat 5e/6ケーブルを使用して1080p信号を最大60m転送できます。またはCat 6a/ATEN 2L-2910 Cat 6aケーブルを使用して転送距離を70mまで延長できます。
4. コンデンサーマイクを使用している場合、ファンタム電源スイッチをONにしてください。
操作方法フロントパネルのボタンとIRリモート制御を使用して本製品をローカル側で操作できます。リモート側では、標準のTCP/IP接続を通じたウェブインターフェース
か、RS-232シリアルコントローラーにより操作できます。詳細はユーザーマニュアルをご参照ください。フロントパネルボタン• ソースを選択する場合は、ディスプレイ選択ボタンを押し、続いて表示する入力に対応したソース選択ボタンを押してください。選択されたディスプレイのボタンはオレンジに点灯し、選択されたソースはグリーンに点灯します。
• フロントパネルのボタンをロックまたはロック解除する場合は、上向きのナビゲーションボタンを5秒間押し続けてください。フロントパネルがロックされたら、ロックアイコン( )が赤に点灯します。
IRリモート制御ソースを選択する場合は、ディスプレイ選択ボタンを押してディスプレイを選択し、続いて出力するソースに対応したソース選択ボタンを押してください。
Web GUIWeb GUIを使用してシステムを設定したり、画面内容を配信できます。以下の手順に従い、Web GUIへアクセスしてください。1. IRリモート制御にて を押し、OSDを表示させます。本製品のIPアドレスが左上隅に表示されます。2. IPアドレスと以下のアカウントでログインします。
• ユーザー名:administrator• パスワード:password
9 デジタルオーディオ出力• オプティカルオーディオ出力• コアキシャルオーディオ出力
10 ステレオオーディオ出力11 RS-232 シリアルポート12 イーサネットポート13 USB Type-Aポート(2.0)14 USB Type-Aポート(3.0)15 IR受信器ポート16 電源ソケット17 電源スイッチ18 接地端子
B ハードウェアのセットアップ接続図を参考にしながら以下の手順で作業を行ってください。1 接地線の一端を本製品の接地端子に、もう一端を適切な接地物に接続して、本製品を接地してください。1
2 本製品をソースに接続してください。2
3 本製品をディスプレイに接続してください。(a) HDMIケーブルを使用して、HDMIディスプレイをHDMI出力ポートへ接続してください。
(b) Cat 5e/6/6aケーブルを使用して、HDBaseTディスプレイをHDBaseT出力ポートへ接続してください。3
4 通知5 ディスプレイ6 機能
Матричний комутатор презентацій VP2730 7 x 3 з передачею потокового відео HDBaseT www.aten.com
A ОглядобладнанняВиглядспереду1 Кнопкивиборудисплея:Натисніть для вибору дисплея. Кнопка для
вибраного дисплея загориться янтарним кольором.2 Кнопкивиборуджерела:Натисніть, щоб призначити джерело для
вибраного дисплея. Вибрана кнопка загориться зеленим кольором. Натисніть для передачі потокового відео джерела через Інтернет.
3 Світлодіодиджерела: Показують вибрані джерела для Джерела (1) та (2).4 Світлодіодивиходувефір: Показують дисплей, з якого передається
потокове відео.5 Функціональнікнопки: Натискайте для доступу до перегляду кількох
екранів, меню, налаштувань виходу в ефір та налаштувань приглушення звуку.
6 Кнопкинавігації: Натискайте для переходу та виконання налаштувань за допомогою OSD.
7 КнопкаУвімк./Вимк.: Натискайте, щоб увімкнути пристрій. Примітка: Щоб увімкнути пристрій, також переконайтесь, що перемикач
живлення встановлено в положення ON.Інфрачервонийблоккерування1 Увімк./Вимк.2 Джерело3 Навігація
Виглядззаду1 Джерело (1)
• Вхід DisplayPort• Вхід HDMI
2 Джерело (2)• Вхід VGA• Стереофонічний аудіовхід• Вхід HDMI
3 Джерело (3), (4) та (5)• Вхід HDMI
4 Вихід HDMI5 Вихід HDBaseT 6 Перемикач фантомного живлення7 Вхід MIC8 Вхід Balanced Audio
(b) Скористайтесь кабелем Cat 5e/6/6a для під’єднання дисплея HDBaseT до вихідного порту HDBaseT.3
4 Під’єднайте мікрофон до порту аудіовиходу.45 Під’єднайте динамік до портів цифрового аудіовиходу або стереофонічного
аудіовиходу.6 Для виконання налаштувань пристрою через інтерфейс RS-232 під’єднайте
апаратний або програмний контролер до послідовного порту RS-232.7 Щоб дозволити потокову передачу відео через IP, скористайтесь кабелем
RJ-45 для під’єднання порту Ethernet апарату до комутатора мережі.8 Під’єднайте інфрачервоний приймач до інфрачервоного порту для виконання
інфрачервоного керування.9 Підключіть шнур живлення до розетки живлення, встановіть перемикач
живлення в положення ON, а потім натисніть кнопку Увімк./Вимк. 10 Увімкніть живлення всіх під’єднаних пристроїв.Примітка:1. Не пропускайте это действие. Належне заземлення допомагає захистити пристрій
від пошкоджень в результаті перепадів напруги та впливу статичної електрики.2. Кожне з джерел (1) та (2) може отримувати два вхідних відеосигнали, однак
може одночасно відображати тільки один.3. Використовуйте кабель Cat 5e/6 для передачі сигналів 1080p на відстань до 60 м,
або кабель Cat 6a/ATEN 2L-2910 Cat 6a для подовження передачі до 70 м.4. Якщо ви використовуєте конденсаторний (електростатичний) мікрофон,
встановіть перемикач фантомного живлення в положення ON.
РоботаВи можете керувати цим апаратом локально за допомогою кнопок передньої панелі та інфрачервоного блоку керування , а також дистанційно через
веб-інтерфейс за допомогою стандартного з’єднання TCP/IP або послідовного контролера RS-232. Див. посібник користувача для отримання детальної інформації.Кнопкипередньоїпанелі• Що вибрати джерело, натисніть кнопку вибору дисплея, а потім натисніть
кнопку вибору джерела, що відповідає входу, який потрібно відобразити. Кнопка вибраного дисплея загориться янтарним кольором, а вибране джерело загориться зеленим кольором.
• Щоб заблокувати або розблокувати кнопки передньої панелі, натисніть та утримуйте кнопку навігації «Вгору» протягом п’яти секунд. Коли передню панель буде заблоковано, значок блокування ( ) загориться червоним кольором.
ІнфрачервонийблоккеруванняЩоб вибрати джерело, натисніть кнопку дисплея для вибору дисплея, а потім натисніть кнопку джерела, що відповідає джерелу, яке потрібно вивести.
Веб-інтерфейскористувачаВикористовуйте веб-інтерфейс користувача для конфігурації системних налаштувань або передачі потокового відео екранів. Для доступу до веб-інтерфейсу користувача виконайте наведені нижче кроки.1. Натисніть на інфрачервоному блоці керування для відображення OSD. У верхньому лівому куті з’явиться IP-адреса апарату.2. Виконайте вхід за допомогою IP-адреси та наступних облікових даних:
• Ім’я користувача: administrator• Пароль: password
9 Цифровий аудіовихід• Оптичний аудіовихід• Коаксіальний аудіовихід
10 Стереофонічний аудіовихід11 Послідовний порт RS-23212 Порт Ethernet13 Порти USB Type-A (2.0)14 Порт USB Type-A (3.0)15 Інфрачервоний порт приймача16 Гніздо живлення 17 Перемикач живлення18 Клема заземлення
B ВстановленняобладнанняПерегляньте наведену вище схему встановлення і виконайте наступні дії:1 Скористайтесь проводом заземлення, щоб заземлити пристрій, приєднавши
один кінець до клеми заземлення, а інший кінець до предмету, заземленого належним чином.1
2 Під’єднайте пристрій до джерел.23 Під’єднайте пристрій до дисплеїв.
(a) Скористайтесь кабелями HDMI для під’єднання дисплеїв HDMI до вихідних портів HDMI.
4 Сповіщення5 Дисплей6 Функція
VP2730. Презентационный матричный коммутатор 7x3 для видеотрансляций, с HDBaseT www.aten.com
A ОбзороборудованияВидспереди1 Нажимныекнопкидлявыборадисплея:Нажмите для фокусировки
дисплея. Кнопка выбранного дисплея горит оранжевым.2 Нажимныекнопкидлявыбораисточника:Нажмите для указания источника
для фокусированного дисплея. Выбранная кнопка горит зеленым. Нажмите для трансляции сигнала источника через интернет.
3 Светодиодныеиндикаторыисточника: Показывают, какие видеовходы выбраны в качестве источников (1) и (2).
4 Индикаторытрансляции: Показывают, на какой дисплей ведется трансляция.
5 Функциональныенажимныекнопки: Используются для доступа к групповому экрану, экранному меню, настройкам трансляции и беззвучного режима.
6 Навигационныенажимныекнопки: Нажмите для навигации и конфигурации настроек с помощью OSD
7 КнопкаВкл/Выкл Позволяет включить устройство. Примечание. Для включения устройства необходимо, чтобы переключатель
POWER находился в положении ON.
ИК-пульт1 Вкл/Выкл2 Источник3 Перемещение
Видсзади1 Источник (1)
• Вход DisplayPort IN• Вход HDMI IN
2 Источник (2)• Вход VGA IN• Аудиовход STEREO• Вход HDMI IN
3 Источники (3), (4) и (5)• Вход HDMI IN
4 Выход HDMI5 Выход HDBaseT OUT 6 Переключатель PHANTOM7 Вход MIC IN8 Сбалансированный аудиовход
(b) С помощью кабеля Cat 5e/6/6a подключите монитор HDBaseT к выходному порту HDBaseT OUT.3
4 Подключите микрофон к порту Audio IN.45 Подключите динамик к аудиовыходу DIGITAL или STEREO.6 Для настройки параметров устройства через интерфейс RS-232 подключите
аппаратный или программный контроллер к последовательному порту RS-232.7 Для потоковой трансляции по IP-каналу подключите порт ETHERNET
устройства к сетевому коммутатору с помощью кабеля RJ-45.8 Для использования ИК-пульта подключите ИК-приемник к порту ИК-приемника.9 Подключите шнур питания к розетке электропитания, установите переключатель
POWER в положение ON, а затем нажмите кнопку включения/выключения. 10 Включите все подсоединенные устройства.Примечание.1. Не пропускайте это действие. Надлежащее заземление помогает защитить
устройство от повреждений, вызванных перепадами напряжения и статическим электричеством.
2. На любой из источников (1) и (2) могут подаваться сразу два входных видеосигнала, но одновременно выводиться на монитор может только один из них.
3. Для передачи сигналов 1080p на расстояние до 60 м используйте кабель Cat 5e/6, а на расстояние до 70 м — кабель Cat 6a или ATEN 2L-2910 Cat 6a.
4. При использовании конденсаторного микрофона установите переключатель PHANTOM в положение ON.
ЭксплуатацияДля управления устройством используются кнопки на передней панели и ИК-пульте, а также дистанционное управление через веб-интерфейс по стандартному соединению TCP/IP или с помощью последовательного
контроллера RS-232. Для более подробной информации см. Руководство пользователя.Нажимныекнопкинапереднейпанели• Для выбора источника нажмите нажимную кнопку выбора дисплея, затем
нажимную кнопку выбора источника, соответствующую входящему сигналу, который вы хотите отобразить. Кнопка выбранного дисплея горит оранжевым, а кнопка выбранного источника горит зеленым.
• Чтобы заблокировать или разблокировать кнопки на передней панели, прижмите на пять секунд кнопку «вверх». Когда передняя панель заблокирована, значок блокировки ( ) светится красным.
ИК-пультЧтобы выбрать источник, нажмите кнопку выбора дисплея для его активации, а затем кнопку выбора источника, сигнал которого будет отображаться на дисплее.Веб-интерфейсИспользуйте веб-интерфейс для настройки видеотрансляции и системных параметров. Для доступа к веб-интерфейсу выполните следующие действия.1. На ИК-пульте нажмите кнопку для отображения экранного меню В верхнем левом углу отображается IP-адрес устройства.2. Войдите в систему, используя этот IP-адрес и следующие учетные данные:
• Имя пользователя: administrator• Пароль: password
9 Аудиовыходы DIGITAL• Оптический аудиовыход• Коаксиальный аудиовыход
10 Аудиовыходы STEREO11 Последовательный порт RS-23212 Порт Ethernet13 Порты USB 2.0 (тип A)14 Порты USB 3.0 (тип A)15 Порт ИК-приемника16 Разъем питания 17 Выключатель питания18 Клемма заземления
B УстановкаоборудованияРуководствуясь вышеприведенной монтажной схемой, выполните следующие действия:1 Заземлите устройство, подсоединив один конец заземляющего провода к
заземляющему разъему, а другой конец к подходящему заземленному объекту.12 Подключите устройство к источникам.23 Подключите устройство к мониторам.
(a) С помощью кабелей HDMI подключите мониторы HDMI к выходным портам HDMI OUT.
4 Уведомление5 Дисплей6 Функции
VP2730 7 x 3 Apresentação de comutador de matriz com transmissão em directo, HDBaseT www.aten.com
A Revisão do Hardware Vista frontal1 Botões de Selecção de Ecrã: Prima para focar um ecrã. O botão de activação
para o ecrã focado acende a âmbar.2 Botões de Selecção de Fonte: Prima para designar uma fonte para o ecrã
focado. O botão de activação seleccionado acende a verde. Prima para transmitir numa fonte pela Internet.
3 LEDs de fonte: Indica as fontes seleccionadas para Fonte (1) e (2).4 LEDs em directo: Indica o ecrã que está a transmitir.5 Botões de selecção de função: Prima para aceder às definições multivista,
menu, em directo, e definições sem som.6 Botões de selecção de navegação: Prima para navegar e configurar as
definições através do OSD.7 Botão de activação para Ligar/Desligar: Prima para ligar a unidade.
Nota: Para ligar a unidade, certifique-se também que o interruptor de alimentação está em ON.
Unidade de controlo remoto de infravermelhos1 On/Off2 Fonte3 Navegação
Vista posterior1 Fonte (1)
• Entrada DisplayPort• Entrada HDMI
2 Fonte (2)• Entrada VGA• Entrada de áudio stéreo• Entrada HDMI
3 Fonte (3), (4), e (5)• Entrada HDMI
4 HDMI Out (Saída HDMI)5 Saída HDBaseT 6 Interruptor de Alimentação
fantasma7 Entrada do microfone8 Entrada de áudio stéreo
5 Ligue um altifalante às portas de saída de áudio digital ou saída de áudio stéreo.6 Para configurar as definições da unidade através do interface RS-232, ligue um
controlador de hardware ou software à porta de série RS-232.7 Para permitir transmissão por IP, utilize um cabo RJ-45 para ligar a porta Ethernet
da unidade a um interruptor de rede.8 Ligue o receptor de IV à porta do receptor de IV para o controlo remoto de
infravermelhos.9 Ligue o cabo de alimentação à tomada, coloque o interruptor de alimentação
em ON, e prima depois o botão de activação On/Off. 10 Ligue todos os dispositivos ligados.Nota:1. Não ignore este passo. A ligação à terra adequada evita danos na unidade
derivados de picos ou electricidade estática.2. Cada fonte (1) e (2) pode receber mais do que duas entradas de vídeo, mas só
pode apresentar uma de cada vez.3. Utilize um cabo Cat 5e/6 para transmitir sinais de 1080p até 60m, ou um cabo
Cat 6a/ATEN 2L-2910 Cat 6a para aumentar a transmissão até 70m.4. Se está a utilizar um microfone condensador, coloque o interruptor de
alimentação fantasma em ON.
OperaçãoPode operar a unidade localmente utilizando os botões de activação no painel frontal e a unidade de controlo remoto de infravermelhos; remotamente através de um interface web numa ligação TCP/IP padrão ou num controlador de série RS-232. Consulte o manual de utilizador para detalhes.
Botões de selecção de painel frontal• Para seleccionar uma fonte, prima o botão de activação de ecrã, e prima depois
o botão de activação de fonte que corresponde à entrada que deseja visualizar. O botão de activação do ecrã seleccionado acende a âmbar, e a fonte seleccionada acende a verde.
• Para bloquear ou desbloquear os botões de activação de painel frontal, mantenha premido o botão de activação de navegação Up (cima) durante cinco segundos. Quando o painel frontal está bloqueado, o ícone de bloqueio ( ) acende a vermelho.
Unidade de controlo remoto de infravermelhosPara seleccionar uma fonte, prima o botão de ecrã para focar um ecrã, e prima depois o botão de fonte que corresponde à fonte que deseja ligar.
Web GUIUtilize o Web GUI para configurar as definições de sistema ou transmitir para os ecrãs. Para aceder ao Web GUI, siga os passos seguintes.1. Prima na unidade de controlo remoto de infravermelhos para ver o OSD. O endereço IP da unidade aparece no canto superior esquerdo.2. Inicie sessão com o endereço IP e as seguintes credenciais:
• Nome de utilizador: administrator• Palavra-passe: password
9 Saída de áudio digital• Saída de áudio digital• Saída de áudio coaxial
10 Saída de áudio stéreo11 Porta de série RS-23212 Porta Ethernet13 Portas USB Tipo A (2.0)14 Porta USB Tipo A (3.0)15 Porta de receptor de IV16 Tomada de Alimentação 17 Interruptor de Alimentação18 Terminal de Aterramento
B Instalação do HardwareConsulte os diagramas de instalação acima enquanto efectua o seguinte:1 Utilize um fio de terra para ligar a unidade ao ligar uma extremidade ao terminal
de terra, e a outra extremidade a um objecto adequado ligado.12 Ligue a unidade às fontes.23 Ligue a unidade ao ecrã.
(a) Utilize cabos HDMI para ligar ecrãs HDMI às portas de saída HDMI.(b) Utilize um cabo Cat 5e/6/6a para ligar o ecrã HDBaseT à porta de saída
HDBaseT.34 Ligue um microfone à porta de entrada áudio.4
4 Notificação5 Ecrã6 Função
VP2730 7 x 3 프레젠테이션 매트릭스 스위치 ( 스트리밍 , HDBaseT 기능 )
A 하드웨어 개요전면1 디스플레이 선택 푸시버튼: 디스플레이를 선택합니다. 선택된 디스플레이의 푸
시 버튼이 주황색으로 점등됩니다.2 소스 선택 푸시버튼: 선택된 디스플레이의 소스를 지정합니다. 선택된 푸시버튼
이 녹색으로 점등됩니다. 를 눌러 소스를 인터넷으로 스트리밍 할 수 있습니다.
3 소스 LED: 소스 (1) 및 (2)용으로 선택된 소스가 점등됩니다.4 실시간 전송 LED: 스트리밍 되는 디스플레이를 표시합니다.5 기능 푸시버튼: 멀티뷰, 메뉴, 고 라이브 설정 및 음소거 설정에 액세스 할 수 있
습니다.6 탐색 푸시버튼: OSD를 통해 설정을 탐색하고 구성합니다.7 켜기/끄기 푸시버튼: 장치의 전원을 켤 수 있습니다.
참고: 장치의 전원을 켜기 위해서는 전원 스위치 역시 켜져 있는지 확인해야합 니다.
IR 리모컨1 켜기/끄기2 소스3 탐색
후면1 소스 (1)
• DisplayPort 입력• HDMI 입력
2 소스 (2)• VGA 입력• 스테레오 오디오 입력• HDMI 입력
3 소스 (3), (4) 및 (5)• HDMI 입력
4 HDMI 출력5 HDBaseT Out6 Phantom 전원 스위치7 마이크 입력8 밸런스 오디오 입력
4 마이크를 오디오 입력 포트에 연결하십시오.45 스피커를 디지털 오디오 출력 또는 스테레오 오디오 출력 포트에 연결합니다.6 RS-232 인터페이스를 통해 장치 설정을 구성하려면 하드웨어 또는 소프트웨어
컨트롤러를 RS-232 시리얼 포트에 연결합니다.7 IP를 통한 스트리밍을 허용하려면 RJ-45 케이블로 장치의 이더넷 포트에 연결
해 네트워크 스위치와 연결하십시오.8 IR 원격 제어를 위해 IR 수신기를 IR 수신기 포트에 연결합니다.9 전원 코드를 전원 소켓에 연결하고 전원 스위치를 ON으로 켭니다. 그 후 켜기/
끄기 푸시버튼을 누릅니다.10 연결된 모든 장치의 전원을 켭니다.참고:1. 이 단계를 건너뛰지 마십시오. 올바른 접지는 서지 혹은 정전기로 인한 장치의
손상을 방지할 수 있습니다.2. 소스 (1)과 (2)는 각각 2개의 비디오 입력을 수신할 수 있지만 한 번에 하나의 비
디오 소스만 디스플레이할 수 있습니다.3. Cat 5e/6 케이블을 사용해 1080p 전송 신호를 최대 60m까지 전송할 수 있으며,
Cat 6a/ATEN 2L-2910 Cat 6a 케이블을 사용해 전송 거리를 70m까지 연장할 수 있습니다.
4. 콘덴서(커패시터) 마이크를 사용중인 경우 Phantom 전원 스위치를 켜짐으로 돌려놓으십시오.
동작전면 패널의 푸시버튼 및 IR 리모컨을 사용해 근거리에서 장치를 조작할 수 있습니다. 원거리 조작은 표준 TCP/IP 연결 또는 RS-232 시리얼 컨트롤러를 통한 웹 인터페이스를 통해 가능합니다. 자세한 내용은 사용자 매뉴얼을 참조하십시오.
전면 푸시버튼
• 소스를 선택하려면 디스플레이 선택 푸시버튼을 누른 다음, 디스플레이 하려는 입력에 해당되는 소스 선택 푸시버튼을 누르십시오. 선택된 디스플레이의 푸시
버튼은 호박색으로, 선택된 소스는 녹색으로 점등됩니다.• 전면 패널의 푸시버튼을 잠그거나 잠금 해제하려면 위로 향한 탐색 푸시버튼을
5초간 누르십시오. 전면 패널이 잠긴 상태에서는 자물쇠 아이콘 ( )에 빨간색 불이 점등됩니다.
IR 리모컨소스를 선택하려면 디스플레이 버튼을 눌러 디스플레이를 선택한 다음, 출력하려는 소스에 해당되는 소스 선택 버튼을 누르십시오.
웹 GUI웹 GUI를 사용해 시스템 설정 또는 스트리밍 출력 스크린을 구성할 수 있습니다. 아래 단계에 따라 웹 GUI에 액세스 할 수 있습니다.1. IR 리모컨 상의 를 누르면 OSD가 표시됩니다. 장치 IP 주소가 상단 좌측 모서리에 표시됩니다.2. IP 주소 및 다음 인증서를 사용해 로그인 하십시오:
• 사용자 이름: administrator• 비밀번호: password
9 디지털 오디오 출력• 광학 오디오 출력• 동축 오디오 출력
10 스테레오 오디오 출력11 RS-232 시리얼 포트12 이더넷 포트13 USB Type-A 포트 (2.0)14 USB Type-A 포트 (3.0)15 IR 수신기 포트16 전원 소켓17 전원 스위치18 접지 단자
B 하드웨어 설치위 다이어그램을 참조해 다음 작업을 수행하십시오:1 접지 와이어의 한쪽 끝을 접지 터미널에 연결하고 다른 쪽 끝을 접지된 적합한
물체에 연결하여 장치를 접지합니다.12 장치를 소스와 연결하십시오.23 장치를 디스플레이와 연결하십시오.
(a) HDMI 케이블을 사용하여 HDMI 디스플레이를 HDMI 출력 포트에 연결합니다.
(b) Cat 5e/6/6a 케이블을 사용해 HDBaseT 디스플레이의 HDBaseT 출력 포트에 연결하십시오.3
4 알림5 디스플레이6 기능
VP2730 7 x 3 矩阵式演示切换器,具备视频流、HDBaseT
A 硬件检视前视图1 显示选择按钮:按下可指定显示输出口。指定的显示设备按钮恒亮橙色。2 信号源选择按钮:按下可指定显示的信号源。所选信号源按钮恒亮绿色。
按下 ,可通过互联网流传入信号源。3 信号源LED:显示信号源(1)和(2)目前选定的信号源。4 上线LED:亮灯的显示设备目前同步对外上线。5 功能按钮:按下此区按钮可访问多视图、菜单、上线设置和静音设置。6 操作按钮:按下此区按钮可通过OSD来浏览和配置设置。7 开/关按钮:按下此按钮可打开本机。
注意: 要打开本机,请先确保将电源开关打开。
IR遥控器1 开/关2 信号源3 操作
后视图1 信号源(1)
• DisplayPort输入• HDMI输入
2 信号源(2)• VGA输入• 立体声音频输入• HDMI输入
3 信号源(3)、(4)和(5)• HDMI输入
4 HDMI输出5 HDBaseT输出6 Phantom电源开关7 麦克风输入8 平衡音频输入
4 将麦克风连接到音频输入端口。4
5 将扬声器连接到数字音频输出端口或立体声音频输出端口。6 如要通过RS-232接口配置本机设置,请将硬件或软件控制器连接到RS-232串行
端口。7 如需通过IP实现流传输,请使用RJ-45线缆将本机的以太网端口连接到网络交
换机。8 将IR接收器连接到IR接收器端口,以接收IR遥控器的信号。9 将电源线插入到电源接口中,然后将电源开关打开并按下开/关按钮。10 启动所有已连接设备的电源。注意:1. 请勿省略此步骤。正确接地有助于防止电涌或静电对装置造成的损坏。2. 信号源(1)和(2)可分别收到两个视频输入,但一次只能显示一个信号源。3. 使用Cat 5e/6线缆最远可在60米以内传输1080p信号,或使用Cat 6a/ATEN 2L-
2910 Cat 6a线缆将传输距离延伸至70米。4. 如果使用电容式麦克风,请将Phantom电源开关打开。
操作您可以使用前面板按钮和IR遥控器在本地操作本机;也可以通过Web接口经由标准TCP/IP连接或RS-232串行控制器执行远程操作。有关详细信息,请参阅用户手册。
前面板按钮
• 如要选择信号源,请按其中一个显示输出按钮以选定显示设备,然后按您要显示的输入信号源按钮。所选定的显示设备和信号源的按钮分别恒亮橙色和绿色。
• 如要锁定或解锁前面板按钮,请按住Up导航按钮五秒。在前面板锁定状态下,锁定图标 ( ) 恒亮红色。
IR遥控器
如要选择信号源,请按显示设备按钮以选定显示设备,然后按您要显示的输出信号源按钮。
Web GUI使用Web GUI配置系统设置或流传出屏幕。要访问Web GUI,请按照下方步骤操作。1. 按下IR遥控器上的 可显示OSD。本机的IP地址会在左上角显示。2. 使用IP地址和以下凭据登录:
• 用户名:administrator• 密码:password
9 数字音频输出• 光纤音频输出• 同轴音频输出
10 立体声音频输出11 RS-232 串口端口12 以太网端口13 USB Type-A端口(2.0)14 USB Type-A端口(3.0)15 IR接收器端口16 电源接口17 电源开关18 接地端子
B 硬件安装参照上面的安装图,执行下述步骤:1 使用接地线,将一端连接到接地端口,另一端连接到合适的接地物体从而将本
机接地。1
2 将本机连接到信号源。2
3 将本机连接到显示设备。(a) 使用HDMI线缆将HDMI显示设备连接到HDMI输出端口。(b) 使用Cat 5e/6/6a线缆将HDBaseT显示设备连接到HDBaseT输出端口。3
4 通知5 显示输出6 功能
VP2730 7 x 3矩陣式簡報切換器,具備串流、HDBaseT
A 硬體檢視 前視圖
1 顯示選擇按鈕:按下可選擇顯示輸出埠。所選定的顯示按鈕恆亮橘色。2 訊號源選擇按鈕:按下可選擇顯示的訊號源。所選定訊號源按鈕恆亮綠色。按下 ,可透過網際網路播入串流訊號源。
3 訊號源LED:顯示訊號源(1)和(2)目前所選定的輸入介面。4 Go Live LED:亮燈的顯示裝置目前正同步對外直播串流。5 功能按鈕:按下此區按鈕可進入多視窗、主選單、直播設定和靜音設定。6 操作按鈕:按下此區按鈕可透過OSD來瀏覽和配置設定。7 開/關按鈕:按下此按鈕可將本設備開機。
注意: 要將本設備開機,請先確保電源開關已打開。
IR遙控器1 開/關2 訊號源3 操作
後視圖
1 訊號源(1)• DisplayPort輸入• HDMI輸入
2 訊號源(2)• VGA輸入• 身歷聲音訊輸入• HDMI輸入
3 訊號源(3)、(4)和(5)• HDMI輸入
4 HDMI輸出5 HDBaseT輸出6 Phantom電源開關7 麥克風輸入8 平衡音訊輸入
4 將麥克風連接到音訊輸入埠。4
5 將揚聲器連接到數位音訊輸出埠或身歷聲音訊輸出埠。6 如要透過RS-232介面配置本設備的設定,請將硬體或軟體控制器連接到RS-232序列埠。
7 如需使用網路傳輸串流,請使用RJ-45線將本設備的乙太網路埠連接到網路交換器。
8 將紅外線接收器連接到紅外線接收器連接埠,以接收紅外線遙控器的訊號。9 將電源線插入到電源插孔中,然後將電源開關打開並按下開/關按鈕。10 啟動所有已連接設備的電源。
注意:1. 請勿省略此步驟。正確接地有助於防止突波或靜電對設備造成損壞。2. 訊號源(1)和(2)可各別收到兩組影像輸入,但一次只能顯示一個訊號源。3. 使用Cat 5e/6線時,傳輸1080p信號最遠可達60公尺,或可使用Cat 6a/ATEN
2L-2910 Cat 6a線將傳輸距離延伸至70公尺。4. 如果使用電容式麥克風,請將Phantom電源開關打開。
操作您可以使用前面板按鈕和紅外線遙控器在現場操作本設備;也可以透過Web介面經由標準TCP/IP連線或RS-232序列控制器執行遠端操作。相關的詳細資訊,請參閱使用者手冊。
前面板按鈕
• 如要選擇訊號源,請按其中一個顯示輸出按鈕以選定顯示裝置,然後再按您要顯示的輸入訊號源按鈕。所選定的顯示裝置和訊號源的按鈕分別恆亮橘色和綠色。
• 如要鎖定或解鎖前面板按鈕,請按住Up操作按鈕五秒。在前面板鎖定狀態下,
鎖定圖示 ( ) 恆亮紅色。
紅外線遙控器
如要選擇訊號源,請按顯示裝置按鈕以選定顯示裝置,然後再按您要顯示的訊號
源按鈕。
Web GUI使用Web GUI可配置系統設定或將螢幕畫面對外直播。要進入Web GUI,請按照下方步驟操作。
1. 按下紅外線遙控器上的 可顯示OSD。本設備的IP位址會在左上角顯示。2. 使用IP位址和以下帳號密碼登入:
• 用戶名:administrator• 密碼:password
9 數位音訊輸出• 光纖音訊輸出• 同軸音訊輸出
10 身歷聲音訊輸出11 RS-232序列埠12 乙太網路埠13 USB Type-A連接埠 (2.0)14 USB Type-A連接埠 (3.0)15 紅外線接收器連接埠16 電源插孔17 電源開關18 接地端子
B 硬體安裝請參照上面的安裝圖,執行下述步驟:
1 使用接地線,將一端連接到接地埠,另一端連接到合適的接地物體,以將本設備接地。1
2 將本設備連接到訊號源。2
3 將本設備連接到顯示裝置。(a) 使用HDMI線將HDMI顯示裝置連接到HDMI輸出埠。(b) 使用Cat 5e/6/6a線將HDBaseT顯示裝置連接到HDBaseT輸出埠。3
4 通知5 顯示輸出6 功能
サポートお問合せ窓口:+81-3-5615-5811www.aten.com/jp/ja/
www.aten.com 技術服務專線:+886-2-8692-6959
www.aten.com.cn 电话支持:+86-400-810-0-810
www.aten.com Phone: +82-2-467-6789