Guida per stampare in sublimazione le tshirt Russell
12
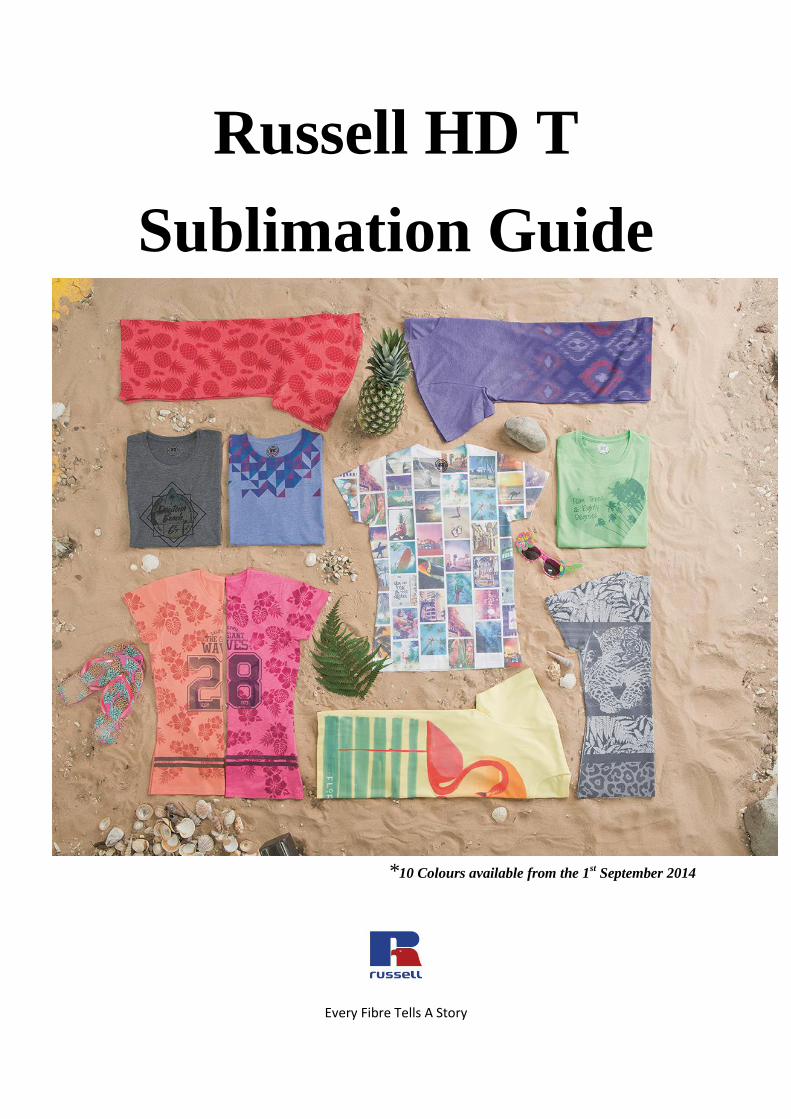
Every Fibre Tells A Story Russell HD T Sublimation Guide *10 Colours available from the 1 st September 2014
-
Upload
fast-copy-snc -
Category
Education
-
view
100 -
download
0
Transcript of Guida per stampare in sublimazione le tshirt Russell
Every Fibre Tells A Story
Russell HD T
Sublimation Guide
*10 Colours available from the 1st September 2014

Every Fibre Tells A Story
Contents
1. What is sublimation?
2. Benefits of Sublimation
3. Debunking the myths
4. Equipment
5. Images
6. How to sublimate?
7. Troubleshooting
Every Fibre Tells A Story
1. WHAT IS SUBLIMATION?
Sublimation is a simple but effective form of digital printing, used for printing high quality
images and graphics onto polymer surfaces. It can be used to print onto promotional items
such as mouse mats and mugs, and in the case of textiles, t-shirts with a high polyester
content.
What makes sublimation unique is the chemical process. Sublimation inks are actually dyes,
which only bond with polyester fibres. When the dye is heated during pressing, two
important things happen: the dye turns from a solid straight into a gas, and the polyester
fibres in the garment open up. The sublimation ink then permeates the fibres, instead of
sitting on the surface like other transfer methods. When the heat is removed, the fibres close
back up and permanently retain the sublimation dye. The end result is a picture-perfect
image that is “embedded “into the fabric – so you can’t actually feel that it’s there.
With sublimation, you can print a t-shirt in 2 minutes or less by following these 3 steps:
Think! Use your imagination, get creative or use an existing image/artwork – why not take a
look at our Pinterest board for some inspiration.
Create! Open your image/artwork in a graphics program for editing and printing
Print! Transfer your image onto a T-shirt using the specified sublimation accessories
detailed in this guide and a heat press.
2. BENEFITS OF SUBLIMATION
Image is permanently dyed into the fibres of the fabric
It will not fade, crack or wash out
It has minimal time, labour and set up costs
Equipment needed can be purchased for under £1000
You can produce and edit an image in a standard computer program
You can use virtually unlimited shades of colour and print in seconds
It’s a constantly expanding market due to social media sites like Instagram and
Every Fibre Tells A Story
3. DEBUNKING TWO COMMON MYTHS
There are 2 common myths about sublimation:
1. Sublimation only works on white
2. Printing only works on 100% polyester
Neither is true.
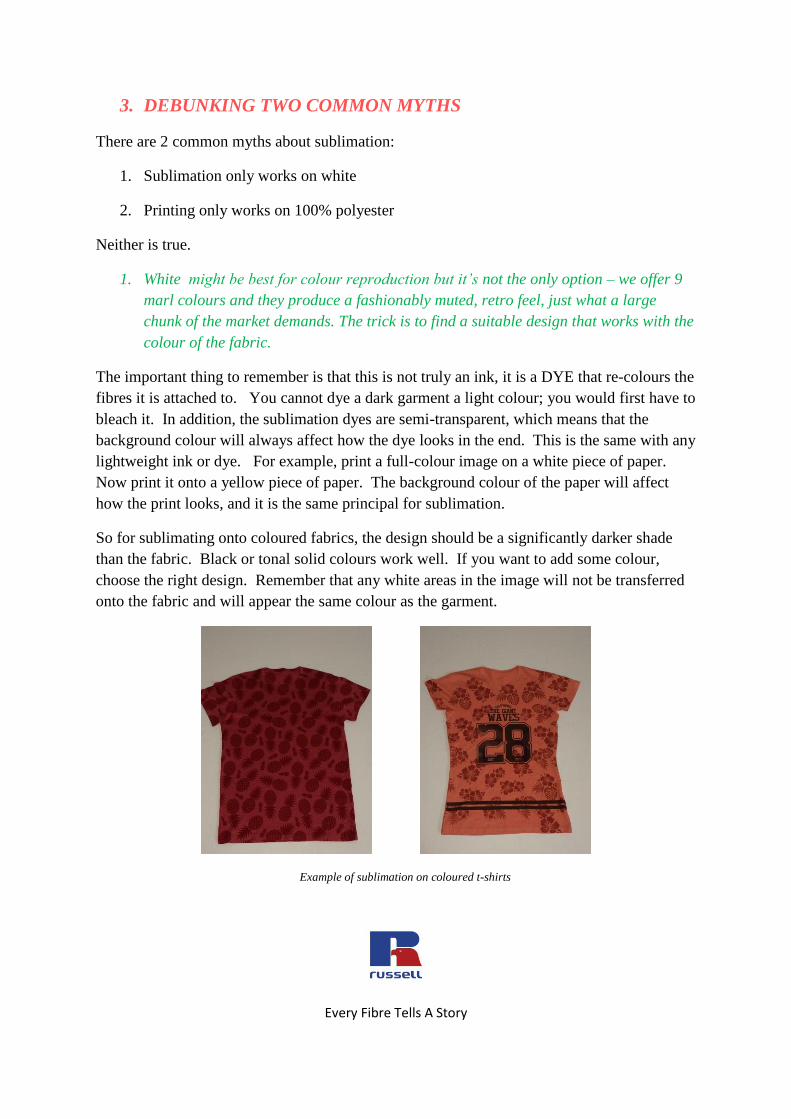
1. White might be best for colour reproduction but it’s not the only option – we offer 9
marl colours and they produce a fashionably muted, retro feel, just what a large
chunk of the market demands. The trick is to find a suitable design that works with the
colour of the fabric.
The important thing to remember is that this is not truly an ink, it is a DYE that re-colours the
fibres it is attached to. You cannot dye a dark garment a light colour; you would first have to
bleach it. In addition, the sublimation dyes are semi-transparent, which means that the
background colour will always affect how the dye looks in the end. This is the same with any
lightweight ink or dye. For example, print a full-colour image on a white piece of paper.
Now print it onto a yellow piece of paper. The background colour of the paper will affect
how the print looks, and it is the same principal for sublimation.
So for sublimating onto coloured fabrics, the design should be a significantly darker shade
than the fabric. Black or tonal solid colours work well. If you want to add some colour,
choose the right design. Remember that any white areas in the image will not be transferred
onto the fabric and will appear the same colour as the garment.
Example of sublimation on coloured t-shirts
Every Fibre Tells A Story
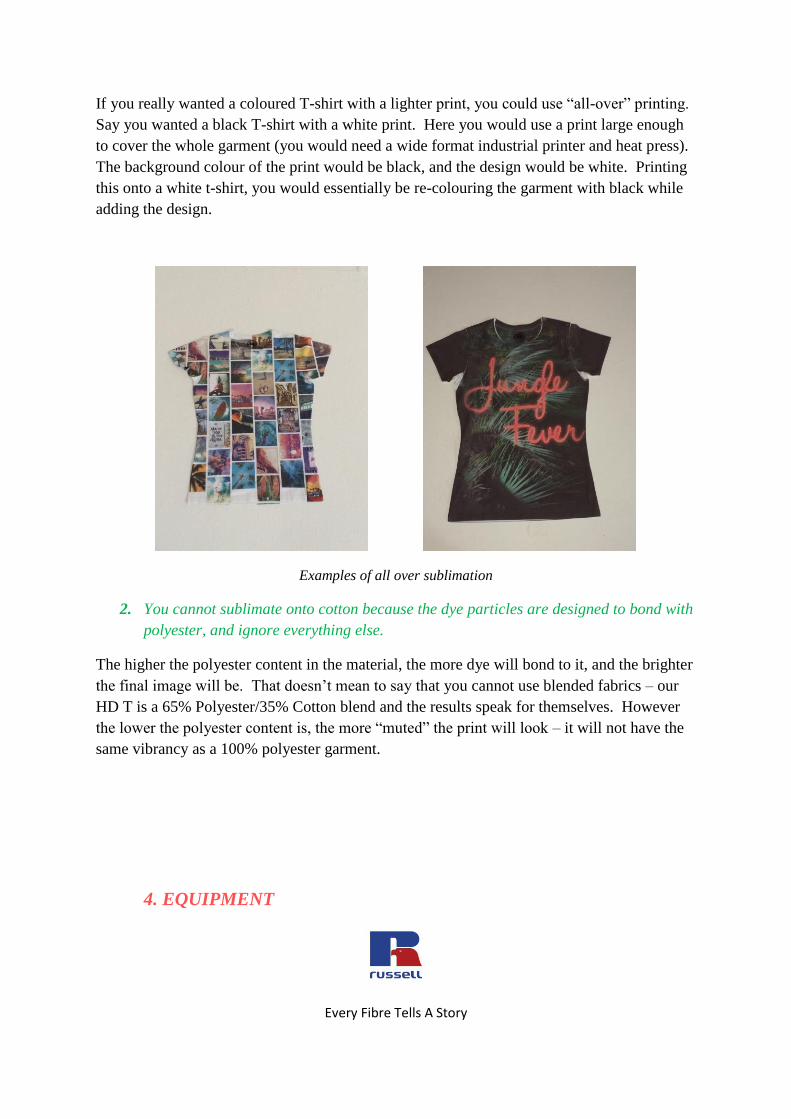
If you really wanted a coloured T-shirt with a lighter print, you could use “all-over” printing.
Say you wanted a black T-shirt with a white print. Here you would use a print large enough
to cover the whole garment (you would need a wide format industrial printer and heat press).
The background colour of the print would be black, and the design would be white. Printing
this onto a white t-shirt, you would essentially be re-colouring the garment with black while
adding the design.
Examples of all over sublimation
2. You cannot sublimate onto cotton because the dye particles are designed to bond with
polyester, and ignore everything else.
The higher the polyester content in the material, the more dye will bond to it, and the brighter
the final image will be. That doesn’t mean to say that you cannot use blended fabrics – our
HD T is a 65% Polyester/35% Cotton blend and the results speak for themselves. However
the lower the polyester content is, the more “muted” the print will look – it will not have the
same vibrancy as a 100% polyester garment.
4. EQUIPMENT
Every Fibre Tells A Story
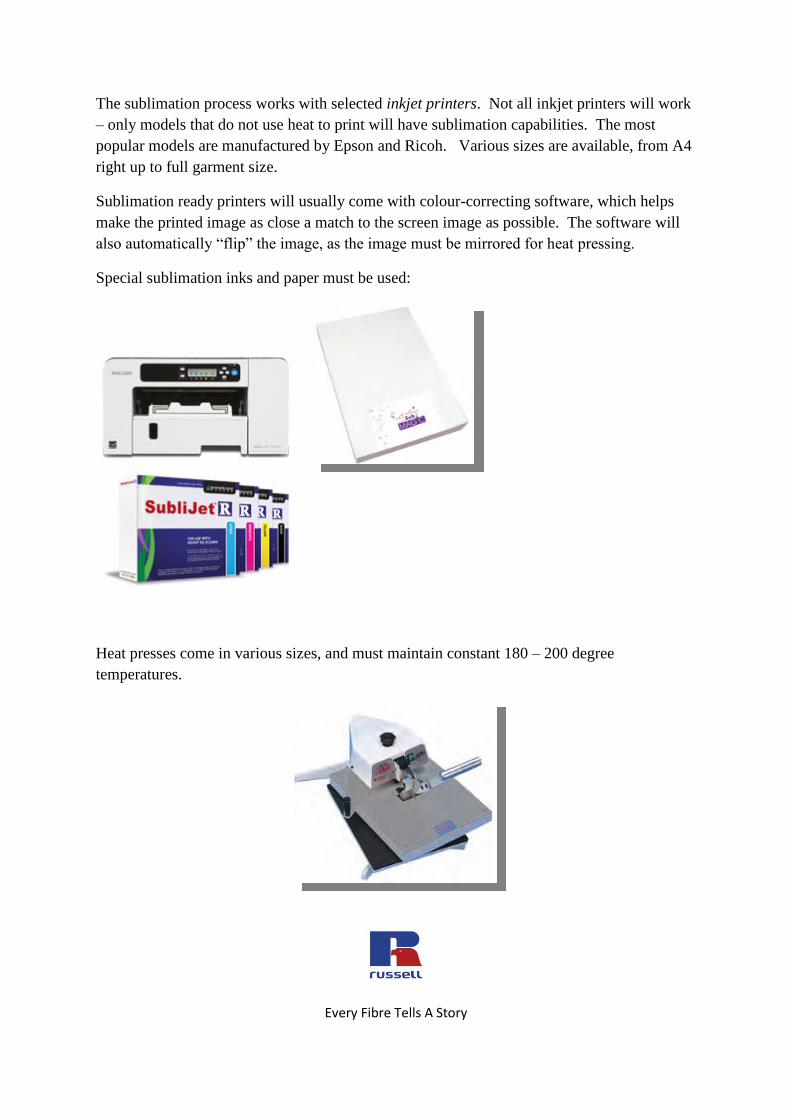
The sublimation process works with selected inkjet printers. Not all inkjet printers will work
– only models that do not use heat to print will have sublimation capabilities. The most
popular models are manufactured by Epson and Ricoh. Various sizes are available, from A4
right up to full garment size.
Sublimation ready printers will usually come with colour-correcting software, which helps
make the printed image as close a match to the screen image as possible. The software will
also automatically “flip” the image, as the image must be mirrored for heat pressing.
Special sublimation inks and paper must be used:
Heat presses come in various sizes, and must maintain constant 180 – 200 degree
temperatures.
Every Fibre Tells A Story
5. IMAGES
As with any printing process, to produce high quality results you must start with a high
quality image. No matter how good your sublimation printer is, it will never be able to
output an image that is higher in quality than the initial image. GARBAGE IN = GARBAGE
OUT!!!
No special software is required to create images for sublimation – any standard graphics
software will do. If you can open up a photo on your computer and print it out, then you can
sublimate it.
For creating artwork from scratch, or for editing artwork and photos before printing, you may
need to use a standard graphics program such as Adobe Illustrator, Adobe Photoshop or
CorelDraw.
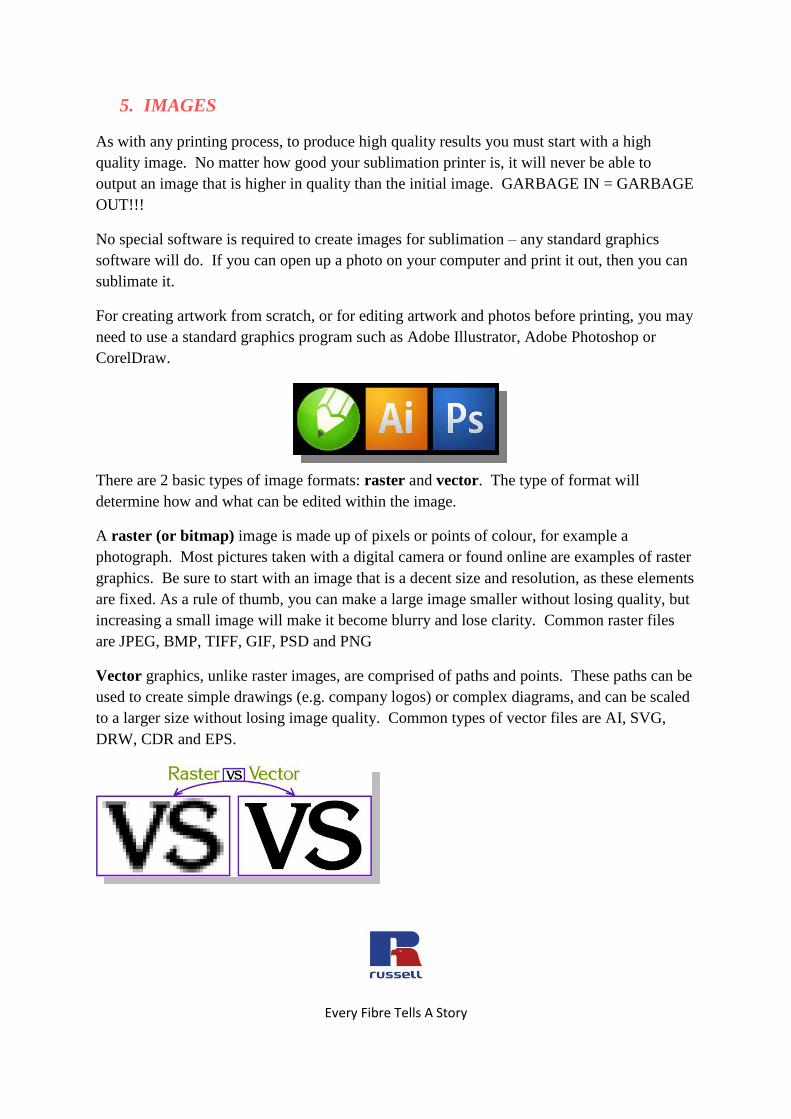
There are 2 basic types of image formats: raster and vector. The type of format will
determine how and what can be edited within the image.
A raster (or bitmap) image is made up of pixels or points of colour, for example a
photograph. Most pictures taken with a digital camera or found online are examples of raster
graphics. Be sure to start with an image that is a decent size and resolution, as these elements
are fixed. As a rule of thumb, you can make a large image smaller without losing quality, but
increasing a small image will make it become blurry and lose clarity. Common raster files
are JPEG, BMP, TIFF, GIF, PSD and PNG
Vector graphics, unlike raster images, are comprised of paths and points. These paths can be
used to create simple drawings (e.g. company logos) or complex diagrams, and can be scaled
to a larger size without losing image quality. Common types of vector files are AI, SVG,
DRW, CDR and EPS.

Every Fibre Tells A Story
6. HOW TO SUBLIMATE
There are 3 key elements in the sublimation process:
1. Time
2. Temperature
3. Pressure
Sublimation is not an exact science, and the above will vary depending on the garment and
the equipment you are using. Use the guidelines from your dealer as a starting point, and
experiment to find out what works best. A very general guideline for our HD T would be 50
seconds at 180 degrees, using light to medium pressure (approx. 2.76 bar).
Every Fibre Tells A Story
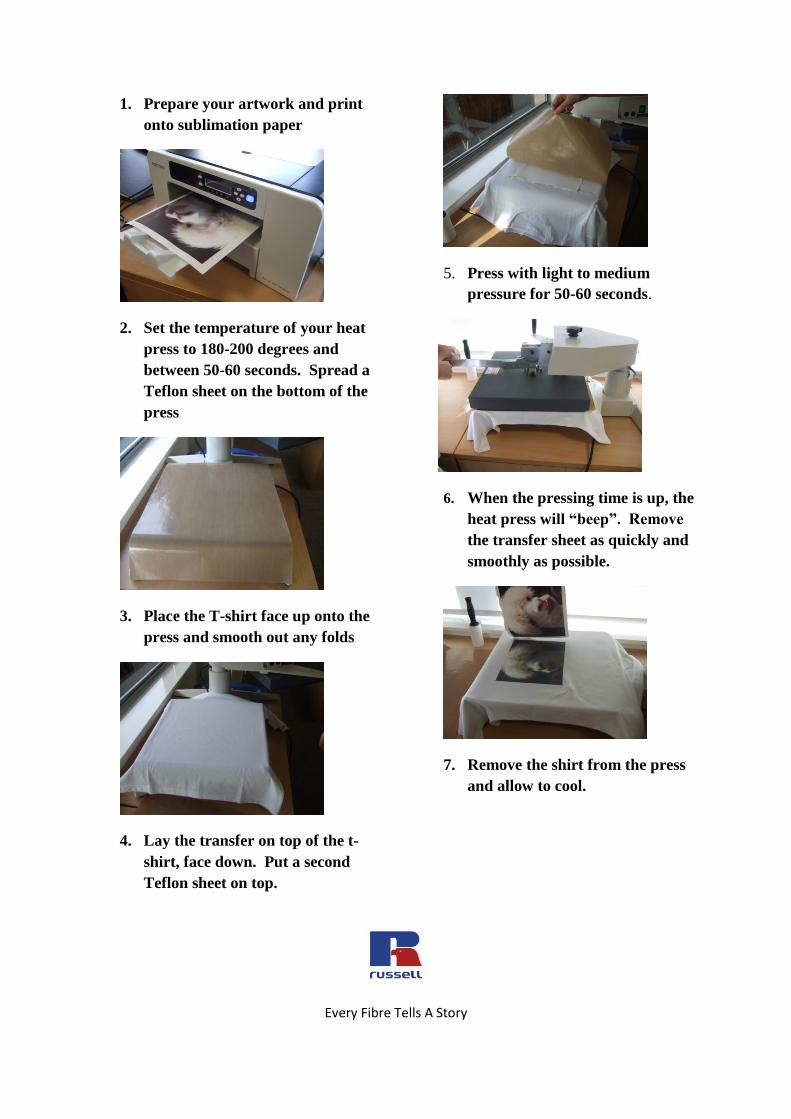
1. Prepare your artwork and print
onto sublimation paper
2. Set the temperature of your heat
press to 180-200 degrees and
between 50-60 seconds. Spread a
Teflon sheet on the bottom of the
press
3. Place the T-shirt face up onto the
press and smooth out any folds
4. Lay the transfer on top of the t-
shirt, face down. Put a second
Teflon sheet on top.
5. Press with light to medium
pressure for 50-60 seconds.
6. When the pressing time is up, the
heat press will “beep”. Remove
the transfer sheet as quickly and
smoothly as possible.
7. Remove the shirt from the press
and allow to cool.
Every Fibre Tells A Story
7. TROUBLESHOOTING
Some common problems are as follows:
Blue Specks: Sometimes tiny stray fibres
from the manufacturing process are left on
the surface of the t-shirt. They are almost
invisible to the naked eye, but once heated
during pressing they turn into permanent
blue specks on the garment’s surface. The
solution is quite simple – run a lint roller
over the T-shirt before putting into the heat
press. For our HD T you only need to do
this for the White and lighter coloured
ones.
Image Bleeding/ Faded Colours: One
reason that these problems may occur is
that there is excess moisture in the fabric.
Moisture can be absorbed into the fabric
from the atmosphere. To eliminate this,
pre-press the T-shirt for 5-10 seconds
before pressing the image on. This will
remove the moisture from the fabric.
“Ghosting”: this is when the print comes
out blurry, typically around the edges.
This is caused by the transfer paper
shifting on the shirt’s surface when the
heat press is opened – the movement
causes the print to blur. The solution is to
either tape the print in place using heat
resistant tape, or use a special spray
adhesive on the transfer prior to applying it
to the shirt.
Fabric changing colour: White fabric
may turn yellow and coloured marl fabric
sometimes changes shade. This can be
avoided - for white reduce the temp by 10
degrees and reduce the pressure a little as
sometimes heat press aren't always
perfectly calibrated. The change in colour
on the marl colour will disappear when the
fabric cools down after printing, again this
can be avoided by reducing the time and/or
pressure.
Every Fibre Tells A Story
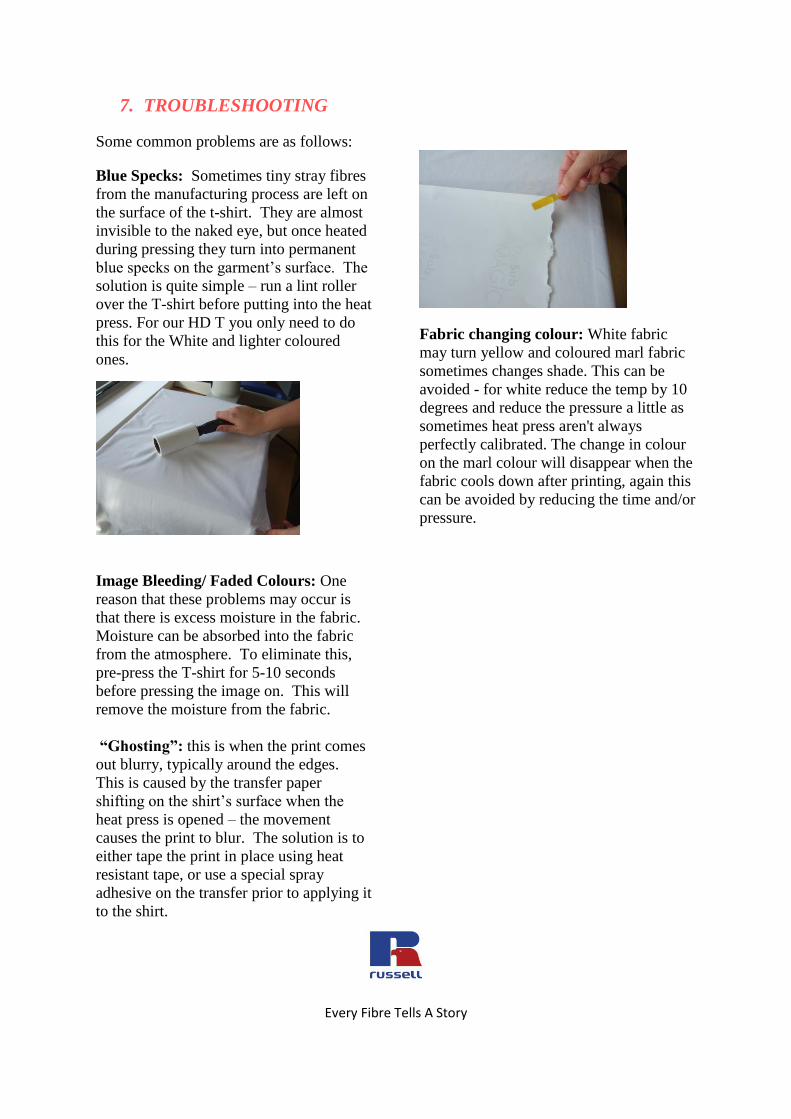
Transfer lines: Transfer lines are razor
thin lines embedded in the garment, where
the edges of the transfer paper have made
contact with the fabric’s surface (using a
square outline). There are a few things
that can be done to prevent this happening:
Tear the paper around the design,
to soften the edges
Use lighter pressure. Light to
medium pressure is recommended.
(You may need to adjust the time
to balance this out)
Press again once you have removed
the transfer, to press out any lines
If this doesn’t work, use heat
resistant foam/ Teflon pads.
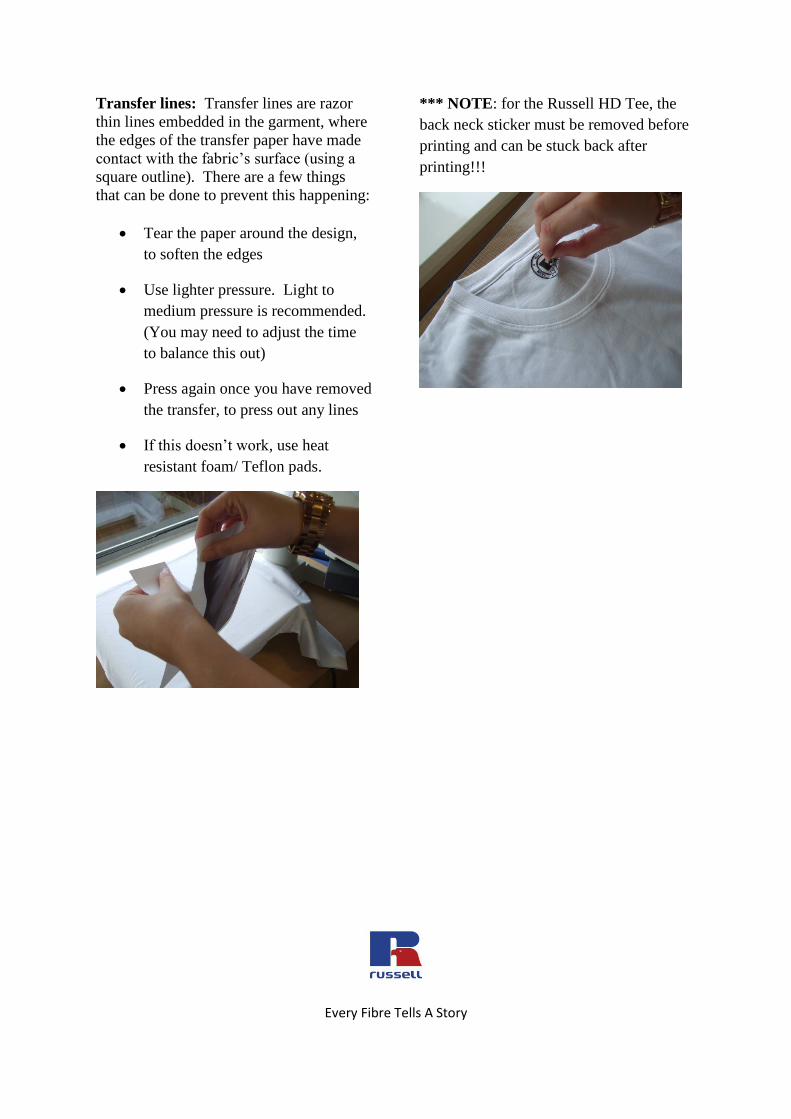
*** NOTE: for the Russell HD Tee, the
back neck sticker must be removed before
printing and can be stuck back after
printing!!!

Every Fibre Tells A Story
The information here is intended as a guide only.
***The information in this booklet was supplied by Sawgrass Europe, a leading provider of
digital printing technologies (sublimation inks, colour management software etc.). For more
information visit: http://www.sawgrasseurope.com/ ***
*** Our equipment was supplied by The Magic Touch, who stock printers, heat presses,
paper, inks, etc. http://www.themagictouch.co.uk/ ***