Telefono GPRS
225
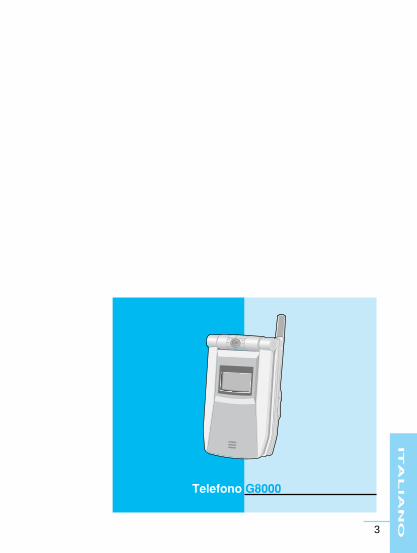
Telefono GPRS GUIDA UTENTE MODELLO: G8000 T • e • l • e • f • o • n • o • G • P • R • S • T • e • l • e • f • o • n • o • G • P • R • S Leggere questo manuale con attenzione prima di procedere con l’utilizzo del prodotto. Conservare questo manuale per eventuali utilizzi futuri. P/NO : MMBB0079901 ISSUE 2.0 PRINTED IN KOREA ITALIANO ENGLISH
Transcript of Telefono GPRS

Telefono GPRSGUIDA UTENTE
MODELLO: G8000
T • e • l • e • f • o • n • o • G • P • R • S • T • e • l • e • f • o • n • o • G • P • R • S
Leggere questo manuale con attenzioneprima di procedere con l’utilizzo del prodotto.Conservare questo manuale per eventualiutilizzi futuri.
P/NO: MMBB0079901ISSUE 2.0
PRINTED IN KOREA
ITALIANOENGLISH

Telefono GPRS GUIDA UTENTE
MODELLO: G8000
Leggere questo manuale con attenzione primadi procedere con l’utilizzo del prodotto.Conservare questo manuale per eventualiutilizzi futuri.
ITALIANO

IT
AL
IA
NO
3
Telefono G8000
IT
AL
IA
NO
4
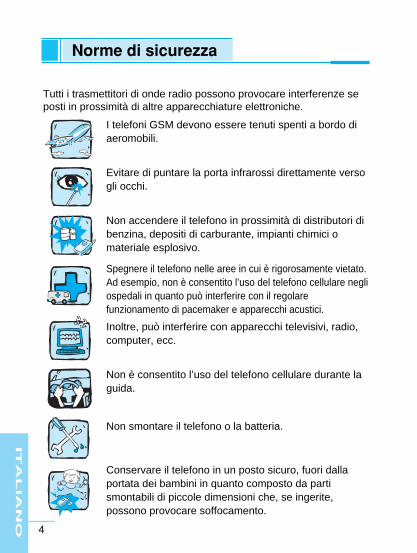
Norme di sicurezza
Tutti i trasmettitori di onde radio possono provocare interferenze seposti in prossimità di altre apparecchiature elettroniche.
I telefoni GSM devono essere tenuti spenti a bordo diaeromobili.
Evitare di puntare la porta infrarossi direttamente versogli occhi.
Non accendere il telefono in prossimità di distributori dibenzina, depositi di carburante, impianti chimici omateriale esplosivo.
Spegnere il telefono nelle aree in cui è rigorosamente vietato.Ad esempio, non è consentito l’uso del telefono cellulare negliospedali in quanto può interferire con il regolarefunzionamento di pacemaker e apparecchi acustici.
Inoltre, può interferire con apparecchi televisivi, radio,computer, ecc.
Non è consentito l’uso del telefono cellulare durante laguida.
Non smontare il telefono o la batteria.
Conservare il telefono in un posto sicuro, fuori dallaportata dei bambini in quanto composto da partismontabili di piccole dimensioni che, se ingerite,possono provocare soffocamento.
IT
AL
IA
NO
5
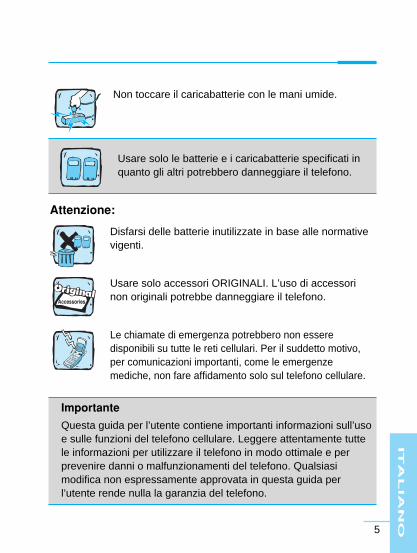
Non toccare il caricabatterie con le mani umide.
Attenzione:
Disfarsi delle batterie inutilizzate in base alle normativevigenti.
Usare solo accessori ORIGINALI. L’uso di accessorinon originali potrebbe danneggiare il telefono.
Le chiamate di emergenza potrebbero non esseredisponibili su tutte le reti cellulari. Per il suddetto motivo,per comunicazioni importanti, come le emergenzemediche, non fare affidamento solo sul telefono cellulare.
Importante
Questa guida per l’utente contiene importanti informazioni sull’usoe sulle funzioni del telefono cellulare. Leggere attentamente tuttele informazioni per utilizzare il telefono in modo ottimale e perprevenire danni o malfunzionamenti del telefono. Qualsiasimodifica non espressamente approvata in questa guida perl’utente rende nulla la garanzia del telefono.
Usare solo le batterie e i caricabatterie specificati inquanto gli altri potrebbero danneggiare il telefono.
IT
AL
IA
NO
6
Sommario
Operazioni preliminariAccessori ............................................................................... 10
Inserimento della scheda SIM .............................................. 12
Installazione della batteria .................................................... 13
Ricarica della batteria ........................................................... 14
Disconnessione dell’adattatore ........................................... 15
Accensione e spegnimento del telefono ............................. 16
Componenti del telefono ...................................................... 171. Telefono aperto ................................................................... 17
2. Telefono chiuso ................................................................... 18
Descrizione dei tasti .............................................................. 191. Tasti alfanumerici ................................................................ 21
Informazioni sul display ........................................................ 22
Istruzioni fondamentali per l’usoModalità standby ................................................................... 241. Visualizzazione del menu .................................................... 24
2. Effettuare una chiamata ...................................................... 24
3. Ricevere una chiamata ........................................................ 26
4. Controllare la lista delle chiamate perse .............................. 26
5. Uso dei tasti di accesso rapido ............................................ 26
6. Come leggere i messaggi ricevuti ....................................... 28
7. Come modificare il tema del display .................................... 29
8. Come regolare il volume del tono della tastiera .................. 29
IT
AL
IA
NO
7
9. Come registrare un messaggio vocale ................................ 29
10. Chiamate recenti ................................................................. 30
Operazioni preliminariChiamate Fax e dati ............................................................... 331. Come usare fax e dati ......................................................... 33
Descrizione menuMappa del menu .....................................................................34
1. Messaggi ............................................................................ 361.1 Scrivi ............................................................................. 36
1.2 Ricevuti ......................................................................... 42
1.3 Inviati ............................................................................. 45
1.4 Bozze messaggi ............................................................ 48
1.5 Impostazioni .................................................................. 50
1.6 Modelli ........................................................................... 55
1.7 Emoticon ....................................................................... 56
2. Chiamate ............................................................................ 572.1 Registro chiamate ......................................................... 57
2.2 Trasferire chiamate ....................................................... 58
2.3 Timer chiamate ............................................................. 60
2.4 Costi chiamate .............................................................. 61
2.5 Contatore dati GPRS .................................................... 62
2.6 Impostazioni .................................................................. 63

IT
AL
IA
NO
8
3. Multimedia .......................................................................... 673.1 Fotocamera ................................................................... 67
3.2 Videocamera ................................................................. 68
3.3 Galleria immagini .......................................................... 68
3.4 Media player ................................................................. 70
4. Internet ............................................................................... 734.1 Home ............................................................................ 73
4.2 Preferiti .......................................................................... 73
4.3 Impostazioni .................................................................. 74
4.4 Vai ad indirizzo .............................................................. 76
4.5 Svuota cache ................................................................ 76
5. Agenda ............................................................................... 775.1 Rubrica .......................................................................... 77
5.2 Agenda .......................................................................... 84
5.3 Da fare .......................................................................... 87
5.4 Memo ............................................................................ 88
6. Giochi ................................................................................. 901. Uso dei tasti nei giochi .................................................... 90
2. Avvio giochi ..................................................................... 90
7. Accessori ............................................................................ 917.1 Sveglia .......................................................................... 91
7.2 Calcolatrice ................................................................... 92
7.3 Fusi orari ....................................................................... 92
7.4 Convertitore .................................................................. 93
7.5 Timers ........................................................................... 94
IT
AL
IA
NO
9
7.6 Memo vocale ................................................................. 95
7.7 PC Sync ........................................................................ 96
7.8 Gestione contenuti ........................................................ 96
8. Imposta ............................................................................... 978.1 Profili audio ................................................................... 97
8.2 Telefono ........................................................................ 99
8.3 Display ........................................................................ 100
8.4 Ricerca rete ................................................................. 103
8.5 Sicurezza .................................................................... 103
8.6 Velocita modem .......................................................... 107
8.7 Stato memoria ............................................................. 108
8.8 Lingua ......................................................................... 108
8.9 Versione telefono ........................................................ 109
8.10 Reset dati .................................................................. 109
9. Preferiti ............................................................................. 110
10. Servizi SIM ....................................................................... 111
AppendiceRisoluzione dei problemi .....................................................112
Promemoria dati del telefono ............................................. 113
Cura e manutenzione ...........................................................114
Dati tecnici ........................................................................... 116
IT
AL
IA
NO
10
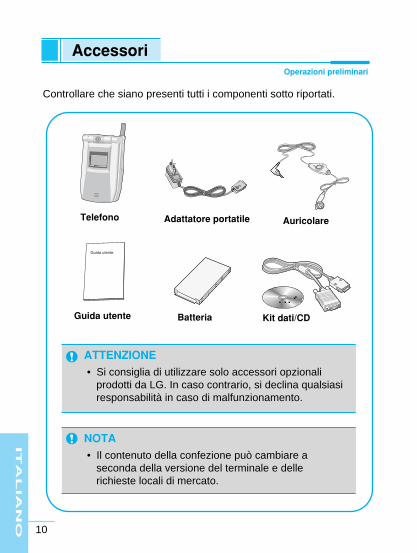
AccessoriOperazioni preliminari
Controllare che siano presenti tutti i componenti sotto riportati.
Telefono Adattatore portatile Auricolare
Guida utente Batteria Kit dati/CD
ATTENZIONE• Si consiglia di utilizzare solo accessori opzionali
prodotti da LG. In caso contrario, si declina qualsiasiresponsabilità in caso di malfunzionamento.
NOTA• Il contenuto della confezione può cambiare a
seconda della versione del terminale e dellerichieste locali di mercato.
IT
AL
IA
NO
11
Operazioni preliminari
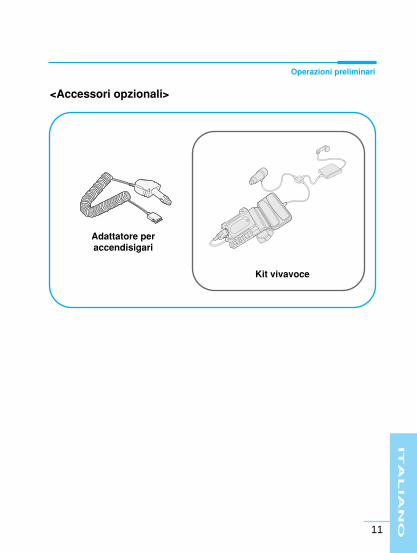
<Accessori opzionali>
Adattatore peraccendisigari
Kit vivavoce
IT
AL
IA
NO
12
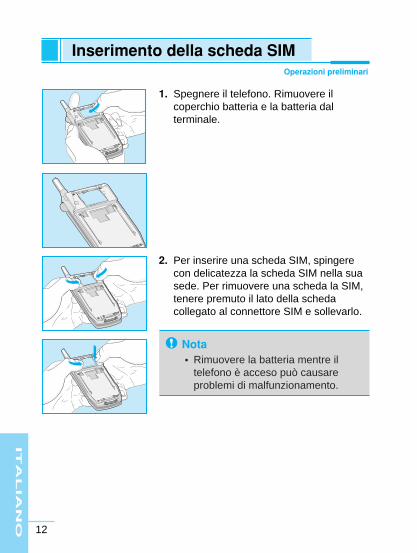
1. Spegnere il telefono. Rimuovere ilcoperchio batteria e la batteria dalterminale.
2. Per inserire una scheda SIM, spingerecon delicatezza la scheda SIM nella suasede. Per rimuovere una scheda la SIM,tenere premuto il lato della schedacollegato al connettore SIM e sollevarlo.
Inserimento della scheda SIMOperazioni preliminari
Nota• Rimuovere la batteria mentre il
telefono è acceso può causareproblemi di malfunzionamento.
IT
AL
IA
NO
13
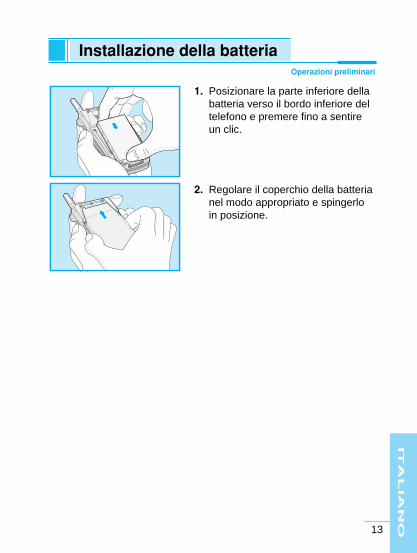
1. Posizionare la parte inferiore dellabatteria verso il bordo inferiore deltelefono e premere fino a sentireun clic.
2. Regolare il coperchio della batterianel modo appropriato e spingerloin posizione.
Operazioni preliminari
Installazione della batteria
IT
AL
IA
NO
14
Operazioni preliminari
Ricarica della batteria
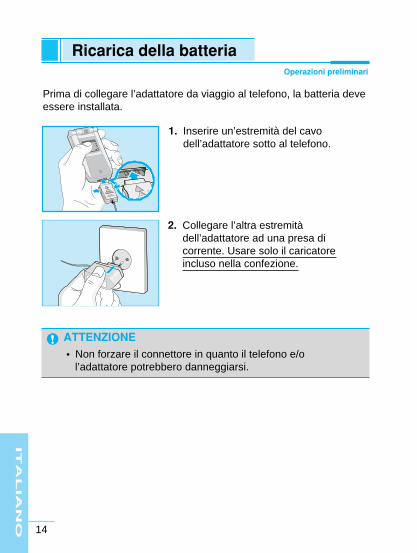
Prima di collegare l’adattatore da viaggio al telefono, la batteria deveessere installata.
1. Inserire un’estremità del cavodell’adattatore sotto al telefono.
2. Collegare l’altra estremitàdell’adattatore ad una presa dicorrente. Usare solo il caricatoreincluso nella confezione.
ATTENZIONE• Non forzare il connettore in quanto il telefono e/o
l’adattatore potrebbero danneggiarsi.
IT
AL
IA
NO
15
Operazioni preliminari
Disconnessione dell’adattatore
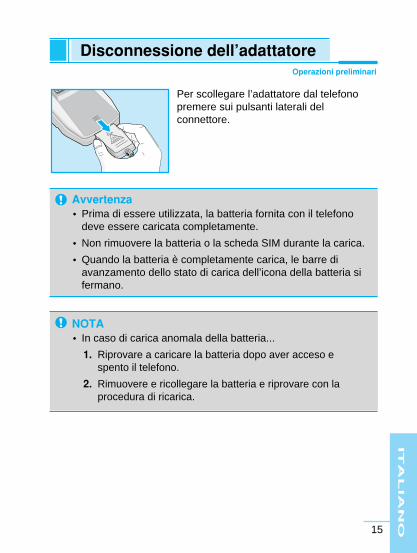
Avvertenza• Prima di essere utilizzata, la batteria fornita con il telefono
deve essere caricata completamente.
• Non rimuovere la batteria o la scheda SIM durante la carica.
• Quando la batteria è completamente carica, le barre diavanzamento dello stato di carica dell’icona della batteria sifermano.
NOTA• In caso di carica anomala della batteria...
1. Riprovare a caricare la batteria dopo aver acceso espento il telefono.
2. Rimuovere e ricollegare la batteria e riprovare con laprocedura di ricarica.
Per scollegare l’adattatore dal telefonopremere sui pulsanti laterali delconnettore.
IT
AL
IA
NO
16
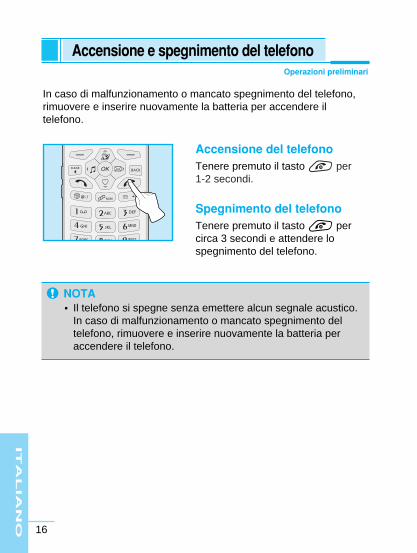
In caso di malfunzionamento o mancato spegnimento del telefono,rimuovere e inserire nuovamente la batteria per accendere iltelefono.
Accensione del telefonoTenere premuto il tasto E per 1-2 secondi.
Spegnimento del telefonoTenere premuto il tasto E percirca 3 secondi e attendere lospegnimento del telefono.
Accensione e spegnimento del telefonoOperazioni preliminari
NOTA• Il telefono si spegne senza emettere alcun segnale acustico.
In caso di malfunzionamento o mancato spegnimento deltelefono, rimuovere e inserire nuovamente la batteria peraccendere il telefono.
IT
AL
IA
NO
17
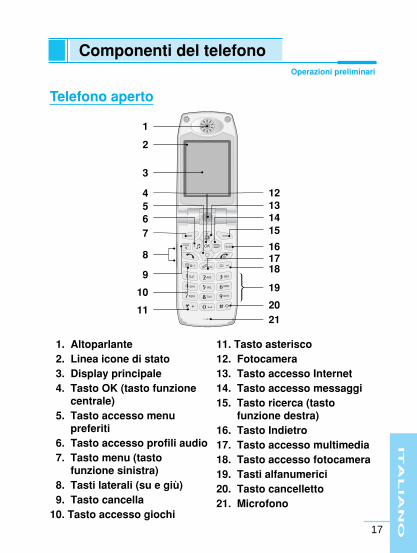
Telefono aperto
Componenti del telefonoOperazioni preliminari
1. Altoparlante2. Linea icone di stato3. Display principale4. Tasto OK (tasto funzione
centrale)5. Tasto accesso menu
preferiti6. Tasto accesso profili audio7. Tasto menu (tasto
funzione sinistra)8. Tasti laterali (su e giù)9. Tasto cancella
10. Tasto accesso giochi
11. Tasto asterisco12. Fotocamera13. Tasto accesso Internet14. Tasto accesso messaggi15. Tasto ricerca (tasto
funzione destra)16. Tasto Indietro17. Tasto accesso multimedia18. Tasto accesso fotocamera19. Tasti alfanumerici20. Tasto cancelletto21. Microfono
1
12131415
161718
19
2021
2
3
4567
8
9
10
11
IT
AL
IA
NO
18
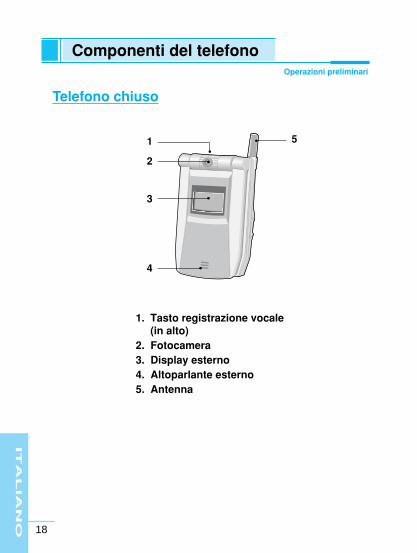
1. Tasto registrazione vocale(in alto)
2. Fotocamera3. Display esterno4. Altoparlante esterno5. Antenna
1
2
3
4
5
Telefono chiuso
Componenti del telefonoOperazioni preliminari
IT
AL
IA
NO
19
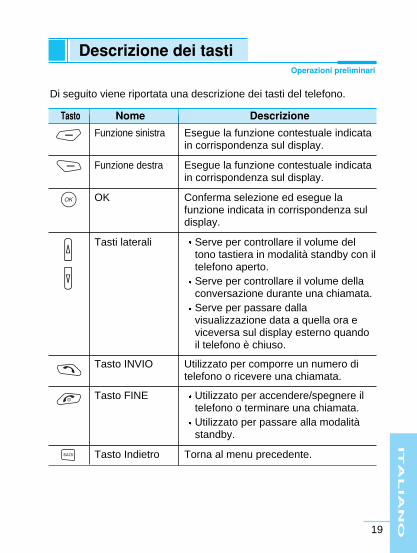
Tasto Nome Descrizione
Di seguito viene riportata una descrizione dei tasti del telefono.
Funzione sinistra Esegue la funzione contestuale indicatain corrispondenza sul display.
Funzione destra Esegue la funzione contestuale indicatain corrispondenza sul display.
OK Conferma selezione ed esegue lafunzione indicata in corrispondenza suldisplay.
Tasti laterali Serve per controllare il volume deltono tastiera in modalità standby con iltelefono aperto.Serve per controllare il volume dellaconversazione durante una chiamata.Serve per passare dallavisualizzazione data a quella ora eviceversa sul display esterno quandoil telefono è chiuso.
Tasto INVIO Utilizzato per comporre un numero ditelefono o ricevere una chiamata.
Tasto FINE Utilizzato per accendere/spegnere iltelefono o terminare una chiamata.Utilizzato per passare alla modalitàstandby.
Tasto Indietro Torna al menu precedente.
Descrizione dei tastiOperazioni preliminari
IT
AL
IA
NO
20
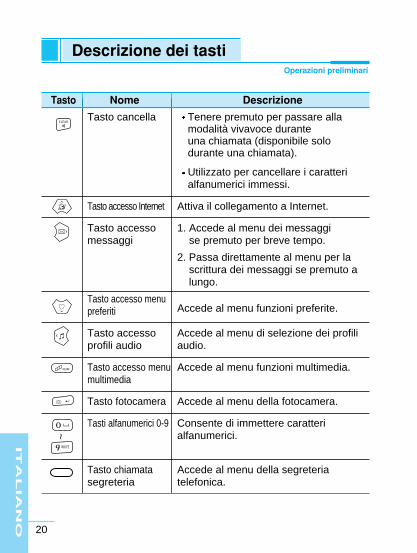
Tasto Nome Descrizione
Tasto cancella Tenere premuto per passare allamodalità vivavoce durante una chiamata (disponibile solodurante una chiamata).
Utilizzato per cancellare i caratterialfanumerici immessi.
Tasto accesso Internet Attiva il collegamento a Internet.
Tasto accesso 1. Accede al menu dei messaggi messaggi se premuto per breve tempo.
2. Passa direttamente al menu per lascrittura dei messaggi se premuto alungo.
Tasto accesso menu Accede al menu funzioni preferite.preferiti
Tasto accesso Accede al menu di selezione dei profili profili audio audio.
Tasto accesso menu Accede al menu funzioni multimedia.multimedia
Tasto fotocamera Accede al menu della fotocamera.
Tasti alfanumerici 0-9 Consente di immettere caratterialfanumerici.
Tasto chiamata Accede al menu della segreteria segreteria telefonica.
~Descrizione dei tasti
Operazioni preliminari
IT
AL
IA
NO
21
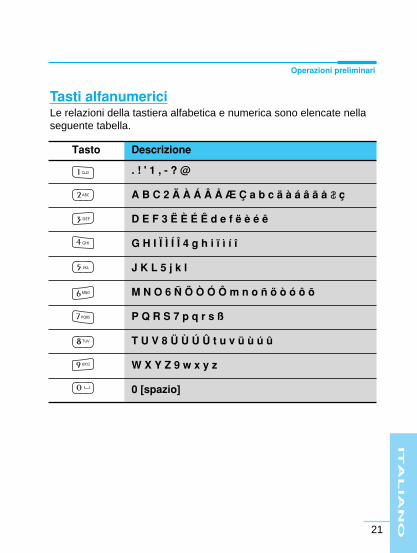
Tasti alfanumericiLe relazioni della tastiera alfabetica e numerica sono elencate nellaseguente tabella.
Tasto Descrizione
. ! ' 1 , - ? @
A B C 2 Ä À Á Â Å Æ Ç a b c ä à á â ã å ç
D E F 3 Ë È É Ê d e f ë è é ê
G H I Ï Ì Í Î 4 g h i ï ì í î
J K L 5 j k l
M N O 6 Ñ Ö Ò Ó Ô m n o ñ ö ò ó ô õ
P Q R S 7 p q r s ß
T U V 8 Ü Ù Ú Û t u v ü ù ú û
W X Y Z 9 w x y z
0 [spazio]
Operazioni preliminari
IT
AL
IA
NO
22
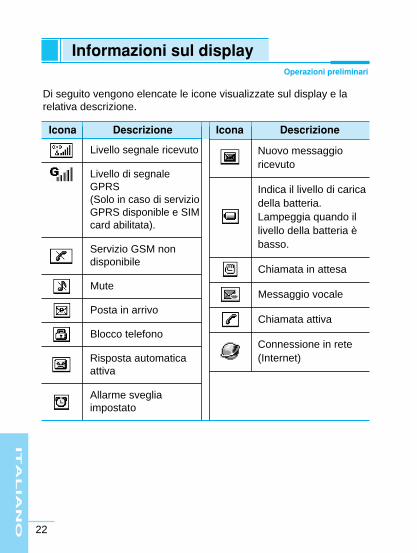
Icona Descrizione Icona Descrizione
Livello segnale ricevuto
Livello di segnaleGPRS (Solo in caso di servizioGPRS disponible e SIMcard abilitata).
Servizio GSM nondisponibile
Mute
Posta in arrivo
Blocco telefono
Risposta automaticaattiva
Allarme svegliaimpostato
Nuovo messaggioricevuto
Indica il livello di caricadella batteria.Lampeggia quando illivello della batteria èbasso.
Chiamata in attesa
Messaggio vocale
Chiamata attiva
Connessione in rete(Internet)
Di seguito vengono elencate le icone visualizzate sul display e larelativa descrizione.
Informazioni sul displayOperazioni preliminari
IT
AL
IA
NO
23
Operazioni preliminari
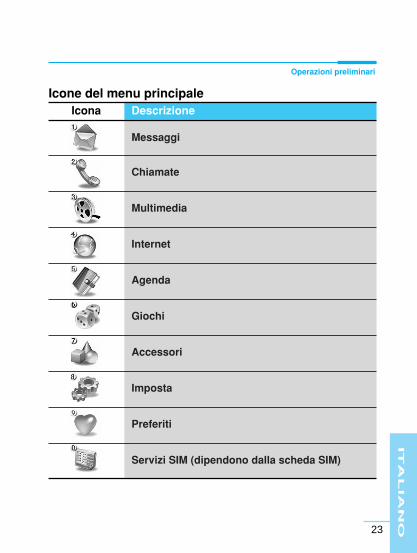
Icona Descrizione
Messaggi
Chiamate
Multimedia
Internet
Agenda
Giochi
Accessori
Imposta
Preferiti
Servizi SIM (dipendono dalla scheda SIM)
Icone del menu principale
IT
AL
IA
NO
24
Visualizzazione del menu1. Aprire il telefono e premere il tasto < [Menu].
2. Premere il tasto U o D per selezionare il menu desiderato epoi il tasto O [OK] per confermare. È anche possibile passaredirettamente al menu desiderato premendo il numerocorrispondente.
3. Premere B per passare al menu precedente e poi oppure Eper ritornare alla modalità standby.
Effettuare una chiamata
Effettuare una chiamata vocale1. Digitare il numero di telefono incluso il prefisso in modalità
standby.
2. Dopo aver digitato il numero, premere il tasto S per effettuarela chiamata.
3. Sul display vengono visualizzati il numero di telefono, il nomedella persona chiamata, l’ora corrente e la durata della chiamata.
4. Dopo aver effettuato la chiamata, premere il tasto E ochiudere il telefono per concludere la chiamata.
Effettuare una chiamata con prefisso internazionale1. Premere il tasto * due volte consecutivamente o tenere
premuto lo stesso tasto per alcuni secondi finché non vienevisualizzato il segno “+”.
2. Digitare il numero di telefono.
3. Premere il tasto S [INVIO].
Modalità standbyIstruzioni fondamentali per l’uso
IT
AL
IA
NO
25
Istruzioni fondamentali per l’uso
NOTA
• Digitare e salvare numeri
- Premendo per breve tempo il tasto C durante ladigitazione di numeri, vengono cancellati i numeri insequenza a cominciare dall’ultimo; se il tasto viene tenutopremuto, vengono cancellati tutti i numeri.
- Premendo il tasto E o B durante la digitazione dinumeri, si passa alla modalità standby.
- Premere il tasto O [Salva] per salvare i numeri immessisul display nella rubrica dei contatti.
• Effettuare una chiamata tramite la lista delle chiamate recenti
- Premere per breve tempo il tasto S dalla modalitàstandby e selezionare un numero dalla lista dellechiamate recenti, quindi premere il tasto S pereffettuare la chiamata.
- Tenere premuto il tasto S per alcuni secondi dallamodalità standby per comporre il numero dell’ultimachiamata effettuata o ricevuta.
• Effettuare una chiamata da un numero della rubrica
- Utilizzare i tasti di selezione rapida dalla modalità standbyper effettuare una chiamata o scrivere un messaggio dainviare.
• Effettuare una chiamata da un numero della rubrica
- Premere il tasto > [Cerca] dalla modalità standby percercare un numero di telefono, quindi premere il tastoS per effettuare la chiamata.
- Premendo il tasto < [Opzioni] e Cerca durante unachiamata, è possibile cercare altri contatti.
IT
AL
IA
NO
26
Ricevere una chiamata
Ricevere una chiamata vocale1. Se il telefono è impostato sulla modalità di risposta Folder attivo,
è possibile rispondere a una chiamata aprendo il telefono oppurepremendo un tasto qualsiasi, tranne i tasti E e C, se iltelefono è già aperto.
2. Se il solo tasto di INVIO viene impostato sulla modalità dirisposta, è possibile ricevere una chiamata solo premendo S.
3. Dopo aver effettuato la chiamata, premere il tasto E [FINE]per terminare la chiamata, a meno che l’interlocutore non lofaccia prima.
Controllare la lista delle chiamate perseÈ possibile controllare la lista dei numeri delle chiamate perse.
1. Le chiamate perse e i relativi numeri vengono visualizzati suldisplay esterno.
2. Quando si apre il telefono, viene visualizzata la lista dellechiamate perse e si passa alle chiamate recenti.
3. Selezionare la chiamata persa desiderata dalla lista delle ultimechiamate e premere il tasto O [OK] per visualizzare ilchiamante, il relativo numero di telefono e l’ora in cui la chiamataè stata ricevuta (consultare il menu relativo alla lista delle ultimechiamate).
Uso dei tasti di accesso rapidoUtilizzare i tasti di selezione rapida dalla modalità standby perscorrere velocemente tutti i menu (consultare il paragrafoDescrizione dei tasti).
Modalità standbyIstruzioni fondamentali per l’uso
IT
AL
IA
NO
27
Istruzioni fondamentali per l’uso
Visualizzazione del menuPremere il tasto < [Menu] dalla modalità standby per passare almenu desiderato, quindi premere il tasto U o D per eseguirevarie operazioni nel menu.
Ricerca di contattiPremere il tasto > [Cerca] dalla modalità standby per cercarenumeri di telefono dai contatti e indirizzi e-mail per l’invio di messaggi.
Accesso a InternetPremere il tasto U dalla modalità standby per passare al menu nelquale è possibile effettuare la connessione a Internet. Se si tienepremuto il tasto, viene tentato il collegamento alla pagina iniziale.
Menu dei messaggiPremere brevemente il tasto R dalla modalità standby per passaredirettamente al menu messaggi. Tenendo premuto il tasto R peralcuni secondi, si passa direttamente al display che consente discrivere i messaggi.
Menu preferitiPremere il tasto D dalla modalità standby per passaredirettamente al menu personale, nel quale è possibile aggiungere,eliminare o modificare i menu più utilizzati.
Impostazione suoneriaPremere il tasto L dalla modalità standby per passare direttamenteal menu di impostazione della suoneria, nel quale è possibileapportare le modifiche desiderate. Se si tiene premuto il tasto, vieneattivato il profilo silenzioso.
IT
AL
IA
NO
28
GiochiPremere il tasto per passare direttamente al menu dei giochi.
MultimediaPremere il tasto V dalla modalità standby per passaredirettamente al menu Multimedia, dal quale è possibile accedere alservizi, fotocamera, videocamera, galleria immagini e riproduzionevideo.
FotocameraPremere il tasto P dalla modalità standby per passaredirettamente alla modalità fotocamera, nella quale è possibilescattare foto.
Registrazione vocalePremere il tasto Tasto registrazione vocale (in alto) nella partesuperiore del telefono dalla modalità standby per passaredirettamente alla registrazione vocale.
Come leggere i messaggi ricevutiL’icona che avvisa dell’arrivo di un messaggio viene visualizzata suldisplay esterno. Per modificare il metodo di avviso di nuovimessaggi, consultare il paragrafo relativo ai profili audio.
Modalità standbyIstruzioni fondamentali per l’uso
IT
AL
IA
NO
29
Istruzioni fondamentali per l’uso
Come modificare il tema del displayÈ possibile modificare con diverse immagini e animazioni il tema deldisplay.
1. Per modificare il formato di data e ora, selezionare Display dalmenu Imposta.
2. Selezionare Standby, Accensione o Spegnimento.
3. Impostare l'immagine desiderata dalla Galleria delle immagini epremere O [OK].
Come regolare il volume del tono della tastieraUtilizzare i tasti laterali dalla modalità standby per regolare il volume.
1. Premere il tasto sul lato del telefono dalla modalità standby peraumentare il volume.
2. Premere il tasto sul lato del telefono dalla modalità standby perdiminuire il volume.
Come registrare un messaggio vocaleNella modalità standby, è possibile registrare un messaggio vocalepremendo Tasto registrazione vocale (in alto).
1. Premendo Tasto registrazione vocale (in alto) brevemente, sipassa al menu di registrazione vocale.
2. Premendo Tasto registrazione vocale (in alto) per alcuni secondi,è possibile registrare direttamente un messaggio vocale.
IT
AL
IA
NO
30
Chiamate recentiÈ possibile leggere e salvare le ultime chiamate perse e ricevute.
Lettura della lista chiamate1. Premere brevemente il tasto S dalla modalità standby.
2. Selezionare la chiamata desiderata dalla lista e premere il tastoO [OK].
3. Vengono visualizzati il chiamante, il relativo numero di telefono el’ora in cui la chiamata è stata ricevuta.
Salvare numeri di telefonoÈ possibile salvare numeri di telefono non memorizzati dalla listadelle ultime chiamate.
1. Selezionare il numero di telefono non memorizzato che sidesidera salvare dalla lista delle ultime chiamate e premere iltasto > [Opzioni].
2. Selezionare Salva come nuovo per registrare un nuovo nome,quindi selezionare l’icona per passare al display di registrazionedei contatti.
3. Selezionare Aggiungi per registrare il contatto desiderato sottoun nome esistente tramite.
4. Dopo la registrazione, ritornare alla lista delle ultime chiamate.
Modalità standbyIstruzioni fondamentali per l’uso
IT
AL
IA
NO
31
Istruzioni fondamentali per l’uso
Cancellare la lista delle chiamate1. Selezionare la chiamata che si desidera cancellare dalla lista e
premere il tasto < [Opzioni].
2. Selezionare Cancella per cancellare la chiamata selezionata.
3. Selezionare Cancella tutti per cancellare tutte le chiamate.
Menu durante la chiamata1. Se si seleziona Nuova chiamata, è possibile effettuare una
nuova chiamata.
2. Se si seleziona SMS, è possibile inviare un messaggio duranteuna chiamata.
3. Se si seleziona Cerca, è possibile effettuare una ricerca tra levoci della rubrica durante una chiamata.
4. Se si seleziona DTMF Si/No, è possibile attivare/disattivare ilsegnale in multifrequenza.
5. Se si seleziona Mute Si/No, è possibile attivare/disattivare ilmicrofono.
6. Se si seleziona Attesa, è possibile mettere in attesa unachiamata attiva.
Chiamata inviata
Chiamata persa
Chiamata ricevuta
Icone utilizzate nella lista delle ultime chiamate
7. Se si seleziona Riprendi, è possibile riprendere una chiamatamessa in attesa.
8. Se si seleziona Termina tutte, è possibile terminare tutte lechiamate.
9. Se si seleziona Trasferire, è possibile trasferire la chiamata adun altro interlocutore.
10. Se si seleziona Collega, è possibile avviare una teleconferenza.
11. Se si seleziona Rilascia, è possibile interrompere ilcollegamento con una teleconferenza.
12. Se si seleziona Partecipanti, è possibile controllare tutti ipartecipanti ad una teleconferenza.
13. Se si seleziona Scambia, è possibile mettere in attesa unachiamata attiva e viceversa.
IT
AL
IA
NO
32
Modalità standbyIstruzioni fondamentali per l’uso
IT
AL
IA
NO
33
Come usare fax e datiIl telefono permette di effettuare e ricevere chiamate fax e dati(servizio di rete che dipende dall’operatore e dalla scheda SIMutilizzata)
Effettuare e ricevere chiamate fax1. Impostare la velocità di trasmissione.
2. Collegare il PC e il telefono mediante un cavo dati.
3. Attivare il programma per fax installato sul PC.
Effettuare e ricevere chiamate dati1. Collegare il PC e il telefono mediante un cavo dati.
2. Attivare il programma per fax per il trasferimento dei dati.
Chiamate Fax e datiOperazioni preliminari
IT
AL
IA
NO
34
1 Messaggi
1 Scrivi
2 Ricevuti
3 Inviati
4 Bozze messaggi
5 Impostazioni
6 Modelli
7 Emoticon
2 Chiamate
1 Registro chiamate
2 Trasferire chiamate
3 Timer chiamate
4 Costi chiamate
5 Contatore dati GPRS
6 Impostazioni
3 Multimedia
1 Fotocamera
2 Videocamera
3 Galleria immagini
4 Media player
4 Internet
1 Home
2 Preferiti
3 Impostazioni
4 Vai ad indirizzo
5 Svuota cache
5 Agenda
1 Rubrica
2 Agenda
Mappa del menuDescrizione menu
IT
AL
IA
NO
35
Descrizione menu
3 Da fare
4 Memo
6 Giochi
1 Uso dei tasti nei giochi
2 Avvio giochi
7 Accessori
1 Sveglia
2 Calcolatrice
3 Fusi orari
4 Convertitore
5 Timers
6 Memo vocale
7 PC Sync
8 Gestione contenuti
8 Imposta
1 Profili audio
2 Telefono
3 Display
4 Ricerca rete
5 Sicurezza
6 Velocita modem
7 Stato memoria
8 Lingua
9 Versione telefono
10 Reset dati
9 Preferiti
10 Servizi SIM
IT
AL
IA
NO
36
È possibile usare il telefono per inviare e ricevere messaggi SMS,multimediali e e-mail.
Scrivi [Menu 1-1]È possibile scrivere messaggi SMS, multimediali e e-mail da inviareo salvare come bozza.
SMS1. Selezionare SMS e premere O [OK].
2. Inserire il testo del messaggio e premere il tasto O [OK].
3. Selezionare durante la scrittura di un messaggio < [Opzioni]e Modelli o Emoticon per usare i modelli di messaggio pre-registrati, le emoticon memorizzate.
4. È possibile allegare contenuti EMS (Immagini, icone o suoni)selezionando < [Opzioni] e Allega .
5. Dopo aver terminato tutte le operazioni necessarie, premere O[OK] per passare al campo del numero da chiamare.
6. È possibile digitare il numero di telefono desiderato nel campoPer(1) oppure richiamarlo dalla rubrica premendo > [Cerca].
7. Selezionare O [OK] dopo aver digitato il numero di telefonodesiderato.
8. Selezionare Invia messaggio e premere O [OK].
9. Selezionare Salva come bozza e premere O [OK] per salvareil messaggio nelle bozze.
10. Dopo aver inviato il messaggio, viene richiesto se si intendememorizzarlo.
11. Premere Si se si desidera memorizzare il messaggio.
Messaggi [Menu 1]Descrizione menu
IT
AL
IA
NO
37
Descrizione menu
MMS Messaggi Multimedia1. Selezionare un MMS nella lista dei messaggi da inviare e
premere il tasto O [OK].
2. Selezionare un formato dalla lista appropriata e premere il tastoO [OK].
3. Digitare il numero di telefono nel campo "Per" e premere il tastoD [Giù]. È possibile immettere più di 1 destinatario e premeredirettamente Invio oppure effettuare la ricerca tramite il tasto> [Cerca].
4. Selezionare Titolo per immettere il titolo.
5. Selezionare Messaggio e scrivere il messaggio.
6. Per allegare il contenuto multimediale desiderato premere il tasto> [Cerca].
7. Per allegare un file audio, selezionare Audio e scegliere il fileaudio desiderato dalla lista appropriata, quindi premere il tastoO [OK].
8. Per allegare una immagine, selezionare Immagine e scegliere ilfile immagine desiderato dalla lista appropriata, quindi premere iltasto O [OK].
9. Per allegare un filmato, selezionare Video e scegliere il file videodesiderato dalla lista appropriata, quindi premere il tasto O[OK].
10. Dopo aver terminato tutte le operazioni necessarie, premere< [OK] per inviare il messaggio multimediale o salvarlotemporaneamente. Per visualizzare il messaggio prima diinviarlo, selezionare Anteprima.
IT
AL
IA
NO
38
Messaggi [Menu 1]Descrizione menu
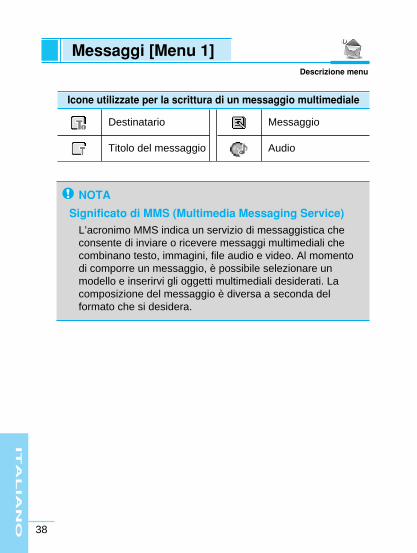
Icone utilizzate per la scrittura di un messaggio multimediale
NOTA
Significato di MMS (Multimedia Messaging Service)L’acronimo MMS indica un servizio di messaggistica checonsente di inviare o ricevere messaggi multimediali checombinano testo, immagini, file audio e video. Al momentodi comporre un messaggio, è possibile selezionare unmodello e inserirvi gli oggetti multimediali desiderati. Lacomposizione del messaggio è diversa a seconda delformato che si desidera.
Destinatario
Titolo del messaggio
Messaggio
Audio
IT
AL
IA
NO
39
Descrizione menu
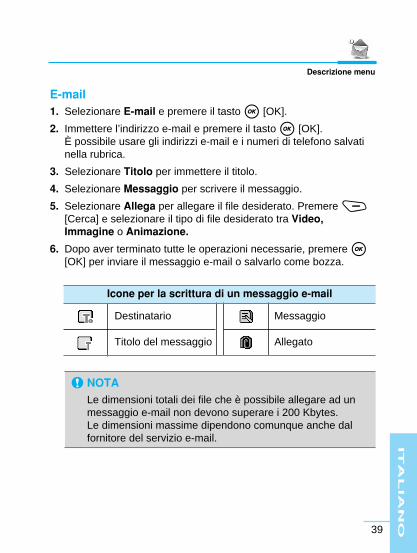
E-mail1. Selezionare E-mail e premere il tasto O [OK].
2. Immettere l’indirizzo e-mail e premere il tasto O [OK]. È possibile usare gli indirizzi e-mail e i numeri di telefono salvatinella rubrica.
3. Selezionare Titolo per immettere il titolo.
4. Selezionare Messaggio per scrivere il messaggio.
5. Selezionare Allega per allegare il file desiderato. Premere >[Cerca] e selezionare il tipo di file desiderato tra Video,Immagine o Animazione.
6. Dopo aver terminato tutte le operazioni necessarie, premere O[OK] per inviare il messaggio e-mail o salvarlo come bozza.
NOTALe dimensioni totali dei file che è possibile allegare ad unmessaggio e-mail non devono superare i 200 Kbytes.Le dimensioni massime dipendono comunque anche dalfornitore del servizio e-mail.
Icone per la scrittura di un messaggio e-mail
Destinatario
Titolo del messaggio
Messaggio
Allegato
IT
AL
IA
NO
40
Messaggi [Menu 1]Descrizione menu
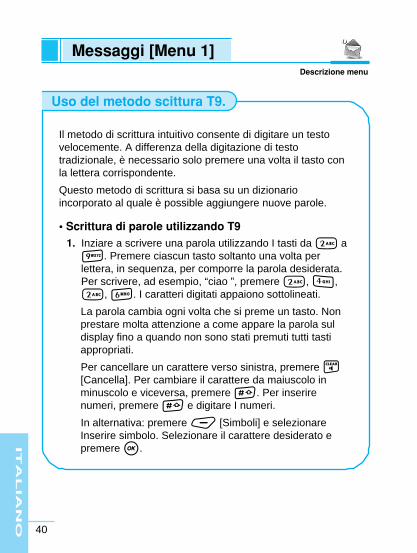
Il metodo di scrittura intuitivo consente di digitare un testovelocemente. A differenza della digitazione di testotradizionale, è necessario solo premere una volta il tasto conla lettera corrispondente.
Questo metodo di scrittura si basa su un dizionarioincorporato al quale è possible aggiungere nuove parole.
• Scrittura di parole utilizzando T91. Inziare a scrivere una parola utilizzando I tasti da 2 a
9. Premere ciascun tasto soltanto una volta perlettera, in sequenza, per comporre la parola desiderata.Per scrivere, ad esempio, “ciao ”, premere 2, 4,2, 6. I caratteri digitati appaiono sottolineati.
La parola cambia ogni volta che si preme un tasto. Nonprestare molta attenzione a come appare la parola suldisplay fino a quando non sono stati premuti tutti tastiappropriati.
Per cancellare un carattere verso sinistra, premere C[Cancella]. Per cambiare il carattere da maiuscolo inminuscolo e viceversa, premere #. Per inserirenumeri, premere # e digitare I numeri.
In alternativa: premere < [Simboli] e selezionareInserire simbolo. Selezionare il carattere desiderato epremere O.
Uso del metodo scittura T9.
IT
AL
IA
NO
41
Descrizione menu
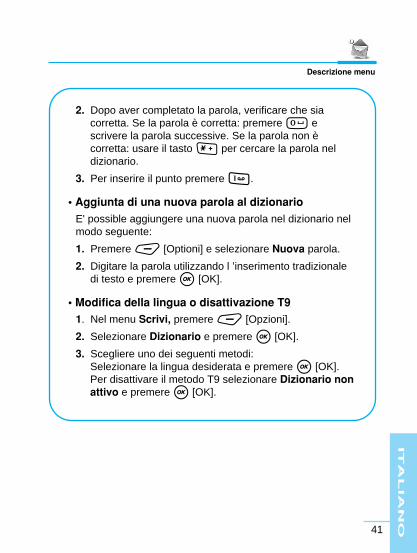
2. Dopo aver completato la parola, verificare che siacorretta. Se la parola è corretta: premere 0 escrivere la parola successive. Se la parola non ècorretta: usare il tasto * per cercare la parola neldizionario.
3. Per inserire il punto premere 1.
• Aggiunta di una nuova parola al dizionarioE' possible aggiungere una nuova parola nel dizionario nelmodo seguente:
1. Premere < [Optioni] e selezionare Nuova parola.
2. Digitare la parola utilizzando l ’inserimento tradizionaledi testo e premere O [OK].
• Modifica della lingua o disattivazione T91. Nel menu Scrivi, premere < [Opzioni].
2. Selezionare Dizionario e premere O [OK].
3. Scegliere uno dei seguenti metodi:Selezionare la lingua desiderata e premere O [OK]. Per disattivare il metodo T9 selezionare Dizionario nonattivo e premere O [OK].
IT
AL
IA
NO
42
Messaggi [Menu 1]Descrizione menu
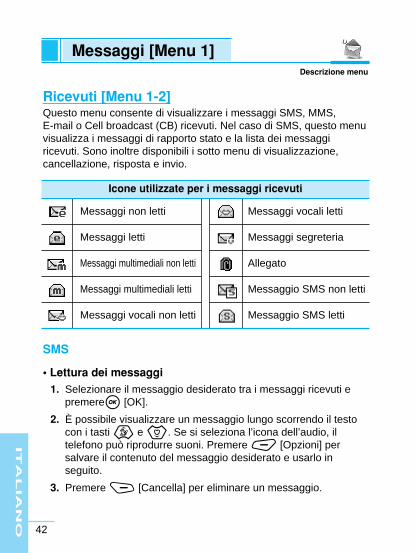
Ricevuti [Menu 1-2]Questo menu consente di visualizzare i messaggi SMS, MMS, E-mail o Cell broadcast (CB) ricevuti. Nel caso di SMS, questo menuvisualizza i messaggi di rapporto stato e la lista dei messaggiricevuti. Sono inoltre disponibili i sotto menu di visualizzazione,cancellazione, risposta e invio.
SMS
• Lettura dei messaggi1. Selezionare il messaggio desiderato tra i messaggi ricevuti e
premereO [OK].
2. È possibile visualizzare un messaggio lungo scorrendo il testocon i tasti U e D. Se si seleziona l’icona dell’audio, iltelefono può riprodurre suoni. Premere < [Opzioni] persalvare il contenuto del messaggio desiderato e usarlo inseguito.
3. Premere > [Cancella] per eliminare un messaggio.
Messaggi non letti
Messaggi letti
Messaggi multimediali non letti
Messaggi multimediali letti
Messaggi vocali non letti
Messaggi vocali letti
Messaggi segreteria
Allegato
Messaggio SMS non letti
Messaggio SMS letti
Icone utilizzate per i messaggi ricevuti
IT
AL
IA
NO
43
Descrizione menu
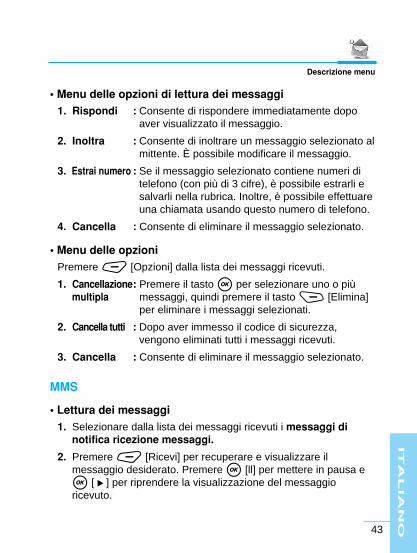
• Menu delle opzioni di lettura dei messaggi1. Rispondi : Consente di rispondere immediatamente dopo
aver visualizzato il messaggio.
2. Inoltra : Consente di inoltrare un messaggio selezionato almittente. È possibile modificare il messaggio.
3. Estrai numero : Se il messaggio selezionato contiene numeri ditelefono (con più di 3 cifre), è possibile estrarli esalvarli nella rubrica. Inoltre, è possibile effettuareuna chiamata usando questo numero di telefono.
4. Cancella : Consente di eliminare il messaggio selezionato.
• Menu delle opzioniPremere < [Opzioni] dalla lista dei messaggi ricevuti.
1. Cancellazione: Premere il tasto O per selezionare uno o più multipla messaggi, quindi premere il tasto > [Elimina]
per eliminare i messaggi selezionati.
2. Cancella tutti : Dopo aver immesso il codice di sicurezza,vengono eliminati tutti i messaggi ricevuti.
3. Cancella : Consente di eliminare il messaggio selezionato.
MMS
• Lettura dei messaggi1. Selezionare dalla lista dei messaggi ricevuti i messaggi di
notifica ricezione messaggi.
2. Premere < [Ricevi] per recuperare e visualizzare ilmessaggio desiderato. Premere O [ll] per mettere in pausa eO [ ] per riprendere la visualizzazione del messaggioricevuto.
IT
AL
IA
NO
44
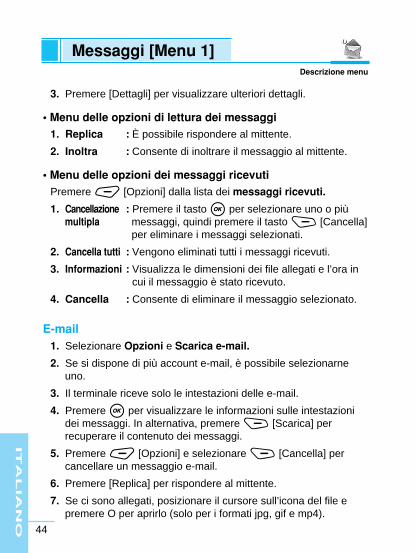
3. Premere [Dettagli] per visualizzare ulteriori dettagli.
• Menu delle opzioni di lettura dei messaggi1. Replica : È possibile rispondere al mittente.
2. Inoltra : Consente di inoltrare il messaggio al mittente.
• Menu delle opzioni dei messaggi ricevutiPremere < [Opzioni] dalla lista dei messaggi ricevuti.
1. Cancellazione : Premere il tasto O per selezionare uno o piùmultipla messaggi, quindi premere il tasto > [Cancella]
per eliminare i messaggi selezionati.
2. Cancella tutti : Vengono eliminati tutti i messaggi ricevuti.
3. Informazioni : Visualizza le dimensioni dei file allegati e l’ora incui il messaggio è stato ricevuto.
4. Cancella : Consente di eliminare il messaggio selezionato.
E-mail1. Selezionare Opzioni e Scarica e-mail.
2. Se si dispone di più account e-mail, è possibile selezionarneuno.
3. Il terminale riceve solo le intestazioni delle e-mail.
4. Premere O per visualizzare le informazioni sulle intestazionidei messaggi. In alternativa, premere > [Scarica] perrecuperare il contenuto dei messaggi.
5. Premere < [Opzioni] e selezionare > [Cancella] percancellare un messaggio e-mail.
6. Premere [Replica] per rispondere al mittente.
7. Se ci sono allegati, posizionare il cursore sull’icona del file epremere O per aprirlo (solo per i formati jpg, gif e mp4).
Messaggi [Menu 1]Descrizione menu
IT
AL
IA
NO
45
Descrizione menu
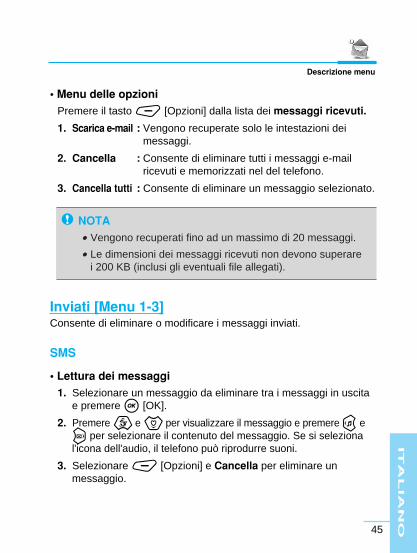
• Menu delle opzioniPremere il tasto < [Opzioni] dalla lista dei messaggi ricevuti.
1. Scarica e-mail : Vengono recuperate solo le intestazioni deimessaggi.
2. Cancella : Consente di eliminare tutti i messaggi e-mailricevuti e memorizzati nel del telefono.
3. Cancella tutti : Consente di eliminare un messaggio selezionato.
Inviati [Menu 1-3]Consente di eliminare o modificare i messaggi inviati.
SMS
• Lettura dei messaggi1. Selezionare un messaggio da eliminare tra i messaggi in uscita
e premere O [OK].
2. Premere U e D per visualizzare il messaggio e premere L eR per selezionare il contenuto del messaggio. Se si selezional'icona dell'audio, il telefono può riprodurre suoni.
3. Selezionare < [Opzioni] e Cancella per eliminare unmessaggio.
NOTA• Vengono recuperati fino ad un massimo di 20 messaggi.
• Le dimensioni dei messaggi ricevuti non devono superarei 200 KB (inclusi gli eventuali file allegati).
• Menu delle opzioni di lettura dei messaggiPremere < [Opzioni] dalla lista dei messaggi in uscita.
1. Inoltra : Consente di inoltrare un messaggio selezionato almittente. È possibile modificare il messaggio.
2. Estrai numeri: Se il messaggio selezionato contiene un numerodi telefono (con più di 3 cifre), è possibile estrarloe salvarlo nella rubrica. Inoltre, è possibileeffettuare una chiamata usando questo numero ditelefono.
3. Cancella : Consente di eliminare il messaggio.
• Menu delle opzioniPremere < [Opzioni] dalla lista dei messaggi.
1. Modifica : Consente di modificare un messaggio selezionato.
2. Cancellazione : Premere il tasto O per selezionare uno o più multipla messaggi, quindi premere il tasto > [Elimina]
per eliminare i messaggi desiderati.
3. Cancella tutti : Consente di eliminare tutti i messaggi ricevuti. Pereliminare tutti i messaggi, è richiesto il codicesegreto.
4. Cancella : Consente di eliminare un messaggio selezionato.IT
AL
IA
NO
46
Messaggi [Menu 1]Descrizione menu
IT
AL
IA
NO
47
Descrizione menu
MMS
• Lettura dei messaggi1. Premere O [OK] per visualizzare il messaggio selezionato.
• Menu delle opzioni di lettura dei messaggi1. Inoltra : Consente di inoltrare un messaggio selezionato al
mittente. È possibile modificare il messaggio.
• Menu delle opzioni dei messaggi in uscitaSelezionare la lista dei messaggi ricevuti e premere < [Opzioni].
1. Modifica : Consente di modificare un messaggio selezionato.
2. Cancellazione : Consente di eliminare uno o più messaggi. multipla Selezionare uno o più messaggi e premere >
[Elimina].
3. Cancella tutti: Consente di eliminare tutti i messaggi ricevuti.
4. Cancella : Consente di eliminare un messaggio selezionato.
E-mail1. Premere O [OK] per visualizzare un messaggio e-mail.
2. Selezionare un messaggio da eliminare e premere >[Cancella].
• Menu delle opzioniPremere < [Opzioni] dalla lista dei messaggi
È possibile modificare o eliminare uno o più messaggi dai menuModifica, Cancella o Cancella tutti.
IT
AL
IA
NO
48
Bozze messaggi [Menu 1-4]I messaggi salvati come bozze o non inviati vengono salvati nellebozze.
SMS
• Modifica dei messaggi1. Selezionare un messaggio da modificare e premere O [OK].
2. È possibile modificare e inviare il messaggio.
• Menu delle opzioniPremere < [Opzioni].
1. Cancellazione : Premere il tasto O per selezionare uno o più multipla messaggi, quindi premere il tasto > [Elimina]
per eliminare i messaggi selezionati.
2. Cancella tutti : Dopo aver immesso il codice di sicurezza,vengono eliminati tutti i messaggi salvati comebozze.
3. Cancella : Consente di eliminare un messaggio selezionato.
Messaggi [Menu 1]Descrizione menu
IT
AL
IA
NO
49
Descrizione menu
MMS
• Modifica dei messaggi1. Selezionare un messaggio da modificare e premere O [OK].
2. Premere < [OK] per inviare il messaggio o salvarlotemporaneamente.
• Menu delle opzioni delle bozze1. Cancellazione : Premere il tasto O per selezionare uno o più
multipla messaggi, quindi premere il tasto <[Cancella] per eliminare i messaggi selezionati.
2. Cancella tutti : Vengono eliminati tutti i messaggi ricevuti.
3. Informazioni: Visualizza le dimensioni dei file allegati e l’ora incui il messaggio è stato ricevuto.
4. Cancella : Consente di eliminare il messaggio selezionato.
E-mail1. Premere O [OK] per modificare un Lista e-mail.
2. Premere > [Cancella] per eliminare un messaggio.
• OpzioniPremere < [Opzioni] dalla lista dei messaggi ricevuti.
È possibile usare i menu Modifica, Cancella e Cancella tutti

Impostazioni [Menu 1-5]Consente di selezionare le impostazioni desiderate per i messaggi.
SMS
• Rapporto stato Impostando Si in questo menu, è possibile verificare se ilmessaggio è stato inviato correttamente.
1. Selezionare Rapporto stato e premere O [OK].
2. Premere Si per impostare il rapporto di recapito nel mododesiderato e premere O [OK]. Premere No per annullarel’impostazione effettuata.
• Tipo messaggio Testo, Voce, Fax, Paging, X.400, E-mail, ERMES
Generalmente il tipo di messaggio è impostato su Testo.
Il testo può essere convertito in altri formati alternativi, compatibilicon il dispositivo che riceve il messaggio.
Contattare il gestore di rete per la disponibilità di questa funzione.
• ValiditàQuesto servizio di rete consente di impostare il periodo di tempodurante il quale i messaggi di testo rimangono memorizzati nelcentro messaggi.
IT
AL
IA
NO
50
Messaggi [Menu 1]Descrizione menu
IT
AL
IA
NO
51
Descrizione menu
• Centro messaggi È possibile impostare il numero del centro servizi al momento diinviare un messaggio.
1. Premere O [OK]. Viene visualizzato l’indirizzo del centroservizi.
2. Premere < [Opzioni] e selezionare Inserire numero perimpostare un nuovo centro servizi.
• Risposta pagata È possibile addebitare il messaggio al mittente in caso di rispostadel destinatario.
MMS
• Rapporto stato
- Richiesta rapportoÈ possibile controllare se il messaggio in uscita è stato inviatocorrettamente.
- Invia rapportoÈ possibile inviare un messaggio in caso di ricezione delmessaggio o meno.
IT
AL
IA
NO
52
• Replica pagata
- Richiesta rapportoÈ possibile controllare se il messaggio in uscita è stato letto omeno.
- Invia rapportoÈ possibile inviare un messaggio in arrivo dopo averlo letto omeno.
• Ricezione automaticaNon visualizza l’avviso del messaggio in arrivo ma mostradirettamente il messaggio originale.
• ValiditàQuesto servizio di rete consente di impostare il periodo di tempodurante il quale i messaggi di testo rimangono memorizzati nelcentro messaggi.
• Timer messaggioConsente di inviare un messaggio ad un’ora stabilita. È possibile scegliere di inviare il messaggio immediatamenteoppure dopo 30 minuti, 1 ora, 5 ore o 1 giorno.
• ConnessioneImpostare i parametri per il collegamento al server MMS.
1. Descrizione punto : È possibile inserire una breve descrizione del .di accesso punto di accesso
2. Nome utente : Il nome utente da usare per accedere al nomedel punto di accesso.
3. Password : La password da usare per accedere al nomedel punto di accesso.
Messaggi [Menu 1]Descrizione menu
IT
AL
IA
NO
53
Descrizione menu
4. Indirizzo MMSC : Consente di impostare l’indirizzo MMSCprincipale e secondario.
5. Indirizzo IP WAP : Consente di impostare l’indirizzo del gatewayWAP principale e secondario.
6. Bearer : Selezionare il bearer (trasporto GPRS o CSD)desiderato tramite il tasto > [Imposta]
- Nr. connessione : Se si seleziona il bearer CSD è necessarioinserire il numero da selezionare e lavelocità di trasmissione.
- Nome punto di : Se si seleziona GPRS è necessario accesso specificare il nome del punto di accesso
MMS (fornito dall’operatore).
Impostazione E-mailE' possibile impostare fino a 20 accounts di posta elettronica. Prima di poter utilizzare questo servizio è necessario impostare iparametri per la connessione GPRS (APN, nome utente e password)o CSD (numero di connessione, velocità, nome utente e password)richiesti dall' operatore del servizio e la modalità di collegamentopreferita (GPRS o CSD). I dati per ogni e-mail accout sono i seguenti
1. Descrizione account : Nome account di posta
2. POP3 server : Nome del server per la posta in arrivo
3. Nome utente : Nome utente richiesto dal server di posta
4. Password : Password richiesta dal server di posta
5. SMTP server : Nome del server per la posta in uscita
6. Indirizzo e-mail : Indirizzo associato all'account e-mail
7. Opzioni di : Selezionare l'opzione di cancellazione cancellazione desiderata
Messaggi di rete CB I messaggi di rete (Messaggi Cell Broadcast CB) sono messaggi ditesto inviati dal gestore della rete all'utente. La rete fornisceinformazioni generali su tempo, traffico, taxi, farmacie e ospedali.Ogni tipo di informazioni corrisponde ad un numero, quindi èpossibile contattare il fornitore del servizio. Quando si riceve unmessaggio CB, è possibile visualizzare i seguenti sottomenu:
• Si/NoÈ possibile scegliere se ricevere o meno i messaggi CB.
• Canali Se non si desidera creare nuovi argomenti, premere O [OK].Selezionare il menu Nuovo premendo < [OK]. Se sono stati giàcreati nuovi argomenti, è possibile eliminarli, modificarli e attivarlipremendo < [Opzioni].
• Lingue È possibile selezionare la lingua desiderata premendo [Si] o [No].Di conseguenza, i messaggi CB verranno visualizzati nella linguaselezionata.
Segreteria Premendo < [Opzioni], è possibile controllare i seguenti menudelle opzioni.
• NuovoÈ possibile aggiungere un nuovo numero per il centro di postavocale.
IT
AL
IA
NO
54
Messaggi [Menu 1]Descrizione menu
IT
AL
IA
NO
55
Descrizione menu
• CancellaÈ possibile eliminare un numero per il centro di posta vocale.
• Cancella tuttiÈ possibile eliminare tutti gli indirizzi di posta vocale.
• Modifica È possibile modificare l’indirizzo del centro di posta vocale.
Modelli [Menu 1-6]Consente di aggiungere, modificare o eliminare modelli di messaggi.
1. Selezionare Modelli dal menu dei messaggi, quindi premere iltasto O [OK].
2. Selezionare il testo desiderato tra le frasi e le emoticonmemorizzate, quindi premere il tasto O [OK].
3. È possibile visualizzare il testo memorizzato.
4. Per modificare il testo, premere < [Opzioni], quindi modificareil testo come desiderato e premere il tasto O [OK].
5. Per aggiungere un nuovo testo, premere il tasto > [Nuovo],quindi scrivere il testo desiderato e premere il tasto O [Salva].
6. Per eliminare un modello dalla lista di quelli memorizzati, premereil tasto Opzioni, quindi selezionare Cancella o Cancella tutti epremere il tasto O [OK].
Emoticon [Menu 1-7]Consente di aggiungere, modificare o eliminare emoticon.
1. Selezionare Emoticon dal menu dei messaggi, quindi premere iltasto O [OK].
2. Selezionare l’emoticon desiderata tra quelle memorizzate, quindipremere il tasto O [OK].
3. È possibile visualizzare l’emoticon memorizzata.
4. Per modificare le emoticon, premere < [Opzioni], quindimodificare le emoticon come desiderato e premere il tasto O[OK].
5. Per aggiungere una nuova emoticon, premere il tasto >[Nuovo], quindi inserire la emoticon desiderata e premere il tastoO [Salva].
6. Per eliminare una emoticon dalla lista di quelle memorizzate,premere il tasto Opzioni, quindi selezionare Cancella o Cancellatutti e premere il tasto O [OK].
IT
AL
IA
NO
56
Messaggi [Menu 1]Descrizione menu
IT
AL
IA
NO
57
In questo menu è possibile controllare le informazioni relative allechiamate, impostare alcuni servizi come il trasferimento di chiamatae l’invio del proprio numero, controllare il costo e la durata dellechiamate.
Registro chiamate [Menu 2-1]È possibile controllare la lista delle chiamate perse, ricevute einviate. Se la rete in uso supporta la funzione CLI (Calling LineIdentification) vengono registati i numeri di telefono delle chiamateperse e ricevute ed è possibile effettuare le seguenti operazioni:
• Effettuare una chiamata usando questo numero.
• Salvare il numero nella rubrica.
• Visualizzare la data e l’ora della chiamata.
• Inviare un messaggio e-mail, SMS o MMS usando il numeroregistrato.
PerseQuesto menu visualizza i numeri delle ultime chiamate perse.Tramite questo menu, è possibile effettuare una chiamata usando ilnumero registrato, salvarlo e visualizzare data e ora della chiamata.
RicevuteQuesto menu visualizza i numeri delle ultime chiamate ricevute.Tramite questo menu, è possibile effettuare una chiamata usando ilnumero registrato, salvarlo e visualizzare data e ora della chiamata.
Chiamate [Menu 2]Descrizione menu
IT
AL
IA
NO
58
InviateQuesto menu visualizza i numeri delle ultime chiamate effettuate.Tramite questo menu, è possibile richiamare usando il numeroregistrato, salvarlo e visualizzare data e ora della chiamata.
TutteTramite questo menu, è possibile visualizzare tutte le ultimechiamate recenti (perse, ricevute e inviate).
Trasferire chiamate [Menu 2-2]Il servizio di trasferimento delle chiamate consente di deviare lechiamate voce, fax e dati su un altro numero. Per ulteriori informazioni, contattare il gestore di rete.
1. Premere < [Menu] in modalità standby.
2. Selezionare Chiamate e Trasferire per accedere al servizio ditrasferimento delle chiamate.
Tutte voceTrasferisce tutte le chiamate voce in ingresso al numero desiderato.
Se occupatoTrasferisce le chiamate voce quando il telefono è occupato inun'altra conversazione.
Chiamate [Menu 2]Descrizione menu
IT
AL
IA
NO
59
Descrizione menu
No rispostaTrasferisce le chiamate voce a cui non si risponde.
Non servitoTrasferisce le chiamate voce quando il telefono è spento o fuoriservizio.
Tutte FaxTrasferisce le chiamate Fax in ingresso verso un numero con unaconnessione fax.
Tutte DatiTrasferisce le chiamate Dati in ingresso verso un numero con unaconnessione PC.
I sottomenuI menu di trasferimento delle chiamate dispongono dei seguentisottomenu:
- SiAttiva il servizio di trasferimento per la condizione selezionata.
- NoDisattiva il servizio di trasferimento per la condizione selezionata.
• Alla segreteriaAttiva il servizio di trasferimento alla segreteria telefonica (serviziodi rete).
IT
AL
IA
NO
60
Chiamate [Menu 2]Descrizione menu
• Ad altro numeroRichiede l’inserimento del numero di telefono alla quale si desideratrasferire le chiamate.
• Verifica statoVerifica lo stato del servizio corrispondente.
Timer chiamate [Menu 2-3]Questa funzione consente di visualizzare la durata delle chiamate inarrivo e in uscita. È possibile azzerare i timer della durata tramite iltasto Reset. L’operazione richiede l’inserimento del codice disicurezza.
Ultima chiamataVisualizza la durata dell’ultima chiamata.
TutteVisualizza la durata di tutte le chiamate.
RicevuteVisualizza la durata delle chiamate ricevute.
InviateVisualizza la durata delle chiamate inviate.
IT
AL
IA
NO
61
Descrizione menu
Costi chiamate [Menu 2-4]Questo servizio di rete (disponibile solo su alcune SIM card)consente di controllare i costi dell’ultima chiamata e i costi di tutte lechiamate. Per impostare e azzerare i contatori, è richiesto il codicePIN2.
Ultima chiamataQuesta funzione consente di visualizzare i costi dell’ultima chiamata.
TutteQuesta funzione consente di visualizzare i costi di tutte le chiamate.
Imposta costiConsente di modificare le impostazioni di visualizzazione dei costidelle chiamate. È necessario immettere il codice PIN per impostarela modalità di visualizzazione dei costi delle chiamate.
• Visualizza inVengono visualizzati i limiti dei costi delle chiamate in base allavaluta o alle unità di addebito desiderate. Contattare il gestore diservizi per i prezzi delle unità di addebito.
• Limite costiQuesto servizio di rete consente di limitare i costi delle chiamate inbase alle unità di addebito selezionate.
IT
AL
IA
NO
62
Chiamate [Menu 2]Descrizione menu
- SiSelezionare Si, per attivare il servizio. È possibile effettuare ericevere chiamate addebitate purché il costo non superi il limiteconsentito.
- NoSe si seleziona No, il limite dei costi delle chiamate vienedisattivato.
Contatore dati GPRS [Menu 2-5]È possibile controllare la quantità di dati trasferiti sulla rete tramite ilcontatore GPRS. Per azzerare i contatori è richiesto il codice disicurezza.
Ultima dati inviativisualizza il numero di byte inviati durante l’ultima sessione GPRS.
Ultima dati ricevutivisualizza il numero di byte ricevuti durante l’ultima sessione GPRS.
NOTA• Il costo effettivo delle chiamate che viene addebitato dal
gestore di servizi può variare in base alle caratteristichedella rete, all’arrotondamento degli importi fatturati, alleimposte e così via.
IT
AL
IA
NO
63
Descrizione menu
Totale inviativisualizza il numero totale di byte inviati.
Totale ricevutivisualizza il numero totale di byte ricevuti.
Impostazioni [Menu 2-6]Per impostare le opzioni relative alle chiamate O [OK] in questomenu.
Avviso di chiamataPermette di ricevere una seconda chiamata mentre ci si trova già inconversazione.
• AttivaAttiva il servizio corrispondente.
• DisattivaDisattiva il servizio corrispondente.
• Verifica statoVerifica lo stato del servizio.
IT
AL
IA
NO
64
Chiamate [Menu 2]Descrizione menu
Invia numero(a seconda della rete e del tipo di abbonamento)
È possibile inviare o meno il proprio numero di telefonoall’interlocutore in base all’impostazione di questa funzione.
• Impostazione reteSe si seleziona questa voce, è possibile inviare il proprio numero ditelefono in base all’impostazione del servizio sulla linea 1 o sullalinea 2.
• SiSe si seleziona Si viene inviato il proprio numero di telefonoall’interlocutore, ovvero, il numero di telefono verrà visualizzato suldisplay del telefono dell’interlocutore.
• NoSe si seleziona No il proprio numero non viene inviato.
Rifiuta (Numeri indesiderati)È possibile includere in una lista i numeri delle chiamate in arrivoindesiderate.
1. Selezionando Disattivare e premendo O [OK], la lista non vieneconsiderata.
2. Selezionando Rifiuta da lista e premendo > [Imposta], èpossibile visualizzare, cancellare ed aggiungere numeri nella listadelle chiamate indesiderate. Premere > [Nuovo] per inserire ilnumero di telefono del quale si desidera rifiutare le chiamate.
3. È possibile rifiutare tutte le chiamate in arrivo selezionandoRifiuta tutte e premendo O [OK].
IT
AL
IA
NO
65
Descrizione menu
Risposta automaticaSe non si può ricevere una chiamata, è possibile impostare lafunzione di risposta automatica dopo un certo numero di squilli.
1. È possibile impostare questa funzione su Si o No premendo itasti L e R.
2. È possibile selezionare una modalità scegliendo tra modonormale, guida o utente o auricolare premendo i tasti L e R.
3. Dopo aver selezionato una modalità, premere il tasto O [OK].
4. Se si desidera ascoltare, registrare o cancellare il messaggio dirisposta, premere < [Opzioni] e selezionare il comandodesiderato.
Messaggio attesaÈ possibile mettere una chiamata in attesa per un certo periodo ditempo e attivare un messaggio di risposta automatica.
1. È possibile impostare questa funzione su Si o No premendo itasti L e R.
2. È possibile selezionare una modalità scegliendo tra modonormale o Utente premendo i tasti L e R.
3. Dopo aver selezionato una modalità, premere il tasto O [OK].
4. Se si desidera ascoltare, registrare o cancellare il messaggio dirisposta, premere < [Opzioni] e selezionare il comandodesiderato.
IT
AL
IA
NO
66
Chiamate [Menu 2]Descrizione menu
Riselezione
• SiSe questa funzione è attivata, il numero composto viene richiamatoautomaticamente in caso di mancato collegamento o reteoccupata.
• NoIn questo caso, il telefono non effettuerà altri tentativi di richiamareil numero composto in caso di mancato collegamento o reteoccupata.
Modo risposta
• Tasto INVIOSe si seleziona questa voce, è possibile rispondere ad unachiamata solo premendo il tasto S a telefono aperto.
• Folder attivoSe si seleziona questa voce, è possibile rispondere ad unachiamata aprendo il folder del telefono. Se il telefono è già aperto,è possibile ricevere la chiamata premendo un tasto qualsiasi,tranne E [FINE] e > [Rifiuta].
Allarme durataSe si seleziona Si, la durata della chiamata verrà notificata tramiteun segnale acustico ad intervalli di un minuto.
IT
AL
IA
NO
67
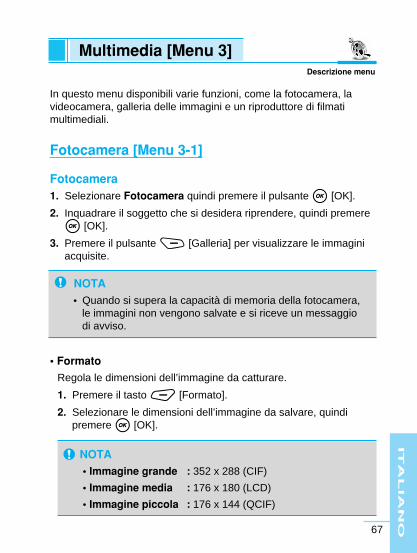
In questo menu disponibili varie funzioni, come la fotocamera, lavideocamera, galleria delle immagini e un riproduttore di filmatimultimediali.
Fotocamera [Menu 3-1]
Fotocamera1. Selezionare Fotocamera quindi premere il pulsante O [OK].
2. Inquadrare il soggetto che si desidera riprendere, quindi premereO [OK].
3. Premere il pulsante > [Galleria] per visualizzare le immaginiacquisite.
• Formato
Regola le dimensioni dell’immagine da catturare.
1. Premere il tasto < [Formato].
2. Selezionare le dimensioni dell’immagine da salvare, quindipremere O [OK].
Multimedia [Menu 3]Descrizione menu
NOTA• Quando si supera la capacità di memoria della fotocamera,
le immagini non vengono salvate e si riceve un messaggiodi avviso.
NOTA• Immagine grande : 352 x 288 (CIF)
• Immagine media : 176 x 180 (LCD)
• Immagine piccola : 176 x 144 (QCIF)
IT
AL
IA
NO
68
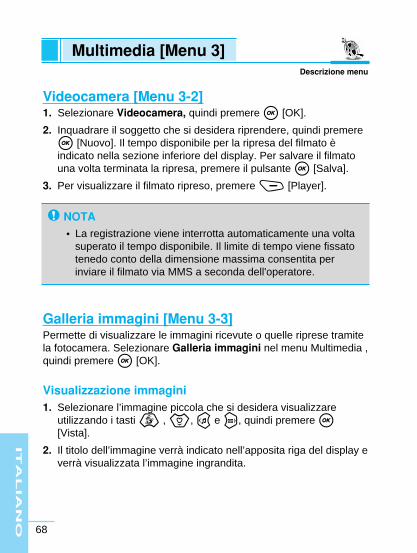
Videocamera [Menu 3-2]1. Selezionare Videocamera, quindi premere O [OK].
2. Inquadrare il soggetto che si desidera riprendere, quindi premereO [Nuovo]. Il tempo disponibile per la ripresa del filmato èindicato nella sezione inferiore del display. Per salvare il filmatouna volta terminata la ripresa, premere il pulsante O [Salva].
3. Per visualizzare il filmato ripreso, premere > [Player].
Galleria immagini [Menu 3-3]Permette di visualizzare le immagini ricevute o quelle riprese tramitela fotocamera. Selezionare Galleria immagini nel menu Multimedia ,quindi premere O [OK].
Visualizzazione immagini 1. Selezionare l’immagine piccola che si desidera visualizzare
utilizzando i tasti U , D, L e R, quindi premere O[Vista].
2. Il titolo dell’immagine verrà indicato nell’apposita riga del display everrà visualizzata l’immagine ingrandita.
NOTA• La registrazione viene interrotta automaticamente una volta
superato il tempo disponibile. Il limite di tempo viene fissatotenedo conto della dimensione massima consentita perinviare il filmato via MMS a seconda dell'operatore.
Multimedia [Menu 3]Descrizione menu
IT
AL
IA
NO
69
Descrizione menu
3. Una volta visualizzata l’immagine ingrandita, utilizzare i tasti L oR per visualizzare l’immagine successiva o precedente.
Cancellazione immagini 1. Selezionare l’immagine che si desidera eliminare dall’elenco delle
immagini, quindi premere il tasto < [Opzioni].
2. Selezionare Cancella dall’elenco delle opzioni, quindi premereO [OK] e confermare l’eliminazione dell’immagine.
3. Per eliminare tutte le immagini della galleria, selezionareCancella tutti dall’elenco delle opzioni, quindi premere O [OK]e confermare l’eliminazione.
Utilizzo di immagini come sfondo displayÈ possibile utilizzare una immagine come sfondo del display inmodalità standby.
1. Selezionare l’immagine da utilizzare dall’elenco delle immagini,quindi premere il tasto < [Opzioni].
2. Selezionare Sfondo dall’elenco delle opzioni, quindi premere O[OK].
Rinomina1. Selezionare il file di cui si desidera modificare il titolo, quindi
premere il tasto < [Opzioni].
2. Selezionare Rinomina dall’elenco delle opzioni, quindi premereO [OK].
3. Immettere il nuovo titolo dell’immagine, quindi premere O [OK]per applicare la modifica.
IT
AL
IA
NO
70
Multimedia [Menu 3]Descrizione menu
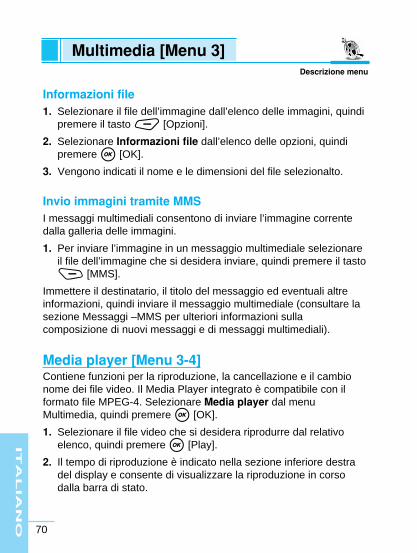
Informazioni file1. Selezionare il file dell’immagine dall’elenco delle immagini, quindi
premere il tasto < [Opzioni].
2. Selezionare Informazioni file dall’elenco delle opzioni, quindipremere O [OK].
3. Vengono indicati il nome e le dimensioni del file selezionalto.
Invio immagini tramite MMS I messaggi multimediali consentono di inviare l’immagine correntedalla galleria delle immagini.
1. Per inviare l’immagine in un messaggio multimediale selezionareil file dell’immagine che si desidera inviare, quindi premere il tasto> [MMS].
Immettere il destinatario, il titolo del messaggio ed eventuali altreinformazioni, quindi inviare il messaggio multimediale (consultare lasezione Messaggi –MMS per ulteriori informazioni sullacomposizione di nuovi messaggi e di messaggi multimediali).
Media player [Menu 3-4]Contiene funzioni per la riproduzione, la cancellazione e il cambionome dei file video. Il Media Player integrato è compatibile con ilformato file MPEG-4. Selezionare Media player dal menuMultimedia, quindi premere O [OK].
1. Selezionare il file video che si desidera riprodurre dal relativoelenco, quindi premere O [Play].
2. Il tempo di riproduzione è indicato nella sezione inferiore destradel display e consente di visualizzare la riproduzione in corsodalla barra di stato.
IT
AL
IA
NO
71
Descrizione menu
3. Premere il tasto O [ll] per interrompere la riproduzione del video. Premere O [ ] per riprendere la riproduzione dalpunto in cui era stata interrotta.
4. Premere il tasto > [Lista] per interrompere la riproduzione evisualizzare l’elenco dei file video.
Muoversi al file seguente o precedente 1. Premere il tasto < [Opzioni] durante la riproduzione del video,
quindi selezionare File seguente per passare al file successivo.
2. Premere il tasto < [Opzioni] durante la riproduzione del video,quindi selezionare File precedente per spostarsi al fileprecedente.
Eliminazione File Video1. Selezionare il file video che si desidera eliminare dal relativo
elenco, quindi premere < [Opzioni].
2. Selezionare Cancella dall’elenco delle opzioni, quindi premereO [OK] e confermare l’eliminazione.
3. Per eliminare tutti i file video dal relativo elenco, selezionareCancella tutti dall’elenco delle opzioni, quindi premere O [OK]e confermare l’eliminazione.
NOTA• I file video sono ordinati in base alla data di creazione.
• Tenere premuto il tasto per alcuni secondi per spostarsi alfile precedente. Allo stesso modo, tenere premuto il tastoper alcuni secondi per spostarsi al file seguente.
IT
AL
IA
NO
72
Multimedia [Menu 3]Descrizione menu
Rinomina File Video1. Selezionare il file di cui si desidera modificare il nome, quindi
premere il tasto < [Opzioni].
2. Selezionare Rinomina dall’elenco delle opzioni, quindi premereO [OK].
3. Immettere il nuovo nome del file video, quindi premere O [OK].
Informazioni file1. Selezionare il file video dal relativo elenco, quindi premere il tasto
< [Opzioni].
2. Selezionare Informazioni file dall’elenco delle opzioni, quindipremere O [OK].
3. Vengono indicati il nome e la data di creazione del file.
Invio File Video in un messaggio multimediale1. Il file video selezionato dall’elenco può essere inviato mediante
un messaggio multimediale.
2. Utilizzare i messaggi multimediali per selezionare il file video chesi desidera inviare, quindi premere il tasto > [MMS].
3. Immettere il destinatario, il titolo del messaggio ed eventuali altreinformazioni, quindi inviare il messaggio multimediale (consultarela sezione Messaggi –MMS per ulteriori informazioni sullacomposizione di nuovi messaggi e di messaggi multimediali).
IT
AL
IA
NO
73
Questo telefono include un browser WAP (Wireless ApplicationProtocol). Selezionare il menu Internet dal menu principale opremere il tasto di accesso a Internet per accedere al menu.
Home [Menu 4-1]Consente di collegarsi alla homepage configurata nel profilo attivato.
Preferiti [Menu 4-2]Selezionare l’indirizzo WEB desiderato e premere il tasto <[Opzioni] per scegliere una delle seguenti opzioni.
• Modifica : Per modificare il titolo e l’indirizzo di un sitoWeb.
• Cancella : Per eliminare il sito Web selezionato.
• Cancella tutti : Per eliminare tutti i siti Web.
• Nuovo : Per salvare un nuovo sito Web manualmente.
NOTA• Che cos’è la tecnologia WAP?
Il termine WAP si riferisce ad un tipo di accesso a Internet.Tramite il telefono, è possibile accedere a Internet ecercare informazioni su giochi, tempo libero, attività varie,titoli azionari, notizie, meteo e altro ancora in qualsiasimomento e da qualsiasi luogo.
Internet [Menu 4]Descrizione menu
IT
AL
IA
NO
74
Impostazioni [Menu 4-3]Prima di avviare il collegamento ad internet è necessario configurarei parametri necessari (dipendono dall’operatore utilizzato e daiservizi desiderati). È possibile creare fino a 9 profili di accesso. Peraccedere alla scrittura o modifica di un profilo premere il tasto >[Imposta].
Homepage Questa opzione consente di inserire l’indirizzo (URL) del sito che sidesidera impostare come homepage. Non è necessario digitare“http://” prima dell’indirizzo in quanto il browser WAP lo aggiungeautomaticamente.
Indirizzo IPImmettere l’indirizzo IP del gateway al quale collegarsi.
Modo di connessione Selezionare il metodo di connessione richiesto dal WAP gateway.
NOTA• Se ancora non è stato salvato alcun indirizzo Web, è
disponibile solo il menu aggiungi Nuovo.
Internet [Menu 4]Descrizione menu
IT
AL
IA
NO
75
Descrizione menu
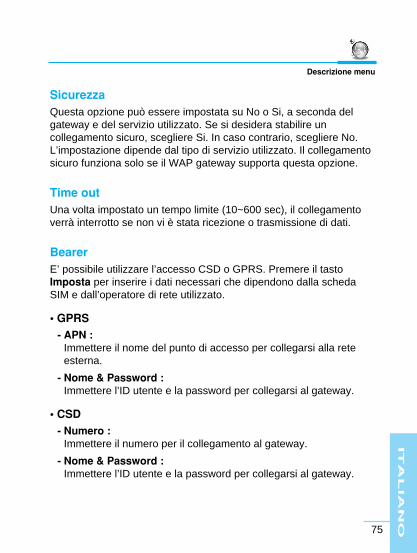
SicurezzaQuesta opzione può essere impostata su No o Si, a seconda delgateway e del servizio utilizzato. Se si desidera stabilire uncollegamento sicuro, scegliere Si. In caso contrario, scegliere No.L’impostazione dipende dal tipo di servizio utilizzato. Il collegamentosicuro funziona solo se il WAP gateway supporta questa opzione.
Time out Una volta impostato un tempo limite (10~600 sec), il collegamentoverrà interrotto se non vi è stata ricezione o trasmissione di dati.
Bearer E’ possibile utilizzare l’accesso CSD o GPRS. Premere il tastoImposta per inserire i dati necessari che dipendono dalla schedaSIM e dall’operatore di rete utilizzato.
• GPRS - APN :
Immettere il nome del punto di accesso per collegarsi alla reteesterna.
- Nome & Password :Immettere l’ID utente e la password per collegarsi al gateway.
• CSD- Numero :
Immettere il numero per il collegamento al gateway.
- Nome & Password :Immettere l’ID utente e la password per collegarsi al gateway.
IT
AL
IA
NO
76
Internet [Menu 4]Descrizione menu
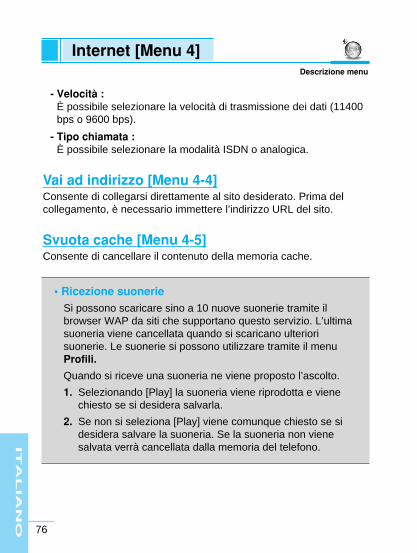
- Velocità :È possibile selezionare la velocità di trasmissione dei dati (11400bps o 9600 bps).
- Tipo chiamata : È possibile selezionare la modalità ISDN o analogica.
Vai ad indirizzo [Menu 4-4]Consente di collegarsi direttamente al sito desiderato. Prima delcollegamento, è necessario immettere l’indirizzo URL del sito.
Svuota cache [Menu 4-5]Consente di cancellare il contenuto della memoria cache.
• Ricezione suonerieSi possono scaricare sino a 10 nuove suonerie tramite ilbrowser WAP da siti che supportano questo servizio. L’ultimasuoneria viene cancellata quando si scaricano ulteriorisuonerie. Le suonerie si possono utilizzare tramite il menuProfili.
Quando si riceve una suoneria ne viene proposto l’ascolto.
1. Selezionando [Play] la suoneria viene riprodotta e vienechiesto se si desidera salvarla.
2. Se non si seleziona [Play] viene comunque chiesto se sidesidera salvare la suoneria. Se la suoneria non vienesalvata verrà cancellata dalla memoria del telefono.

IT
AL
IA
NO
77
Questo menu include le funzioni Rubrica, Agenda, Attività e Memo.
Rubrica [Menu 5-1]Accedere a questo menu selezionando Agenda e quindi Rubrica.
Aggiungi nuovoTramite questa funzione è possibile aggiungere una nuova voce allarubrica. Selezionare Aggiungi nuovo dal menu, quindi premere O[OK].
1. Selezionare Telefono o SIM
2. Nella SIM è possibile specificare il nome ed il numero per ognicontatto.
3. Premere O [Salva] per salvare il contatto nella rubrica SIM. Nel Telefono si possono includere diversi campi (nome, numero,e-mail etc).
1. Spostarsi su Nome e immettere il nome.
2. Spostarsi su Numero e immettere il numero.
3. Tramite il tasto < [Opzioni] e possibile associare il numero aitasti a selezione rapida. Selezionare un tasto disponibile epremere O [OK].Spostarsi sugli altri campi desiderati ed inserirei dati richiesti. È possibile immettere più contatti o indirizzi e-mail.
4. Spostarsi su E-mail e inserire l'indirizzo e-mail desiderato.
5. Spostarsi su a Gruppo e selezionare il gruppo desiderato.
6. Spostarsi su Memo per scrivere un’annotazione.
7. Spostarsi su Immagine e premere > [Imposta]. A questopunto, è possibile specificare un’immagine dalla galleria immaginio registrarla direttamente.
Agenda [Menu 5]Descrizione menu
IT
AL
IA
NO
78
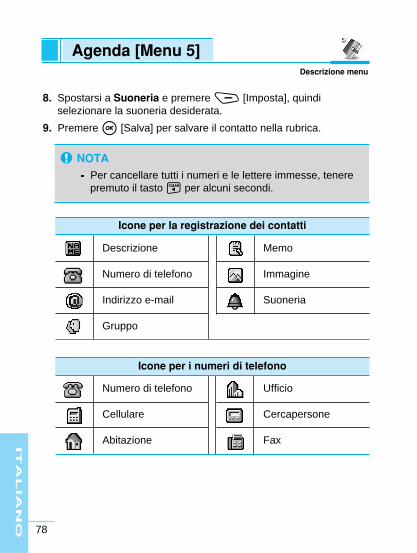
8. Spostarsi a Suoneria e premere > [Imposta], quindiselezionare la suoneria desiderata.
9. Premere O [Salva] per salvare il contatto nella rubrica.
NOTAPer cancellare tutti i numeri e le lettere immesse, tenerepremuto il tasto C per alcuni secondi.
Descrizione
Numero di telefono
Indirizzo e-mail
Gruppo
Memo
Immagine
Suoneria
Icone per la registrazione dei contatti
Numero di telefono
Cellulare
Abitazione
Ufficio
Cercapersone
Fax
Icone per i numeri di telefono
Agenda [Menu 5]Descrizione menu
IT
AL
IA
NO
79
Descrizione menu
CercaConsente di eseguire ricerche in base al nome, al numero delcontatto e al gruppo. Per accedere a questo menu dal modo standbypremere il tasto Cerca.
• Per nome1. Selezionare Cerca dal menu Rubrica.
2. Per cercare un nome immettere le iniziali del nome e premereO [OK].
3. La ricerca viene eseguita tra tutti i nomi presenti nel telefono enella scheda SIM.
4. Per visualizzare i dettagli del contatto, selezionare il nomedall’elenco dei risultati della ricerca e premere O [OK].Premere O [OK] per tornare all’elenco dei risultati dellaricerca.
• Per gruppo1. Selezionare Cerca dal menu, quindi premere O [OK].
2. Premere il tasto R o L per selezionare l'opzione Gruppi,quindi scegliere un gruppo e premere O [OK].
3. La ricerca viene eseguita tra tutti i numeri presenti nel telefono enella scheda SIM.
4. Per visualizzare i dettagli del contatto, selezionare il nomedall’elenco dei risultati della ricerca e premere O [OK].Premere O [OK] per tornare all’elenco dei risultati dellaricerca.
IT
AL
IA
NO
80
Agenda [Menu 5]Descrizione menu
• Per contatto1. Selezionare Cerca dal menu, quindi premere O [OK].
2. Premere il tasto R o L per selezionare Contatti, quindiimmettere le iniziali desiderate e premere O [OK].
3. La ricerca viene eseguita tra tutti i numeri presenti nel telefono enella scheda SIM.
4. Per visualizzare i dettagli del contatto, selezionare il nomedall’elenco dei risultati della ricerca e premere O [OK].Premere O [OK] per tornare all’elenco dei risultati dellaricerca.
• Gruppi1. Selezionare Gruppi chiamata dal menu della Rubrica.
2. Per aggiungere un nuovo gruppo, premere < [Opzioni] eselezionare Nuovo.
3. Per eliminare un gruppo, selezionare il gruppo e premere <[Opzioni], quindi selezionare Cancella.
4. Per modificare il nome di un gruppo, selezionare il gruppo epremere > [Rinomina].
5. Per modificare la melodia associata al gruppo, selezionare ilgruppo e premere < [Opzioni], quindi selezionare Tonogruppo.
• Chiamate con i numeri della ricerca1. Per effettuare una chiamata, selezionare un numero dall’elenco
dei risultati della ricerca e premere S.
IT
AL
IA
NO
81
Descrizione menu
• Modifica, invio, copia e spostamento del numero di un contattoPremere < [Opzioni] per scegliere tra una serie di funzioni.
1. Modifica : Modifica i dettagli del numero di un contatto.
2. Invio messaggio : Consente di inviare un messaggio, unmessaggio multimediale o una e-mail alnumero desiderato.
3. Copia : Copia il numero del contatto selezionato nellascheda SIM o nel telefono.
4. Sposta : Sposta il numero del contatto selezionatonella scheda SIM o nel telefono.
5. Cancella : Elimina il numero dalla rubrica.
Selezione rapidaPer effettuare le chiamate in modo più agevole, è possibileconfigurare l’opzione di selezione rapida per i numeri utilizzati conmaggiore frequenza.
• Visualizzazione dei dettagli relativi a un tasto di selezione rapida1. Selezionare Selezione rapida dal menu Rubrica, quindi
premere O [OK].
2. Per visualizzare i dettagli relativi a una selezione rapida,selezionare una voce del relativo elenco e premere O [OK].
• Assegnazione dei tasti per la selezione rapida1. Selezionare Selezione rapida dal menu Rubrica, quindi
premere O [OK].
2. Selezionare il tasto disponibile per la chiamata rapida e premere> [Assegna].
3. Selezionare un numero di telefono dalla rubrica da assegnare altasto selezione rapida e premere O [OK].
IT
AL
IA
NO
82
Agenda [Menu 5]Descrizione menu
• Eliminazione e spostamento dei numeri1. Selezionare Selezione rapida dal menu Rubrica, quindi
premere O [OK].
2. Per cancellare le assegnazioni per le selezioni rapide esistenti,selezionare quelle che si desidera eliminare, quindi premere< [Opzioni] e selezionare Cancella.
3. Per cancellare tutte le assegnazioni esistenti, selezionareCancella tutti.
4. Per spostare le assegnazioni esistenti, selezionare Sposta,quindi selezionare il tasto vuoto desiderato.
Cancella rubricaConsente di eliminare tutti i contatti memorizzati nella memoria deltelefono e nella scheda SIM.
1. Selezionare Cancella rubrica dal menu, quindi premere O[OK].
2. Selezionare Telefono per eliminare tutti i contatti memorizzati neltelefono. Viene richiesto l’inserimento del codice sicurezza deltelefono.
3. Selezionare SIM per eliminare tutti i contatti memorizzati nellaSIM. Viene richiesto l’inserimento del codice PIN della SIM.
IT
AL
IA
NO
83
Descrizione menu
Numeri servizio SDNUtilizzare questa funzione per accedere ad un particolare elenco dinumeri di servizio forniti dal proprio gestore di rete (se supportatodalla scheda SIM).
1. Selezionare Numeri servizio nel menu rubrica e premere O[OK].
2. Utilizzare i tasti U e D per selezionare un servizio, quindipremere S [INVIO].
Copia tuttoConsente di copiare i contatti dalla memoria del telefono cellularealla scheda SIM e viceversa.
1. Selezionare Copia tutto dal menu, quindi premere O [OK].
2. Selezionare Telefono � SIM o SIM � Telefono e immettere ilPIN o il codice del telefono.
Sposta tuttoConsente di spostare i contatti dalla memoria del telefono cellularealla scheda SIM e viceversa.
1. Selezionare Copia tutto dal menu, quindi premere O [OK].
2. Selezionare Telefono � SIM o SIM � Telefono e immettere ilPIN o il codice del telefono.
IT
AL
IA
NO
84
Agenda [Menu 5]Descrizione menu
Agenda [Menu 5-2]Consente di aggiungere o eliminare gli eventi programmati eimpostare la ripetizione di eventi e gli avvisi.
1. Selezionare Agenda, quindi premereO [OK].
2. Premere i tasti U, D o L e il tasto R per selezionare ladata da visualizzare, quindi premere O [OK].
3. Selezionare l’evento programmato dal relativo elenco in base alladata corrispondente.
4. È possibile visualizzare il titolo, il nome, la ripetizione el’impostazione dell’avviso e della suoneria in base alla data eall’evento corrispondente.
NOTAUna data con una attività già impostata apparesottolineata. È inoltre possibile spostare la data nel modoseguente:
• 1 : Giorno precedente
• 3 : Giorno successivo
• 4 : Mese precedente
• 6 : Mese successivo
• 5 : Oggi
• 7 : Anno precedente
• 9 : Anno successivo
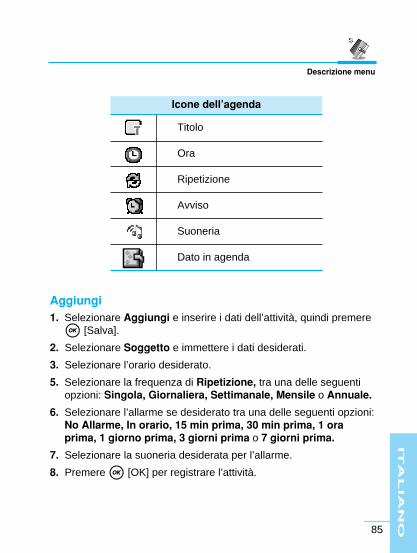
IT
AL
IA
NO
85
Descrizione menu
Aggiungi 1. Selezionare Aggiungi e inserire i dati dell’attività, quindi premere
O [Salva].
2. Selezionare Soggetto e immettere i dati desiderati.
3. Selezionare l’orario desiderato.
5. Selezionare la frequenza di Ripetizione, tra una delle seguentiopzioni: Singola, Giornaliera, Settimanale, Mensile o Annuale.
6. Selezionare l’allarme se desiderato tra una delle seguenti opzioni:No Allarme, In orario, 15 min prima, 30 min prima, 1 oraprima, 1 giorno prima, 3 giorni prima o 7 giorni prima.
7. Selezionare la suoneria desiderata per l’allarme.
8. Premere O [OK] per registrare l’attività.
Titolo
Ora
Ripetizione
Avviso
Suoneria
Dato in agenda
Icone dell’agenda
IT
AL
IA
NO
86
Agenda [Menu 5]Descrizione menu
Opzioni agenda1. Selezionare Agenda, e premere < [Opzioni].
2. Oggi : Visualizza la data odierna. Selezionare Oggi,quindi premere O [OK].
3. Vai a data : Si sposta alla data specificata dall’utente. Immetterela data, quindi premere O [OK].
4. Cerca : Immettere la parola da cercare, quindi premere O[OK].
5. Cancella : Selezionare Cancella vecchi per eliminare tutti gliappuntamenti precedenti. Per eliminare gliappuntamenti relativi a un periodo di tempospecifico, selezionare Cancella periodo. Pereliminare tutti gli appuntamenti, selezionareCancella tutti, quindi immettere il codice disicurezza del telefono.
6. Vacanze : Nell’impostazione degli appuntamenti è possibiletenere conto dei periodi di vacanza.
NOTA• L’opzione Vacanze viene visualizzata quando non ci sono
vacanze impostate. Se il giorno visualizzato è un giornoimpostato come vacanza l’opzione diventa Reset vacanze,e selezionando questa opzione la vacanza programmataviene cancellata.
IT
AL
IA
NO
87
Descrizione menu
Da fare [Menu 5-3]Consente di aggiungere, modificare ed eliminare attività da svolgere.
1. Selezionare Da fare dal menu Agenda, quindi premere O [OK].
2. Selezionare l’attività desiderata dal relativo elenco pervisualizzarne i dettagli.
3. Premere O [OK] per tornare all’elenco.
Per memorizzare una nuova attività:
1. Premere il tasto > [Nuovo] dall’elenco delle attività.
2. Selezionare e configurare l’attività da eseguire specificando untitolo, la data e un memo.
3. Premere O [Salva] per salvare l’attività inserita.
Opzioni1. Selezionare l’attività dal relativo elenco, quindi premere <
[Opzioni].
2. Cancella : Selezionare questa voce per eliminare l’attivitàcorrispondente.
3. Cancella tutti : Selezionare questa voce per eliminare tutte leattività.
NOTA• Per le attività completate non è disponibile l’opzione
Eseguito.
• Per le attività da completare non è disponibile l’opzioneNon ancora.
IT
AL
IA
NO
88
Agenda [Menu 5]Descrizione menu
4. Eseguito : Selezionare questa voce per contrassegnareun’attività come completata.
5. Non ancora : Selezionare questa voce per ripristinareun’attività completata.
6. Vedi calendario: Selezionare questa voce per visualizzare ilcalendario completo.
7. Nuovo : Consente di aggiungere nuove attività.
Memo [Menu 5-4]Consente di salvare, eliminare e modificare i memo.
Visualizzazione1. Selezionare Memo dall’elenco dell’agenda/memo, quindi premere
O [OK].
2. Selezionare il memo che si desidera visualizzare dal relativoelenco, quindi premere O [OK].
Aggiungere un nuovo memo1. Premere il tasto > [Nuovo] dall’elenco dei memo o
selezionare Nuovo dal menu delle opzioni.
2. Configurare un memo, quindi premere O [Salva] per salvarlo.
IT
AL
IA
NO
89
Descrizione menu
Cancellare1. Selezionare il memo che si desidera eliminare dal relativo elenco,
quindi premere < [Opzioni].
2. Selezionare Cancella per eliminare il memo selezionato.
3. Selezionare Cancella e immettere il codice di sicurezza pereliminare tutti i memo in elenco.
Modifica1. Selezionare il memo che si desidera modificare dal relativo
elenco, quindi premere O [OK].
2. Premere il tasto < [Cambia] per modificare il memoselezionato.
Blocco/Sblocco memo1. Selezionare il memo che si desidera modificare e premere <
[Opzioni].
2. Selezionare Blocca per bloccare un memo.
3. Selezionare Sblocca per sbloccare un memo. Per modificare unmemo bloccato è necessario immettere il codice di sicurezza.
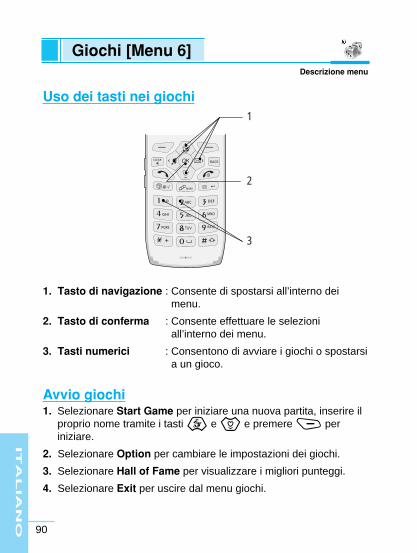
IT
AL
IA
NO
90
Uso dei tasti nei giochi
1. Tasto di navigazione : Consente di spostarsi all’interno deimenu.
2. Tasto di conferma : Consente effettuare le selezioniall’interno dei menu.
3. Tasti numerici : Consentono di avviare i giochi o spostarsia un gioco.
Avvio giochi1. Selezionare Start Game per iniziare una nuova partita, inserire il
proprio nome tramite i tasti U e D e premere > periniziare.
2. Selezionare Option per cambiare le impostazioni dei giochi.
3. Selezionare Hall of Fame per visualizzare i migliori punteggi.
4. Selezionare Exit per uscire dal menu giochi.
1
2
3
Giochi [Menu 6]Descrizione menu
IT
AL
IA
NO
91
Questo menu offre utili funzioni come la sveglia, la calcolatrice, ilfuso orario, il convertitore, il cronometro e la casella contenente imemo vocali.
Sveglia [Menu 7-1]1. Selezionare Sveglia dal menu delle accessori, quindi premere
O [OK].
2. Viene indicata l’ora corrente della quale tenere conto perimpostare la sveglia.
3. Premere il pulsante L o R oppure premere > [Imposta] perattivare o disattivare la sveglia.
4. Immettere l’orario di attivazione della sveglia.
5. Premere L o R oppure premere il pulsante > [Imposta] perselezionare una delle 5 modalità disponibili.
6. Premere L e R oppure premere il pulsante > [Imposta] perselezionare la suoneria.
7. Premere O [Salva] per salvare le impostazioni della sveglia.
8. Quando l’allarme si attiva premere il tasto O o chiudere il folderper disattivarlo. Premendo il tasto < [Posponi] o non facendonulla l’allarme verrà ripetuto dopo 5 minuti. L’allarme verràripetuto al massimo 6 volte.
Accessori [Menu 7]Descrizione menu
IT
AL
IA
NO
92
Calcolatrice [Menu 7-2]Consente di eseguire operazioni di addizione (+), sottrazione (–),moltiplicazione (x) e divisione (÷).
1. Selezionare Calcolatrice dal menu delle Accessori, quindipremere O [OK].
2. Immettere i numeri.
3. Premere L (+), R (–), U (x) D e (÷).
4. Premere < [.].
5. Premere O [=].
6. Premere [o].
7. Premere V per convertire i numeri negativi in positivi eviceversa.
8. Premere > [AC] per inizializzare la calcolatrice.
Fusi orari [Menu 7-3]Consente di visualizzare gli orari delle principali città del mondo.
1. Selezionare Fusi orari dal menu delle Accessori, quindi premereO [OK].
2. Premere R e L per visualizzare gli orari delle principali città delmondo.
3. Per selezionare la propria città selezionare OK.
Accessori [Menu 7]Descrizione menu
IT
AL
IA
NO
93
Descrizione menu
Convertitore [Menu 7-4]Consente di convertire valute straniere e misure di lunghezza,superficie, peso e volume.
Conversione delle valute1. Selezionare Valuta dal menu delle Accessori, quindi premere
O [OK].
2. Premere U o D per selezionare l’opzione Locale oStraniera e immettere il valore.
3. Premere il pulsante > [Cambio] per immettere il tasso dicambio.
4. Premere O [OK] per visualizzare il risultato della conversione.
5. Per immettere un nuovo valore, premere < [AC].
Conversione di misure di lunghezza, superficie, peso evolume1. Selezionare Convertitore dal menu Accessori, quindi premere
O [OK].
2. Selezionare un’opzione tra Lunghezza, Area , Peso e Volumedall’elenco del convertitore.
3. Premere U o D per selezionare un’opzione di conversione,quindi immettere il valore.
4. Premere > [Unità] per selezionare la misura che si desideraconvertire.
5. Premere O [OK] per visualizzare il risultato della conversione.
6. Per immettere un nuovo valore, premere < [Reset].

IT
AL
IA
NO
94
Accessori [Menu 7]Descrizione menu
Timers [Menu 7-5]Consente di utilizzare le funzioni Contatore giorni e Cronometro.
Contatore giorniIndica il numero di giorni restanti alla data fissata per un particolareevento.
1. Selezionare Contatore giorni dall’elenco di opzioni del menuTimers, quindi premere O [Select].
2. Selezionare l’evento desiderato, quindi premere O[OK] pervisualizzare il numero di giorni restanti.
3. Per eliminare l’evento o tutti gli eventi, premere il tasto <[Opzioni] dall’elenco del contatore, quindi selezionare Cancella oCancella tutti.
4. Per aggiungere un evento, premere > [Nuovo] dall’elenco delcontatore.
5. Per effettuare una modifica, selezionare l’evento desideratodall’elenco, quindi premere O [OK] e infine < [Modifica] permodificare l’evento.
CronometroConsente di utilizzare la funzione cronometro.
1. Selezionare Cronometro dal menu del Timer, quindi premereO [OK].
2. Premere O [Start] per avviare il cronometro.
3. Premere < [Giro] mentre il cronometro è in funzione perregistrare il tempo.
IT
AL
IA
NO
95
Descrizione menu
4. Premere O [Stop] per fermare il cronometro.
5. Per riavviare il cronometro mentre è in pausa, premere O[Restart].
6. Premere > [Reset] per ripartire dall’inizio.
Memo vocale [Menu 7-6]
Registrazioni vocali1. Se si desidera eseguire una registrazione vocale, premere >
[Registra], oppure premere < [Opzioni] e selezionareRegistra.
2. Iniziare la registrazione vocale.
3. Quando si desidera terminare la registrazione, premere O[Stop].
4. Se si desidera cancellare la registrazione, premere <[Opzioni] e selezionare Cancella.
Assegnazione di un nuovo nome al file vocale1. Selezionare il file di cui si desidera modificare il nome, quindi
premere il pulsante < [Opzioni].
2. Selezionare Rinomina dall’elenco delle opzioni, quindi premereO [OK].
3. Immettere il nuovo nome del file vocale, quindi premere ilpulsante O [Salva].
IT
AL
IA
NO
96
Accessori [Menu 7]Descrizione menu
Riproduzione di una registrazione vocale1. Premere O [Play].
2. Per interrompere la riproduzione, premere > [Stop].
Eliminazione di una registrazione vocale1. Selezionare la registrazione vocale che si desidera eliminare.
2. Premere < [Opzioni].
3. Selezionare Cancella, quindi premere O [Si].
4. Se si desidera eliminare tutte le registrazioni vocali, selezionareCancella tutti, quindi premere O [Si].
PC Sync [Menu 7-7]PC Sync è un programma che consente di scambiare dati tra PC etelefono tramite un cavo dati.
• Scambio di dati1. Selezionare PC Sync dal menu delle utilità e premere O [OK].
2. Per avviare lo scambio dei dati, premere O [OK].
• Selezione della modalità di invio1. Selezionare PC Sync e premere O [OK].
2. Premere < [Imposta] e selezionare Seriale o IrDA, quindipremere O [OK].
Gestione contenuti [Menu 7-8]Il programma di Gestione contenuti permette di trasferire dati daltelefono a un PC e viceversa.
IT
AL
IA
NO
97
Consente di impostare l’ora, la data, il display e le opzioni disicurezza del telefono nonché la lingua dei messaggi sul display ealtre opzioni.
Profili audio [Menu 8-1]E’ possibile impostare e modificare il profilo audio desiderato per lasuoneria, la tastiera e gli allarmi di ricezione messaggi
Si può selezionare uno dei profili già impostati (alcunipersonalizzabili) oppure impostare due profili personali.
Selezionare il profilo desiderato e premere OK. A seconda del profilosi presentano le seguenti opzioni:
• ImpostaConsente di modificare i valori nei sottomenu del menu dei profili.
• MostraConsente di visualizzare le impostazioni di un profilo che non sipuò modificare.
NOTA• Se si collega l’auricolare o il kit vivavoce al telefono, verrà
selezionato automaticamente il corrispondente menu diciascun profilo.
Imposta [Menu 8]Descrizione menu
IT
AL
IA
NO
98
• Gruppo di sottomenu dell’opzione ImpostaIl menu Imposta dispone dei seguenti sottomenu:
- Avviso chiamateConsente di impostare il tipo di avviso per le chiamate in arrivo inbase all’ambiente.
- Tipo suoneriaConsente di impostare la suoneria in base all’ambiente.
- Volume suoneriaConsente di impostare il volume della suoneria in baseall’ambiente.
- Avviso messaggiConsente di impostare il tipo di avviso per i messaggi in arrivo inbase all’ambiente.
- Tono messaggiConsente di impostare il tono di avviso per i messagi in arrivo.
- Allarme Consente di impostare l’attivazione o meno dell’allarme
- Allarme perConsente di impostare l’avviso per ciascuna chiamata o gruppodi chiamate o per tutte le chiamate in arrivo.
- TastieraConsente di impostare il tono della tastiera in base all’ambiente.
- Volume tastieraConsente di impostare il volume della tastiera in baseall’ambiente.
Imposta [Menu 8]Descrizione menu
IT
AL
IA
NO
99
Descrizione menu
Telefono [Menu 8-2]Consente di attivare le funzioni relative al telefono.
Ora1. Selezionare Ora, quindi premere O [OK].
2. Per impostare l'ora, inserire i numeri corrispondenti.
3. Per cambiare il formato dell’orario, premere D.
4. Selezionare 12 ore o 24 ore premendo L o R.
5. Premere O [OK].
Data1. Selezionare Data quindi premere O [OK].
2. Per impostare la data, inserire i numeri corrispondenti.
3. Per cambiare il formato della data, premere D.
A : Anno
M : Mese
D : Giorno
4. Premere O [OK].
Impostazioni profiloIn questo menu è possibile modificare l’impostazione del profiloaudio corrente.
IT
AL
IA
NO
100
Imposta [Menu 8]Descrizione menu
Display [Menu 8-3]Consente di impostare i valori per la retroilluminazione, il contrasto, iltema, il titolo iniziale sul display e altre funzioni.
Per impostare il display, selezionare Display dall’elenco di gestionedel telefono, quindi premere O [OK].
IlluminazioneConsente di impostare le funzioni di illuminazione, del display. Perimpostare l’illuminazione, selezionare Illuminazione dall’elenco diimpostazioni del display, quindi premere O [OK]. E' possibileselezionare impostazione Normale, Risparmio o Minima oppureeffettuare impostazioni Manuali che includono i seguenti sottomenu:È possibile impostare il livello di luminosità della retroilluminazionedel display principale.
• LCD principale 1. Selezionare Durata e immettere i secondi. La
retroilluminazione del display principale si spegnera dopo ilperiodo di tempo specificato se il terminale non viene usato.
2. Selezionare Sempre accesa per mantenere costantementeaccesa la retroilluminazione del display principale.
3. Selezionare Sempre spenta per mantenere sempre spentala retroilluminazione del display principale.
IT
AL
IA
NO
101
Descrizione menu
• LCD esterno
1. Selezionare la durata del display secondario dall’elenco delleimpostazioni utente, quindi premere O [OK].
2. Selezionare Durata, quindi immettere il tempo per il quale ildisplay esterno deve rimanere illuminato.
3. Il tempo di illuminazione va da 1 a 20 secondi.
4. Selezionare Sempre spenta per mantenere costantementespenta la retroilluminazione del display esterno.
• Tastiera
1. Selezionare Tastiera dall’elenco delle impostazioni utente,quindi premere O [OK].
2. La procedura di impostazione dell’illuminazione della tastiera èla stessa seguita per il display principale.
Contrasto LCD Consente di regolare il contrasto del display.
1. Selezionare Contrasto LCD dall’elenco delle impostazionimanuali, quindi premere O [OK].
2. Per regolare il contrasto del display, premere i tasti L e R.
3. Premere O [OK] per impostare il livello di contrasto selezionato.

IT
AL
IA
NO
102
Imposta [Menu 8]Descrizione menu
Tema display Consente di impostare il tema del display.
È possibile scegliere una delle seguenti impostazioni:Standby, Accensione e Spegnimento. I temi vengono selezionatidalla galleria delle immagini.
1. Selezionare Tema display dall’elenco delle impostazioni deldisplay, quindi premere O [OK].
2. Selezionare la configurazione dello sfondo nella modalitàdesiderata.
3. Premere i tasti L, R e U D per selezionare l’immagine ol’animazione desiderata da utilizzare come tema, quindi premereO per impostare il tema.
Testo standby È possibile scegliere se visualizzare o meno il testo di standby. Se siattiva questa funzione, è possibile scrivere un messaggio che verràvisualizzato a telefono acceso.
Ricerca rete [Menu 8-4]È possibile impostare il metodo di selezione rete. Generalmente, laselezione della rete è impostata su Automatica.
NOTA• Premere < [Mostra] per vedere l'anteprima
dell'immagine
IT
AL
IA
NO
103
Descrizione menu
Sicurezza [Menu 8-5]In questo menu è possibile controllare le funzioni di richiesta PIN,numeri fissi, limitazione chiamate, gruppo chiuso utenti e modificacodici di sicurezza.
Richiesta PIN 1. Selezionare Richiesta PIN nel menu "Sicurezza", quindi premere
O [OK].
2. Attivare o disattivare la funzione. Se si attiva la funzione, ènecessario immettere il codice PIN ogni volta che si accende iltelefono.
3. Immettere il codice PIN corrente, quindi premere O [OK].
4. Se si immette un codice PIN errato per più di tre volteconsecutive, il codice corrente non potrà essere utilizzato.Se il PIN è bloccato, è necessario immettere il codice PUK.
5. È possibile immettere il codice PUK per un massimo di diecivolte. Se si immette un codice PUK errato per oltre dieci volte, lascheda SIM non potrà essere utilizzata.
IT
AL
IA
NO
104
Settings [Menu 8]Descrizione menu
Numeri fissi FDN Consente di limitare le chiamate in uscita a numeri di telefonoselezionati. I numeri sono protetti tramite il codice PIN2.
1. Se il codice PIN2 inserito è corretto, vengono visualizzati iseguenti sottomenu:
Si : Consente di limitare le chiamate in uscita anumeri di telefono selezionati.
No : Consente di chiamare qualsiasi numero ditelefono.
Lista numeri : Consente di visualizzare la lista dei numeri fissiFDN
2. Se si desidera modificare l’elenco di tali numeri, spostarsiall’elenco desiderato mediante i tasti U e D e premere O[Imposta].
Limitazione chiamate
Il blocco delle chiamate consente di prevenire l'invio o la ricezione dideterminate categorie di chiamate.Questa funzione richiede una password di rete fornita dall'operatoredi sistema. Vengono visualizzati i seguenti sottomenu.
• Tutte in uscita:
Blocca tutte le chiamate in uscita.
• Internazionali
Blocca tutte le chiamate internazionali in uscita.
IT
AL
IA
NO
105
Descrizione menu
• Internazionali tranne Home
Blocca tutte le chiamate internazionali in uscita escluse quelleverso la rete home nazionale.
• Tutte in entrata
Blocca tutte le chiamate in entrata.
• Entrata Roaming
Blocca tutte le chiamate in entrata quando si utilizza il roaming.
Attivazione e disattivazione della funzione1. Per attivare questa funzione, premere O [Si].
2. Per disattivare questa funzione, premere > [No].
Verifica dello stato corrente e disattivazione di tutti iservizi di blocco chiamate1. Una volta selezionata la funzione, premere < [Opzioni] e
selezionare Verifica stato.
2. Selezionando Annulla, è possibile disattivare tutti i servizi diblocco chiamate.
IT
AL
IA
NO
106
Settings [Menu 8]Descrizione menu
Gruppo chiuso utenti (CUG) (servizio di rete)
Questa funzione consente di limitare le chiamate ai numericorrispondenti a determinati gruppi di utenti.L’uso di questa funzione associa ogni chiamata in uscita all’indice diun gruppo.Se viene specificato l’indice di un gruppo, questo verrà utilizzato pertutte le chiamate in uscita.Se non viene specificato l’indice di un gruppo, la rete utilizzeràl’indice preferenziale (un indice specifico memorizzato nella rete).
A. Default : Imposta l’indice del gruppo utenti chiuso programmatoin rete.
B. Si : Imposta l’indice del gruppo utenti chiuso.
C. No : Disattiva la funzione relativa al gruppo utenti chiuso.
Cambia codici Consente di modificare il codice PIN, il codice PIN2, il codice disicurezza e la password per il servizio di limitazione chiamate.
• Codice PIN/PIN2 PIN è l’abbreviazione di Personal Identification Number ed è uncodice utilizzato per impedire l’uso non autorizzato del telefono.
1. Selezionare Cambia codici dall’elenco delle impostazioni per lasicurezza, quindi premere O [OK].
2. Immettere il codice PIN/PIN2 corrente.Se si immette un codice errato per più di tre volte, è necessarioimmettere il codice PUK/PUK2 per sbloccare il PIN.
IT
AL
IA
NO
107
Descrizione menu
3. Il numero di tentativi di immissione per il codice PUK/PUK2 èlimitato a 10. Se questo limite viene superato, anche il codicePUK verrà bloccato e il telefono non potrà essere utilizzato.
4. Una volta immesso il codice PIN coretto, è possibile modificareil codice esistente.
• Codice di sicurezzaQuesto codice è memorizzato nel telefono.A differenza del codice PIN/PIN2, non esiste un limite al numero ditentativi di immissione di questo codice.
• Password per limitazione chiamateConsente di modificare la password per il blocco chiamate.
Velocita modem [Menu 8-6]
GPRS È possibile impostare una velocità di trasmissione pari a 115200 peril collegamento come modem.
CSD È possibile impostare una velocità di trasmissione pari a 19200 per ilcollegamento come modem.
IT
AL
IA
NO
108
Settings [Menu 8]Descrizione menu
Stato memoria [Menu 8-7]Consente di visualizzare la capacità di memoria utilizzata.Selezionare Stato memoria dall’elenco di gestione del telefono,quindi premere O [OK].
Memoria AgendaÈ possibile controllare la memoria utilizzata per i memo, i messaggiin arrivo e in uscita, la rubrica, le attività da fare.
Memoria comune È possibile controllare la memoria utilizzata per le immagini, i video,le animazioni, i dati scaricati (ad esempio, suonerie, immagini econtenuti EMS).
MMS & e-mail È possibile controllare la memoria utilizzata per i messaggi e-mail emultimediali.
Lingua [Menu 8-8]Consente di selezionare la lingua utilizzata dal telefono.
1. Selezionare Lingua dall’elenco di gestione del telefono, quindipremere O [OK].
2. Premere i tasti numerici per selezionare la lingua desiderata.

IT
AL
IA
NO
109
Descrizione menu
Versione telefono [Menu 8-9]1. Selezionare il menu Versione telefono quindi premere <
[option].
2. È possibile verificare la versione corrente del software installatosul telefono.
Reset dati [Menu 8-10]Consente di inizializzare tutte le impostazioni predefinite.
1. Selezionare Reset dati nell’elenco di gestione del telefono, quindipremere O [OK].
2. Premere O [OK] per selezionare Si o No.
3. Se si sceglie Si, immettere il codice di sicurezza del telefonoquindi premere O [OK] per inizializzare tutte le impostazionipredefinite.
IT
AL
IA
NO
110
Consente di raggruppare in un menu le funzioni più utilizzate perspostarsi rapidamente ai menu desiderati.È possibile scegliere tra 9 tipi diversi e configurare i numeri del menupersonalizzato.
1. Premere > [Aggiungi] per registrare il menu. Lo stesso menunon può essere registrato più volte e i menu impostati nonpossono essere registrati una seconda volta.Premere > [Cambia] per modificare gli altri menu.
2. Premere < [Option] per scegliere un’opzione tra Cancella,Cancella tutti, Informazioni e Cambia.
3. Selezionare Cancella per eliminare il menu selezionato.
4. Selezionare Cancella tutti per eliminare tutti i menu registrati.Selezionare Informazioni per visualizzare il percorso del menuselezionato.
Preferiti [Menu 9]Descrizione menu
IT
AL
IA
NO
111
Attraverso la scheda SIM, i gestori di servizi possono offrireapplicazioni speciali come ad esempio servizi di home banking,gestione dei titoli azionari, ecc.Se l’utente è registrato per uno di tali servizi, il nome del servizioverrà visualizzato alla fine del menu principale.Per ulteriori informazioni, contattare il gestore.
Servizi SIM [Menu 10]Descrizione menu
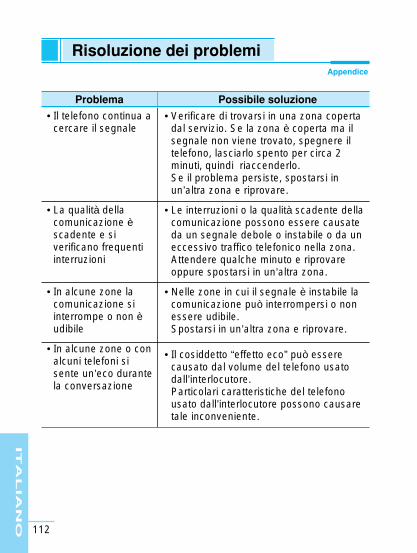
IT
AL
IA
NO
112
Risoluzione dei problemiAppendice
Problema Possibile soluzione
• Verificare di trovarsi in una zona copertadal servizio. Se la zona è coperta ma ilsegnale non viene trovato, spegnere iltelefono, lasciarlo spento per circa 2minuti, quindi riaccenderlo. Se il problema persiste, spostarsi inun’altra zona e riprovare.
• Le interruzioni o la qualità scadente dellacomunicazione possono essere causateda un segnale debole o instabile o da uneccessivo traffico telefonico nella zona.Attendere qualche minuto e riprovareoppure spostarsi in un’altra zona.
• Nelle zone in cui il segnale è instabile lacomunicazione può interrompersi o nonessere udibile.Spostarsi in un’altra zona e riprovare.
• Il cosiddetto “effetto eco” può esserecausato dal volume del telefono usatodall’interlocutore.Particolari caratteristiche del telefonousato dall’interlocutore possono causaretale inconveniente.
• Il telefono continua acercare il segnale
• La qualità dellacomunicazione èscadente e siverificano frequentiinterruzioni
• In alcune zone lacomunicazione siinterrompe o non èudibile
• In alcune zone o conalcuni telefoni sisente un’eco durantela conversazione
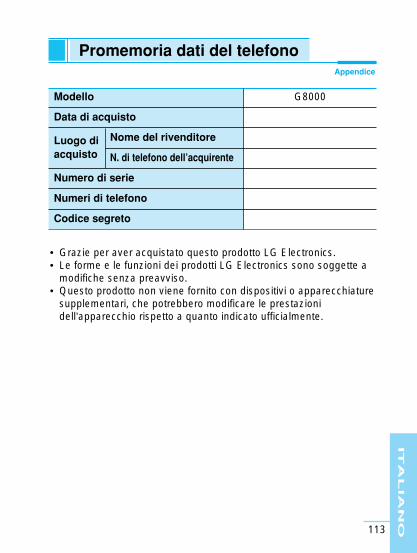
IT
AL
IA
NO
113
Modello G8000
Data di acquisto
Luogo di Nome del rivenditore
acquisto N. di telefono dell’acquirente
Numero di serie
Numeri di telefono
Codice segreto
Promemoria dati del telefonoAppendice
• Grazie per aver acquistato questo prodotto LG Electronics.• Le forme e le funzioni dei prodotti LG Electronics sono soggette a
modifiche senza preavviso.• Questo prodotto non viene fornito con dispositivi o apparecchiature
supplementari, che potrebbero modificare le prestazionidell’apparecchio rispetto a quanto indicato ufficialmente.
IT
AL
IA
NO
114
Quando si utilizza questa apparecchiatura, è importanteseguire le precauzioni indicate di seguito.� Non toccare il caricabatterie con le mani umide.
� Non smontare l’apparecchio (se è necessaria una riparazione,portarlo ad un tecnico specializzato).
� Utilizzare lontano da apparecchiature elettriche quali TV, radio oPC.
� Tenere lontano da fonti di calore quali termosifoni e cucine.
� Non far cadere l’apparecchio.
� Non sottoporre l'apparecchio a scosse o vibrazioni.
� Il rivestimento esterno del telefono potrebbe danneggiarsi se siutilizzano involucri o custodie in vinile.
� Usare un panno asciutto per la pulizia esterna del telefono (nonusare solventi come benzene, acquaragia o alcol).
� Non esporre l'apparecchio a fumo o polvere.
� Tenere lontano da carte di credito o supporti magnetici perevitarne la smagnetizzazione.
� Non toccare il display con oggetti appuntiti per evitare didanneggiare il telefono.
� Non versare liquidi sul telefono.
� Usare gli accessori con attenzione e delicatezza.Non toccare l'antenna se non strettamente necessario.
Cura e manutenzione
IT
AL
IA
NO
115
� Manutenzione della batteria� Non è necessario scaricare completamente la batteria prima di
ricaricarla. A differenza di altri tipi di batteria, non ci sono effettidella memoria che possono compromettere le prestazioni dellabatteria.
� Usare solo batterie e caricabatterie LG. I caricabatterie LG sonoprogettati per ottimizzare le prestazioni e la durata dellebatterie.
� Non smontare o mettere in corto circuito la batteria.
� Tenere puliti i contatti metallici della batteria.
� Sostituire la batteria quando le prestazioni non sono piùaccettabili. Prima di essere sostituita, la batteria può esserericaricata centinaia di volte.
� Se la batteria è rimasta inutilizzata per un lungo periodo, èconsigliabile ricaricarla.
� Non esporre il caricabatteria alla luce solare diretta e nonutilizzarlo in ambienti particolarmente umidi.
� Evitare di lasciare la batteria in luoghi freddi o caldi in quanto leprestazioni potrebbero risentirne.
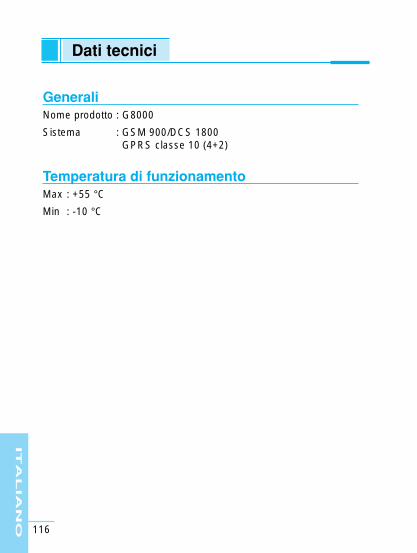
IT
AL
IA
NO
116
GeneraliNome prodotto : G8000
Sistema : GSM 900/DCS 1800GPRS classe 10 (4+2)
Temperatura di funzionamentoMax : +55 °C
Min : -10 °C
Dati tecnici
GPRS Phone USER’S MANUAL
MODEL: G8000
Please read this manual carefullybefore operating your set. Retain it for future reference.
ENGLISH

EN
GL
IS
H
3
G8000 Phone
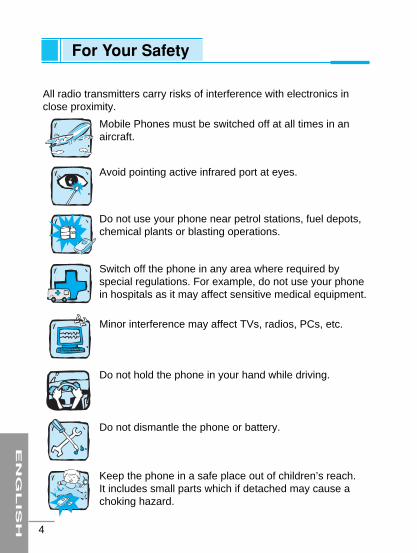
EN
GL
IS
H
4
For Your Safety
All radio transmitters carry risks of interference with electronics inclose proximity.
Mobile Phones must be switched off at all times in anaircraft.
Avoid pointing active infrared port at eyes.
Do not use your phone near petrol stations, fuel depots,chemical plants or blasting operations.
Switch off the phone in any area where required byspecial regulations. For example, do not use your phonein hospitals as it may affect sensitive medical equipment.
Minor interference may affect TVs, radios, PCs, etc.
Do not hold the phone in your hand while driving.
Do not dismantle the phone or battery.
Keep the phone in a safe place out of children’s reach. It includes small parts which if detached may cause achoking hazard.
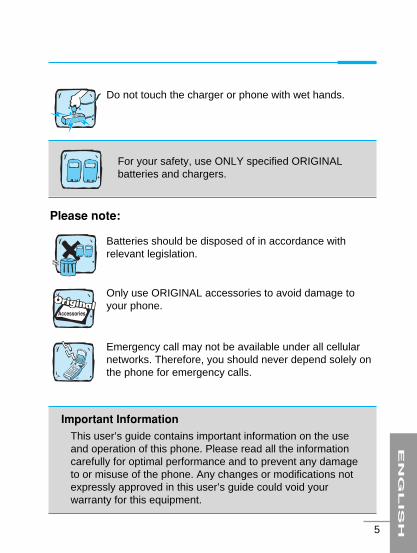
EN
GL
IS
H
5
Do not touch the charger or phone with wet hands.
Please note:
Batteries should be disposed of in accordance withrelevant legislation.
Only use ORIGINAL accessories to avoid damage toyour phone.
Emergency call may not be available under all cellularnetworks. Therefore, you should never depend solely onthe phone for emergency calls.
Important InformationThis user’s guide contains important information on the useand operation of this phone. Please read all the informationcarefully for optimal performance and to prevent any damageto or misuse of the phone. Any changes or modifications notexpressly approved in this user’s guide could void yourwarranty for this equipment.
For your safety, use ONLY specified ORIGINALbatteries and chargers.
EN
GL
IS
H
6
Contents
Before UseAccessories ........................................................................... 10
How to insert the SIM Card ................................................... 12
How to install Battery ............................................................ 13
How to charge the Battery .................................................... 14
How to disconnect the charger ............................................ 15
How to switch On and Off ..................................................... 16
Part of the Phone ................................................................... 171. Main body of the Phone ....................................................... 17
2. Outside of the phone ............................................................ 18
Key Description ..................................................................... 19Alphanumeric Keys .................................................................. 21
Display Information ............................................................... 22
Basic UseStandby Display ..................................................................... 241. Using the Menu ................................................................... 24
2. Making a Call ....................................................................... 24
3. Receiving a Call ................................................................... 26
4. Checking missed calls ......................................................... 26
5. How to use Hotkeys ............................................................. 26
6. How to read received Messages ......................................... 28
7. How to change the Display Theme ...................................... 28
8. How to adjust the Keypad tone ............................................ 29
EN
GL
IS
H
7
9. How to record a voice ........................................................ 29
10. Recent Calls ...................................................................... 29
11. In call menu ....................................................................... 31
Additional FunctionsHow to use Fax and Data ...................................................... 321. Making and Receiving fax calls ........................................... 32
2. Making and Receiving data calls ......................................... 32
Menu functionsMenu Tree ............................................................................... 33
1. Message ............................................................................. 351.1 Write ............................................................................. 35
1.2 Inbox ............................................................................ 40
1.3 Outbox ......................................................................... 43
1.4 Draftbox ....................................................................... 45
1.5 Settings ........................................................................ 47
1.6 Templates .................................................................... 52
1.7 Emoticon ...................................................................... 52
2. Call ...................................................................................... 532.1 Call register .................................................................. 53
2.2 Call divert ..................................................................... 54
2.3 Call duration ................................................................. 56
2.4 Call costs ..................................................................... 57
2.5 GPRS data counter ...................................................... 58
2.6 Settings ........................................................................ 59
EN
GL
IS
H
8
3. Multimedia .......................................................................... 623.1 Camera ........................................................................ 62
3.2 Camcorder ................................................................... 63
3.3 Image gallery ............................................................... 63
3.4 Media player ................................................................ 65
4. Internet ............................................................................... 684.1 Home ........................................................................... 68
4.2 Bookmarks ................................................................... 68
4.3 Settings ........................................................................ 69
4.4 Go to URL .................................................................... 70
4.5 Clear cache .................................................................. 70
5. Organiser ............................................................................ 725.1 Phone book .................................................................. 72
5.2 Schedule ...................................................................... 78
5.3 To Do ........................................................................... 81
5.4 Memo ........................................................................... 82
6. Games ................................................................................. 846.1 How to use key for a game .......................................... 84
6.2 Start games .................................................................. 84
7. Utilities ................................................................................ 857.1 Alarm clock .................................................................. 85
7.2 Calculator ..................................................................... 86
7.3 World time .................................................................... 86
7.4 Unit converter ............................................................... 87
7.5 Timer ............................................................................ 88
7.6 Voice recorder .............................................................. 89

EN
GL
IS
H
9
7.7 PC sync ........................................................................ 90
7.8 Contents manager ....................................................... 90
8. Settings .............................................................................. 918.1 Profile ........................................................................... 91
8.2 Phone ........................................................................... 92
8.3 Display ......................................................................... 94
8.4 Network ........................................................................ 96
8.5 Security ........................................................................ 97
8.6 Modem ....................................................................... 100
8.7 Memory status ........................................................... 101
8.8 Language ................................................................... 102
8.9 Phone info .................................................................. 102
8.10 Reset settings ........................................................... 102
9. Favorites ......................................................................... 103
10. SIM services ................................................................... 104
SupplementPhone Information Memo ................................................... 105
Care and Maintenance ........................................................ 106
Technical Data ..................................................................... 108
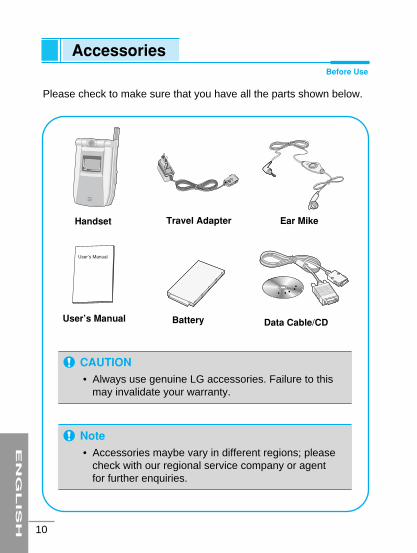
EN
GL
IS
H
10
AccessoriesBefore Use
Please check to make sure that you have all the parts shown below.
Handset Travel Adapter Ear Mike
User’s Manual Battery Data Cable/CD
CAUTION• Always use genuine LG accessories. Failure to this
may invalidate your warranty.
Note• Accessories maybe vary in different regions; please
check with our regional service company or agentfor further enquiries.

EN
GL
IS
H
11
Before Use
Cigar Lighter Adapter
Handsfree Kit
<Optional Accessories>
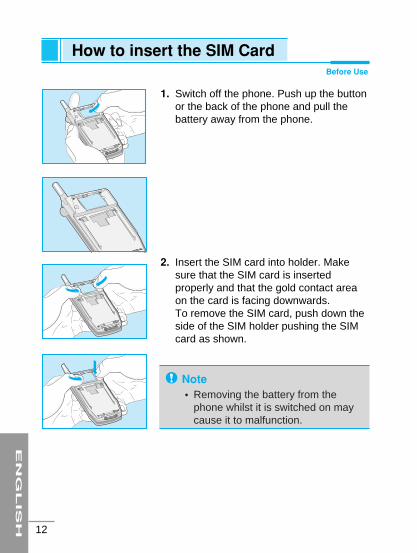
EN
GL
IS
H
12
1. Switch off the phone. Push up the buttonor the back of the phone and pull thebattery away from the phone.
2. Insert the SIM card into holder. Makesure that the SIM card is insertedproperly and that the gold contact areaon the card is facing downwards. To remove the SIM card, push down theside of the SIM holder pushing the SIMcard as shown.
How to insert the SIM CardBefore Use
Note• Removing the battery from the
phone whilst it is switched on maycause it to malfunction.
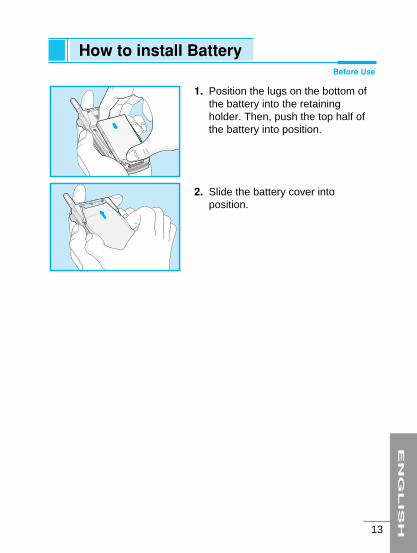
EN
GL
IS
H
13
1. Position the lugs on the bottom ofthe battery into the retainingholder. Then, push the top half ofthe battery into position.
2. Slide the battery cover intoposition.
Before Use
How to install Battery
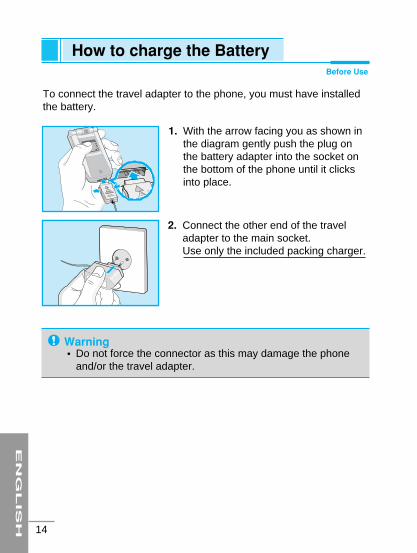
EN
GL
IS
H
14
Before Use
How to charge the Battery
To connect the travel adapter to the phone, you must have installedthe battery.
1. With the arrow facing you as shown inthe diagram gently push the plug onthe battery adapter into the socket onthe bottom of the phone until it clicksinto place.
2. Connect the other end of the traveladapter to the main socket. Use only the included packing charger.
Warning• Do not force the connector as this may damage the phone
and/or the travel adapter.
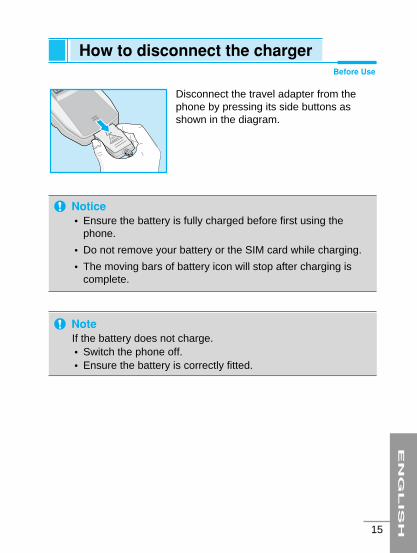
EN
GL
IS
H
15
Before Use
How to disconnect the charger
Notice• Ensure the battery is fully charged before first using the
phone.
• Do not remove your battery or the SIM card while charging.
• The moving bars of battery icon will stop after charging iscomplete.
NoteIf the battery does not charge.• Switch the phone off.• Ensure the battery is correctly fitted.
Disconnect the travel adapter from thephone by pressing its side buttons asshown in the diagram.
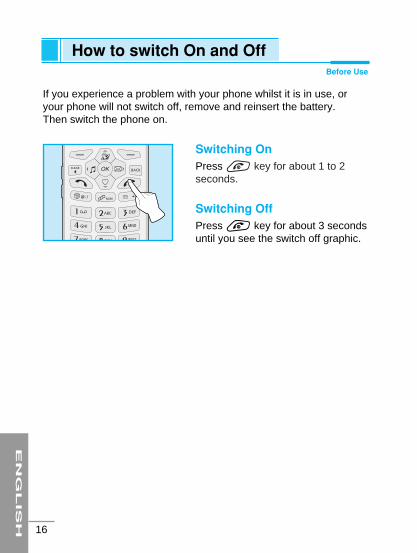
EN
GL
IS
H
16
If you experience a problem with your phone whilst it is in use, oryour phone will not switch off, remove and reinsert the battery.Then switch the phone on.
Switching OnPress E key for about 1 to 2seconds.
Switching OffPress E key for about 3 secondsuntil you see the switch off graphic.
How to switch On and OffBefore Use

EN
GL
IS
H
17
Main body of the Phone
Part of the PhoneBefore Use
1. Earpiece2. Status Icon3. Main LCD4. OK Key (Centre Softkey)5. Favorites Hotkey6. Profile Hotkey7. Menu Key (Left Softkey)8. Side Keys9. Clear Key
10. Game Hotkey11. Star Key
12. Camera13. Internet Hotkey14. Message Hotkey15. Search Key (Right Softkey)16. Previous Key17. Multimedia Hotkey18. Camera Hotkey19. Alphanumeric Keys20. Hash Key21. Microphone
1
12131415
161718
19
2021
2
3
4567
8
9
10
11

EN
GL
IS
H
18
1. Voice Recorder Key (Top)2. Camera3. External LCD4. External Speaker5. Antenna
1
2
3
4
5
Outside of the phone
Part of the PhoneBefore Use
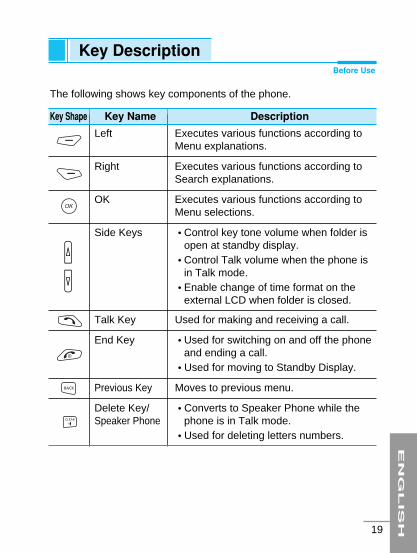
EN
GL
IS
H
19
Key Shape Key Name Description
The following shows key components of the phone.
Key DescriptionBefore Use
Left Executes various functions according toMenu explanations.
Right Executes various functions according toSearch explanations.
OK Executes various functions according toMenu selections.
Side Keys • Control key tone volume when folder isopen at standby display.
• Control Talk volume when the phone isin Talk mode.
• Enable change of time format on theexternal LCD when folder is closed.
Talk Key Used for making and receiving a call.
End Key • Used for switching on and off the phoneand ending a call.
• Used for moving to Standby Display.
Previous Key Moves to previous menu.
Delete Key/ • Converts to Speaker Phone while theSpeaker Phone phone is in Talk mode.
• Used for deleting letters numbers.
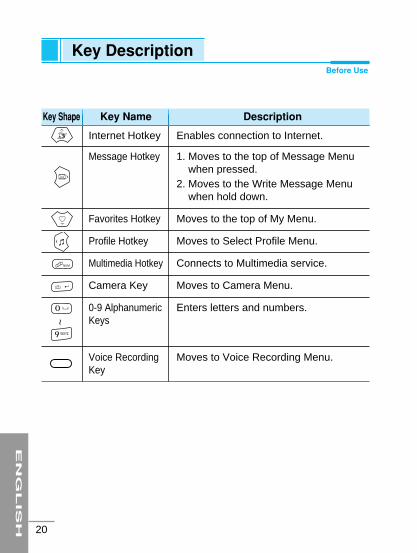
Internet Hotkey Enables connection to Internet.
Message Hotkey 1. Moves to the top of Message Menuwhen pressed.
2. Moves to the Write Message Menuwhen hold down.
Favorites Hotkey Moves to the top of My Menu.
Profile Hotkey Moves to Select Profile Menu.
Multimedia Hotkey Connects to Multimedia service.
Camera Key Moves to Camera Menu.
0-9 Alphanumeric Enters letters and numbers.Keys
Voice Recording Moves to Voice Recording Menu.Key
EN
GL
IS
H
20
Key Shape Key Name Description
~Key Description
Before Use
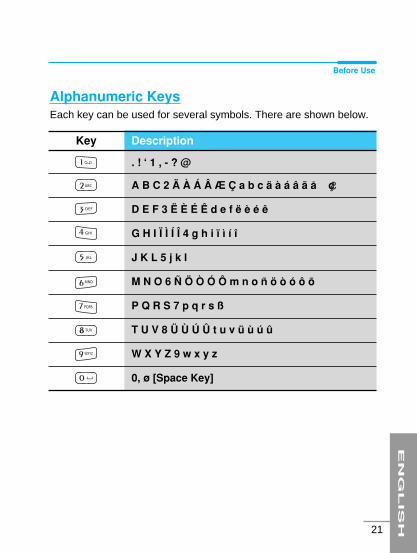
EN
GL
IS
H
21
Alphanumeric KeysEach key can be used for several symbols. There are shown below.
Key Description
. ! ‘ 1 , - ? @
A B C 2 Ä À Á Â Æ Ç a b c ä à á â ã å ç
D E F 3 Ë È É Ê d e f ë è é ê
G H I Ï Ì Í Î 4 g h i ï ì í î
J K L 5 j k l
M N O 6 Ñ Ö Ò Ó Ô m n o ñ ö ò ó ô õ
P Q R S 7 p q r s ß
T U V 8 Ü Ù Ú Û t u v ü ù ú û
W X Y Z 9 w x y z
0, ø [Space Key]
Before Use
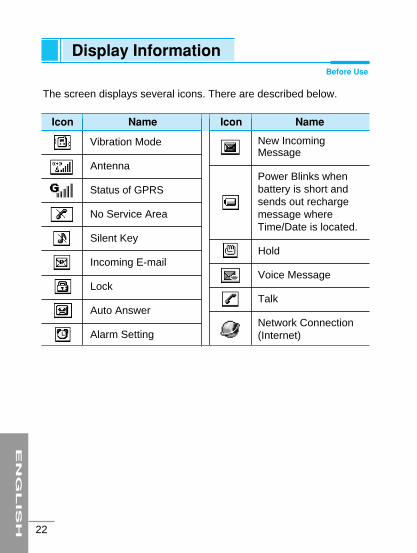
EN
GL
IS
H
22
Icon Name Icon Name
The screen displays several icons. There are described below.
Display InformationBefore Use
Vibration Mode
Antenna
Status of GPRS
No Service Area
Silent Key
Incoming E-mail
Lock
Auto Answer
Alarm Setting
New IncomingMessage
Power Blinks whenbattery is short andsends out rechargemessage whereTime/Date is located.
Hold
Voice Message
Talk
Network Connection(Internet)
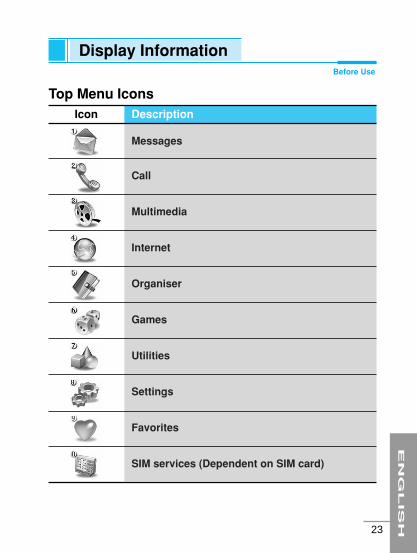
EN
GL
IS
H
23
Display InformationBefore Use
Icon Description
Messages
Call
Multimedia
Internet
Organiser
Games
Utilities
Settings
Favorites
SIM services (Dependent on SIM card)
Top Menu Icons
EN
GL
IS
H
24
Using the Menu1. Open the folder and press < [Menu] key.
2. Press U or D key to select the desired menu, and press O [OK] key to execute. You could also directly execute themenu desired by pressing the corresponding number of themenu.
3. Press B to move to the preceding menu, and press E toreturn to the Standby Display.
Making a CallMaking a voice call1. Enter telephone numbers with area code in the Standby mode.
2. After entering the numbers, press S key to make the call.
3. Telephone numbers, name, current time, call duration time arepresented on the display.
4. After making the call, press E key or close the folder to endthe call.
Making an international call1. Press * key two times in sequence or hold this key down until
“+” is displayed.
2. Enter the phone number.
3. Press S [Send] key.
Standby DisplayBasic Use
EN
GL
IS
H
25
Basic Use
REFERENCE
• Entering and Saving Numbers- Pressing C key while entering numbers will delete
numbers sequentially from the last, and holding the buttondown will delete all numbers.
- Pressing E or B key while entering numbers willmove to the Standby Display.
- Press O [Save] to save the numbers you entered at theContacts Registration Display.
• Use Recent calls to Make a Call- Press S key from the Standby Display and select a
number from the Recent Call List, then press S key tomake a call.
- Hold down S key from the Standby Display to dial thelast call you made or received.
• Speed dial- Use speed dials saved in speed dial from the Standby
Display to make a call or send a message.
- Press > [Search] key from the Standby Display tosearch for a telephone number, then press S key tomake a call.
- Pressing >[Search] key while the phone is in use willenable search for other contacts; however, a call cannotbe made to the searched number.
EN
GL
IS
H
26
Receiving a CallReceiving a Voice Call1. In case Folder open is set in answer mode, you can answer a call
by opening a folder, or if the folding is open, by pressing anybutton except E and C when the folder is already opened.
2. If you set Send key in answer mode, you must press S toanswer the call.
3. After the call, press E key to end the call, unless the otherparty disconnects first.
Checking missed callsYou can check the number list of missed calls.
1. Missed Call and the number of missed calls are shown on theexternal LCD.
2. Pressing OK brings up the list of miss calls.
3. Select missed calls from the Last Call List and press O key to view the caller, telephone numbers and time call received.(Refer to Recent calls [Menu 2-1].)
How to use HotkeysUse speed dials from the Standby mode to move to selected menuquickly. (Refer to Key description.)
View MenuPress < [Menu] key from the standby mode to move to Menu,then press U or D key to execute various menus.
Standby DisplayBasic Use
EN
GL
IS
H
27
Basic Use
Searching ContactsPress > [Search] key from the standby mode to search fortelephone numbers from Contacts and address for sendingmessages.
Accessing InternetPress U key from the standby mode to move to the Internet Menu,where access to Internet is available. If you long press the key, thephone will access the Home page.
Message MenuPress R key from the standby mode will directly move to the Menu.Hold down R key will move directly to the Write Message display,allowing you to write a message immediately. If you hold down thekey, the phone moves to SMS write.
My MenuPress D key from the standby mode to directly move to My Menu,where you can add, delete, or edit the menu.
Profile SettingPress L key from the standby mode to move directly to the ProfileSetting, where you can change current prfile. If you hold down thekey, Quiet profile is activated.
GamesPress <game> key to directly move to Games menu.
EN
GL
IS
H
28
Standby DisplayBasic Use
MultimediaPress V key from the standby mode to directly move to the VODMenu, where you can access VOD service and play video.
CameraPress P key from the standby mode to directly move to theCamera Mode, where you can take pictures, record videos.
Voice RecordingPress Voice Recorder Key (See page17) at the upper portion of thephone from the standby mode to immediately record voice.
How to read received MessagesIcon and letters alerting the message arrival will be shown in theexternal LCD. Reading incoming messages will depend upon howyou preset, and you can change alerting mechanism under Settings[Menu 1-5].
How to change the Display ThemeYou can change Clock mode, Image and animation of DisplayTheme.
1. To change ‘Time’ or ‘Date format’, select ‘Phone’ from theSettings menu.
2. To change Clock mode (Analogue, Digital, Dual, Normal) or‘Display Theme’, select ‘Display’ from the Settings menu andselect ‘Screen theme’.
3. If you select ‘Image gallery’ from Multimedia, you can changeDisplay Theme into Image or Animation.
Basic Use
EN
GL
IS
H
29
How to adjust the Keypad toneUse side keys from the standby mode to adjust volume.
1. Press key on the side of the phone from the standby mode toincrease the volume.
2. Press key on the side of the phone from the standby mode toreduce the volume.
How to record a voiceIn a standby mode, you can record a voice by pressing VoiceRecorder Key (in the middle of the top).
1. If you press the key, the menu is moved to Voice recorder.
2. If you hold down the key, you can voice record directly.
Recent CallsYou can read the last dialed, missed and received calls.
Read Call List1. Press S key in the standby mode.
2. Select the item to read from the Last Call List, then press O[OK].
3. Read the caller, telephone numbers, and the time of call.
REFERENCE• In ‘Screen theme’ menu, you can also change the themes of
Power On/Off.
EN
GL
IS
H
30
Standby DisplayBasic Use
Saving Phone NumbersYou can save unregistered telephone numbers from the Recent calllist.
1. Select the unregistered telephone numbers from the Last CallList.
2. Select Save as new by pressing < [Option], to register a newname, then select icon to move to the Contact Registrationdisplay.
3. Select Add to existed by pressing < [Option] and register inContacts through the Name Search Display to register under anexisting name.
4. After registration, return to the Last Call List.
Deleting Call List1. Select the item you want to delete from the Call List, then press
< [Option] key.
2. Select Delete to delete the item you selected.
3. Select Delete all to delete the entire items.
Icons Used in the Recent call List
Incoming Call
Missed Call
Outgoing Call
Basic Use
EN
GL
IS
H
31
In call menu1. If you select New call, you can make a call.
2. If you select SMS, you can send a message during a call.
3. If you select Search, you can search phone book entries duringa call.
4. If you select DTMF On/Off, you can set DTMF.
5. If you select Mute On/Off, you can set Mute.
6. If you select Hold, you can hold an active call.
7. If you select Retrieve, you can retrieve a held call.
8. If you select End all calls, you can disconnect all calls.
9. If you select Call transfer, you can connect the recipient withanother party.
10. If you select Join calls, you can make a conference call.
11. If you select Release, you can disconnect one of the conferencecalls.
12. If you select Participants, you can check all participants inconference call.
13. If you select Swap, you can swap between an active call and aheld call.
Note• Some of these services are dependent on your network
operator.
Making and Receiving fax calls1. Set Baud rate.
2. Connect PC and phone by a data cable.
3. You can activate Fax program in PC.
Making and Receiving data calls1. Connect PC and phone by a data cable.
2. You can activate Fax program to transfer data.
EN
GL
IS
H
32
How to use Fax and DataAdditional Functions
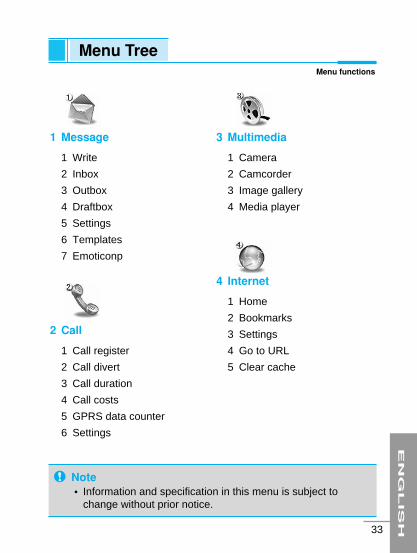
EN
GL
IS
H
33
1 Message
1 Write
2 Inbox
3 Outbox
4 Draftbox
5 Settings
6 Templates
7 Emoticonp
2 Call
1 Call register
2 Call divert
3 Call duration
4 Call costs
5 GPRS data counter
6 Settings
3 Multimedia
1 Camera
2 Camcorder
3 Image gallery
4 Media player
4 Internet
1 Home
2 Bookmarks
3 Settings
4 Go to URL
5 Clear cache
Menu TreeMenu functions
Note• Information and specification in this menu is subject to
change without prior notice.
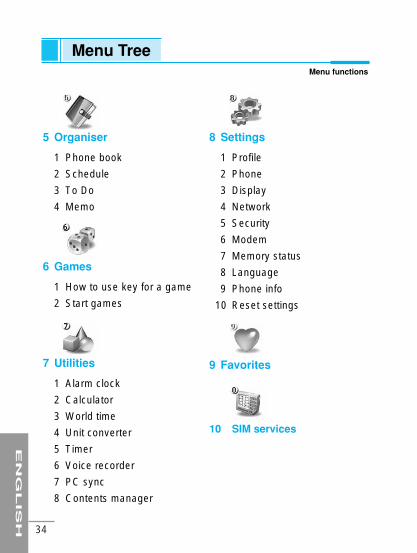
EN
GL
IS
H
34
5 Organiser
1 Phone book
2 Schedule
3 To Do
4 Memo
6 Games
1 How to use key for a game
2 Start games
7 Utilities
1 Alarm clock
2 Calculator
3 World time
4 Unit converter
5 Timer
6 Voice recorder
7 PC sync
8 Contents manager
8 Settings
1 Profile
2 Phone
3 Display
4 Network
5 Security
6 Modem
7 Memory status
8 Language
9 Phone info
10 Reset settings
9 Favorites
10 SIM services
Menu TreeMenu functions
EN
GL
IS
H
35
Message [Menu 1]Menu functions
You can use your phone to send short messages, multimediamessages, and E-mail. You can also read and store receivedmessages.
Write [Menu 1-1]You can write a multimedia message, email, or short message tosend or save as draft.
SMS 1. Select SMS from Write message and press O [OK].
2. Select SMS from among the types of messages to send, thenpress O [OK].
3. Select < [Option] and select Template, Emoticon to usestored sentences or emoticon while writing a message.
4. You can select a picture, animation or sound by pressing <[Option].
5. After entering all items, press O [Ok] to move to To Field.
6. You can input phone numbers under To Field or recall the phonenumbers from Phonebook by pressing > [Search].
7. Select O [Done] after inputting the phone number.
8. Select Send message and press O [OK].
9. Select Save to draftbox and press O [OK] to save in Draftbox.
10. When the message is sent, your phone asks whether you want tostore the edited message.
11. Press Yes if you want to store it.
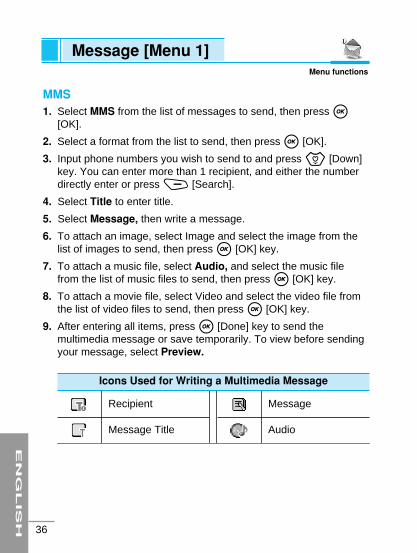
EN
GL
IS
H
36
MMS1. Select MMS from the list of messages to send, then press O
[OK].
2. Select a format from the list to send, then press O [OK].
3. Input phone numbers you wish to send to and press D [Down]key. You can enter more than 1 recipient, and either the numberdirectly enter or press > [Search].
4. Select Title to enter title.
5. Select Message, then write a message.
6. To attach an image, select Image and select the image from thelist of images to send, then press O [OK] key.
7. To attach a music file, select Audio, and select the music filefrom the list of music files to send, then press O [OK] key.
8. To attach a movie file, select Video and select the video file fromthe list of video files to send, then press O [OK] key.
9. After entering all items, press O [Done] key to send themultimedia message or save temporarily. To view before sendingyour message, select Preview.
Icons Used for Writing a Multimedia Message
Recipient
Message Title
Message
Audio
Message [Menu 1]Menu functions
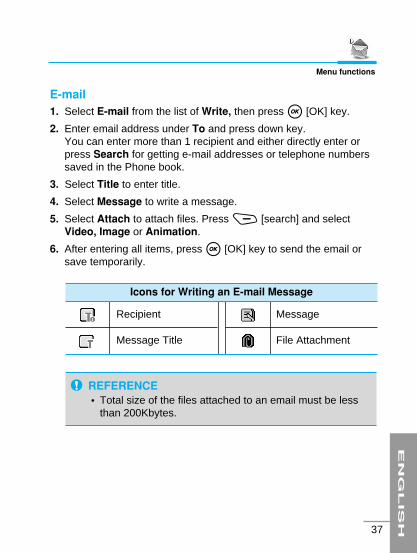
EN
GL
IS
H
37
Menu functions
E-mail1. Select E-mail from the list of Write, then press O [OK] key.
2. Enter email address under To and press down key.You can enter more than 1 recipient and either directly enter orpress Search for getting e-mail addresses or telephone numberssaved in the Phone book.
3. Select Title to enter title.
4. Select Message to write a message.
5. Select Attach to attach files. Press > [search] and selectVideo, Image or Animation.
6. After entering all items, press O [OK] key to send the email orsave temporarily.
Icons for Writing an E-mail Message
Recipient
Message Title
Message
File Attachment
REFERENCE• Total size of the files attached to an email must be less
than 200Kbytes.
EN
GL
IS
H
38
Message [Menu 1]Menu functions
How to Use T9
T9 allows you to input text quickly.
In T9, you only need to press the key with the correspondingletter once. This is based on a built-in dictionary to which youcan also add new words.
· Writing words by using T9. 1. Start writing a word by using the keys 2 to 9.
Press each key only once for one letter.To write for instance ‘girl’, press 4, 4, 7, 5. The characters that you enter appear blocked.
The word changes after each keystroke. Therefore youshouldn’t pay too much attention to how the word appearson the display until you have pressed all the appropriatekeys.
To delete a character to the left, press C. To change thecharacter case, press #. To insert several numbers,press and hold # and key in the numbers.
Alternatively : Press < [Symbol] and select insertsymbol. Select the desired character and press O.
2. When you have finished writing the word, check that theword is correct.If the word is correct : Press 0 and write the next
word.If the word is not correct : Search by scrolling with *.
3. To insert a punctuation mark, press 1 repeatedly untilthe desired mark appears.
EN
GL
IS
H
39
Menu functions
· Adding a new word in the dictionaryWhen no word is blocked, you can add a new word in thedictionary in the following way:
1. Press < [option] and select Add dictionary.
2. Key in the word by using T9 and press O.
· Changing the language or turning T9 off1. In the Write menu, press < [Option].
2. Select Dictionary and press O.
3. If you want to change the language used in T9, selectthe desired language and press O.If you want to turn T9 off, select Dictionary off andpress O.
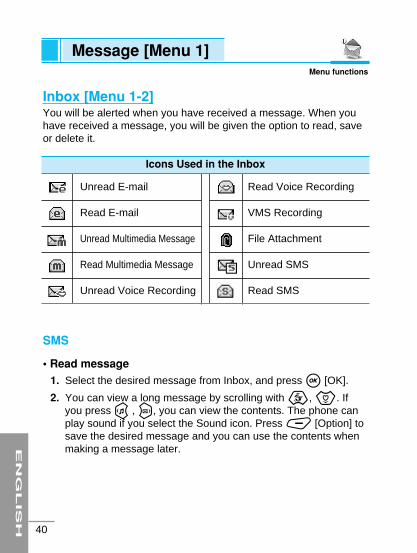
EN
GL
IS
H
40
Message [Menu 1]Menu functions
Inbox [Menu 1-2]You will be alerted when you have received a message. When youhave received a message, you will be given the option to read, saveor delete it.
SMS
• Read message1. Select the desired message from Inbox, and press O [OK].
2. You can view a long message by scrolling with U, D. Ifyou press L , R, you can view the contents. The phone canplay sound if you select the Sound icon. Press < [Option] tosave the desired message and you can use the contents whenmaking a message later.
Unread E-mail
Read E-mail
Unread Multimedia Message
Read Multimedia Message
Unread Voice Recording
Read Voice Recording
VMS Recording
File Attachment
Unread SMS
Read SMS
Icons Used in the Inbox
EN
GL
IS
H
41
Menu functions
• Read message option menu1. Reply : Replies immediately after viewing the message.
2. Forward : Forwards a selected message to another party.You can modify the message.
3. Get number: If the selected message has the phone numbers(more than 3 figures), you can extract and save itin Phonebook. Also, you can call this number.
4. Delete : Deletes the message.
• Option menuPress < [Option] from Inbox.
1. Multiple : Press O key to select one or multiple messages,delete then press > [Delete] key to delete the
selected messages.
2. Delete All : After entering your Security code, the phonedeletes all the messages in the inbox.
3. Delete : Deletes the message.
MMS
• Read message1. Select Message alert from Inbox, and press O. Then, the
phone will show the Delivery report.
2. Press < [Retrieve] to receive the desired message andshow it. Press O [ll] to pause, and press O [ ] to resume.
3. Press [Detail] for more details.
EN
GL
IS
H
42
• Read message option menu1. Reply : Replies immediately after viewing the message.
2. Forward : Forwards a selected message to another party.You can modify the message.
• Option menuPress < [Option] key from the Inbox.
1. Multiple delete : Press O key to select one or multiple messages,then press > key to delete the selectedmessages.
2. Delete All : After entering Security code, deletes all themessages in the inbox.
3. Information : Shows the size of the attachment file and the timewhen a message was received.
4. Delete : Deletes the message.
E-mail1. Select Option and select Get e-mail list.
2. When you have several registered Email accounts, you canselect an account.
3. Only mail headers will be received.
4. Press O to view the details of the mail headers. Or press< [Receive] to receive the mail contents.
5. Press < [Option] and select > [Delete] to erase e-mail ine-mail server and the Phone simultaneously.
6. Press < [Reply] to reply to the sender.
7. If there is an attached file, put cursor on it and press O to openit. (jpg, gif, mp4 formats are available)
Message [Menu 1]Menu functions
EN
GL
IS
H
43
Menu functions
• Option menuPress < [Option] key from the Inbox.
1. Get subjects : Only mail headers will be received.
2. Delete : Deletes the selected message.
3. Delete all : Deletes only e-mails in the Inbox. E-mails inyour phone are all deleted.
Outbox [Menu 1-3]Deletes or edits sent messages.
SMS
• Read1. Select a message to delete from the Outbox and press O.
2. Press U , D to view a long message, and press L , R toselect the contained contents. If Sound icon is selected, thesound plays.
3. Select > [Delete] to delete a message.
REFERENCE• The maximum mail list is 20.
• The size of received mail is up to 200KB includingattached files.
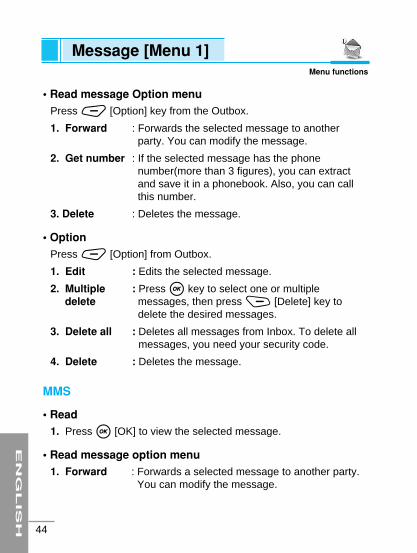
EN
GL
IS
H
44
• Read message Option menuPress < [Option] key from the Outbox.
1. Forward : Forwards the selected message to anotherparty. You can modify the message.
2. Get number : If the selected message has the phonenumber(more than 3 figures), you can extractand save it in a phonebook. Also, you can callthis number.
3. Delete : Deletes the message.
• OptionPress < [Option] from Outbox.
1. Edit : Edits the selected message.
2. Multiple : Press O key to select one or multiple delete messages, then press > [Delete] key to
delete the desired messages.
3. Delete all : Deletes all messages from Inbox. To delete allmessages, you need your security code.
4. Delete : Deletes the message.
MMS
• Read1. Press O [OK] to view the selected message.
• Read message option menu1. Forward : Forwards a selected message to another party.
You can modify the message.
Message [Menu 1]Menu functions

EN
GL
IS
H
45
Menu functions
• OptionSelect Inbox and press < [Option].
1. Edit : Edits a selected message.
2. Multiple : Deletes a message or messages.delete Select one or multiple messages and press
> [Delete].
3. Delete all : Deleted all messages from Inbox.
4. Delete : Deletes a selected message.
E-mail1. View an email by pressing O [Select].
2. Select the message you want to delete and press > [Delete].
• OptionPress < [Option] from Inbox.
You can edit or delete a message or messages by the Edit, Deleteand Delete all menu.
Draftbox [Menu 1-4]Message saved as draft or failed sending are saved in Draftbox.
SMS
• Edit1. Select a message you want to edit and press O [Select].
2. You can edit and send the message.
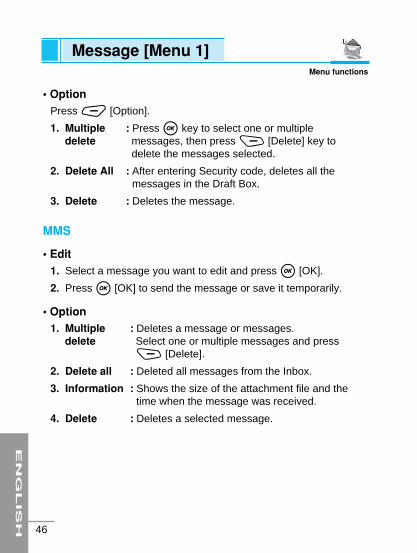
• OptionPress < [Option].
1. Multiple : Press O key to select one or multipledelete messages, then press > [Delete] key to
delete the messages selected.
2. Delete All : After entering Security code, deletes all themessages in the Draft Box.
3. Delete : Deletes the message.
MMS
• Edit1. Select a message you want to edit and press O [OK].
2. Press O [OK] to send the message or save it temporarily.
• Option1. Multiple : Deletes a message or messages.
delete Select one or multiple messages and press> [Delete].
2. Delete all : Deleted all messages from the Inbox.
3. Information : Shows the size of the attachment file and thetime when the message was received.
4. Delete : Deletes a selected message.
EN
GL
IS
H
46
Message [Menu 1]Menu functions
EN
GL
IS
H
47
Menu functions
E-mail1. Press O [OK] to edit a message.
2. Press > [Delete] to delete a message.
• OptionPress < [Option] from Inbox.
You can use the View details, Edit, Delete, and Delete all menu.
Settings [Menu 1-5]Sets matters pertaining to messages.
SMS
• Delivery reportsIf you set Yes in this menu, you can check whether your messageis sent to the other party successfully or not.
1. Select Delivery report and press O [Ok].
2. Press On to set Delivery report and press O [Ok]. Press Off tocancel it already set.
• Message typesText, Voice, Fax, X.400, E-mail, ERMES, National paging
Usually, the type of message is set to Text type. You can replaceyour text with the alternative formats, which are suitable for thedevice that will be received the message. Contact your serviceprovider for the availability of this function.
• Validity periodThis network service allows you to set how long your textmessages will be stored at the message centre.

EN
GL
IS
H
48
• Message centreYou can set the Service centre number when you send amessage.
1. Press O [Ok] and the phone will show Service centreaddress.
2. Press < [Edit] and write the desired address to set anew Service centre.
• Pay for replyWhen the other party replies to your message, you can pay forthis.
MMS
• Delivery report
- Report requestYou can check whether the outgoing message is sentsuccessfully.
- Report allowYou can send a message whether you receive the message ornot.
• Read reply
- Report requestYou can check whether the outgoing message is read or not.
- Report allowYou can send a message whether you read an incomingmessage or not.
Message [Menu 1]Menu functions
EN
GL
IS
H
49
Menu functions
• Auto retrieveSkips the message alert to directly view the original message.
• Validity periodThis network service allows you to set how long your textmessages will be stored at the message centre.
• Message timerSends a mail at an appointed time. The message can be sentimmediately, 1 min later, 5 min later, 1 Hr later, 5 Hr later, 1 Day later or 1 Week later to choose from.
• ConnectionYou can select a network and modify your mail server provider listset in the phone.
1. Access point : You can make a brief description on what this .description access point is for.
2. User name : User name to access the access point name.
3. Password : Password to access the access point name.
4. MMSC address : Sets primary MMSC and address using[Setup].
5. WAP IP address: Sets primary WAP gateway address and portnumber. and secondary WAP gateway addressand port number.
6. Bearer : Select GPRS or CSD using Right key >.For more information, contact your serviceprovider.
- Dial number : If you select CSD as Bear, you can input thedial number you want to key.
- Access point : If you select GPRS as Bearer, you can seename address of Gateway to contact e-mail server
provides. For more information, contact yourservice provider.
E-mail accountYou can set up to 20 e-mail accounts to use e-mail.
1. Account description : Explains what the account is needed for.
2. POP3 sever addr. : The server address to receive e-mail.
3. User name : User ID and Password to contact POP3server.
4. Password : Password to access the e-mail account.
5. SMTP server addr. : Input the IP address to send e-mail.(e.g:170.30.52.59)
6. E-mail address : You need email address to send e-mail.
Info. ServiceCell Broadcast messages (CB message) are text ones that are sentby the network to GSM phone users. The network provides generalinformation such as weather reports, traffic news, tax, pharmacies,and stock prices. Each type of information has the number;therefore, you can contact service provider. When you receive CBmessage, you can view the submenus below:
• CB On/OffYou can set whether you receive cell broadcast message or not.E
NG
LIS
H
50
Message [Menu 1]Menu functions
EN
GL
IS
H
51
Menu functions
• ChannelsIf you want to create new topics, press O [OK]. Then, you selectNew topics menu by pressing < [Select]. If you have alreadytopics, you can delete, edit, and activate by pressing > [Mark]or [Unmark].
• LanguagesYou can select the language pressing [Mark] or [Unmark]. Then,the cell broadcast message will be displayed in the language thatyou selected.
Voice mailIf you press < [Option], you can check the following optionmenus.
• AddYou can add new voice mail centre number.
• DeleteYou can delete the address of voice mail centre.
• Delete allYou can delete all voice mail address.
• EditYou can edit the address of voice mail centre.
Templates [Menu 1-6]Adds, edits, or deletes Templates.
1. Select Templates from the Message Menu, then press O [OK]key.
2. Select the term desired from the Preformatted and Emoticons,then press O [OK] key.
3. You can view the terms entered.
4. To edit the terms, press < [Option], and select Edit, thenpress O [OK].
5. To add terms, press > [Add], then write a term and press O[Save] key.
6. To delete terms, press Option, then press Delete or Delete All.
Emoticon [Menu 1-7]1. Select Emoticon from the Message Menu, then press O [OK]
key.
2. Select the term desired from the Preformatted and Emoticons,then press O [OK] key.
3. You can view the terms entered.
4. To edit the terms, press < [Option], and select Edit, thenpress O [OK].
5. To add terms, press > [Add], then write a term and press O[Save] key.
6. To delete terms, press Option, then press Delete or Delete All.
EN
GL
IS
H
52
Message [Menu 1]Menu functions
EN
GL
IS
H
53
Call [Menu 2]Menu functions
You can activate or cancel the function such as call divert, callsettings; in addition, you can check the cost and the duration of calls.
Call register [Menu 2-1]You can check the record of missed, received, and dialled calls. In the options of missed calls, received calls, and dialled numbersyou can check:
• You can call by this number.
• You can save the number in the phonebook.
• You can view the date and the time of the call.
• You can send SMS, MMS, and e-mail to the recorded number.
• You can delete the record.
Missed callsThis menu shows recently missed numbers. You can call thesenumbers, save and view date and time in this menu.
Received callsThis menu shows recently received numbers. You can call thesenumbers, save and view date and time.
Dialled callsThis menu shows recently dialed numbers. You can call thesenumbers, save and view date and time.
EN
GL
IS
H
54
All callsYou can save the phone number and check the date, time for a call.Or, you can call back to the other party.
Call divert [Menu 2-2]The Call divert service allows you to divert incoming voice calls, faxcalls, and data calls to another number. For details, contact your service provider.
1. Press < [Menu] in standby mode.
2. Select Call and Call divert menu.
All voice callsDiverts voice calls unconditionally.
If busyDiverts voice calls when the phone is in use.
if no replyDiverts voice calls which you do not answer.
If out of reachDiverts voice calls when the phone is switched off or out of coverage.
Call [Menu 2]Menu functions
EN
GL
IS
H
55
Menu functions
All fax callsDiverts to a number with a fax connection unconditionally.
All data callsDiverts to a number with a PC connection unconditionally.
• The submenusCall divert menus have the submenus as shown below.
• OnActivates the corresponding service.
- To Voicemail boxForwards to message centre. This function doesn’t include Alldata calls and All fax calls menus.
- To a phoneInput the number for diverting.
• OffDeactivates the corresponding service.
• View statusChecks the Status of the corresponding service.
EN
GL
IS
H
56
Call [Menu 2]Menu functions
Call duration [Menu 2-3]This function allows you to view the duration of incoming andoutgoing calls. You can clear the duration record by using Reset keyafter entering the security code.
Last callYou need to input Security code to delete it.
All callsIf you press < [Clear], you can delete the duration of Last call,received call, and outgoing call. You need to input Security code.
Received callsIf you press < [Clear], you can delete Received call duration.You need to input Security code.
Dialled callsIf you press < [Clear], you can delete outgoing call duration. Youneed to input Security code.

EN
GL
IS
H
57
Menu functions
Call costs [Menu 2-4]This network service allows you to check the cost of your last calland all call costs. To clear the counters, you need the PIN2 Code.You can set the cost limit by pressing On.
Last callThis function allows you to reset the last call costs. You need to inputthe PIN2 code.
All callsThis function allows you to reset the all call costs. You need to inputPIN2 code.
Cost settingsChanges the conditions to show call costs. Input PIN2
to set the conditions of call cost.
• Set call costThe phone can show the call cost limits in terms of charging unitsor the desired currency. Contact your service provider for chargingunit prices.
• Set limitThis network service allows you to limit the costs of your calls to aselected number of charging units.
EN
GL
IS
H
58
Call [Menu 2]Menu functions
- OnIf you have selected On, the number of remaining units is shown.You can make and receive charged calls as long as the specifiedcost limit is not exceeded. You can set the cost limit by pressingOn.
- OffIf you have selected Off, Call cost limit is canceled.
GPRS data counter [Menu 2-5]You can check the amount of data transferred over the network viaGPRS. You need security code. If you press O [OK], you cancheck the following:
Last sent dataShows bytes of last sent GPRS data.
Last received dataShows bytes of last received GPRS data.
All sent dataShows bytes of all sent GPRS data you have sent.
All received dataShows bytes of all sent GPRS data.
REFERENCE• The actual cost invoiced for calls by your service provider
may vary depending upon network features, rounding-offfor billing, tax, etc.

EN
GL
IS
H
59
Menu functions
Settings [Menu 2-6]You can set the menu relevant to a call by pressing [OK] in thismenu.
Call waitingIf this service is enabled, you can accept a waiting (incoming) call.
• ActivateActivating the corresponding service.
• CancelDeactivates the corresponding service.
• View statusChecks the status of the service.
Send my number(network and subscription dependent)
You can send your phone number to the other party dependent onsetting this function.
• Set by networkIf you select this, you can send your phone number depending ontwo line service such as line 1 or line 2.
• OnIf you select this, you can send your phone number to the otherparty. That is, your phone number will be displayed on receiver’sphone.
EN
GL
IS
H
60
Call [Menu 2]Menu functions
• OffIf you select this, your phone number will not be displayed onreceiver’s phone.
Call rejectYou can set or cancel the list to reject an incoming call.
1. If you select Deactivate and press O [OK], the lists existed arecanceled.
2. If you select Reject on list and press > [Setup], you can seethe lists. Press > [Add] to input a phone number you want toreject.
3. You can set all the numbers stored in your phone if you selectReject all and press O [OK].
Auto responseIf you can’t answer a call, you can set Auto response after a setnumber rings.
1. You can set ON/ OFF by pressing L , R key.
2. You can select one of Normal, Driving, User mode or Headsetmode by pressing L , R key.
3. After selecting a mode, press O [OK] key.
4. If you want to change or listen the three modes in advance, press< [Option] and select Listen or Record.
EN
GL
IS
H
61
Menu functions
Hold onYou can hold a call temporarily, and then activate answer message.
1. You can set Activate/ Deactivate by pressing L , R key.
2. You can select one of Normal, Diving, or User mode by pressingL , R key.
3. After selecting a mode, press O [OK] key.
4. If you want to change or listen the three modes in advance, press< [Option] and select Listen or Record.
Auto redial
• OnWhen this function is activated, the phone will automatically try toredial in the case of failure to connect a call.
• OffYour phone will not make any attempts to redial when the originalcall has not connected.
Answer mode
• Send keyIf you select this menu, you can only answer incoming calls bypressing the S key.
• On flip openIf you select this menu, you can receive an incoming call byopening folder. If the folder already is open, you can answer thecall by pressing any key except E [End] and > [Reject] key.
Minute minderIf you select On, you will hear a beep for every completed minutewhile the call is active.
EN
GL
IS
H
62
Multimedia [Menu 3]Menu functions
Camera, movie camera, image gallery and play video functions.
Camera [Menu 3-1]
Camera1. Select Camera, then press O [OK] button.
2. Focus on the subject to capture the image from the CameraStandby Mode, then press O [Take] button.
3. Press > [Gallery] button to view the recorded film.
• Adjust SizeAdjusts the size of the image to be saved.
1. Press < [Format] button.
2. Select the size of the image to be saved, then press O [OK]button.
REFERENCE• Images will not be saved and a warning message will appear
when the camera memory capacity is exceeded.
REFERENCE• Large Size Photo : 352 x 288 (CIF)
• Mid Size Photo : 176 x 180 (LCD)
• Small Size Photo : 176 x 144 (QCIF)
EN
GL
IS
H
63
Menu functions
Camcorder [Menu 3-2]1. Select Camcorder, then press O [OK] button.
2. Focus on the subject you want to capture from the CameraStandby Mode, then press O [Rec.] button. Time available forfilming the movie is denoted in the lower portion of the display. Tosave the movie after filming, press O [Save] button.
3. Press > [Player] button to view the filmed movie.
Image gallery [Menu 3-3]Shows the images set or saved in Image gallery. Select Imagegallery from the Multimedia Menu, then press O [OK] button.
Viewing Magnified Image1. Select the small image you intend to view by using U , D ,
L, and R , then press O [View] button.
2. Image title will appear in the title line of the display and themagnified image will show.
3. Use R or L from the Magnified Image Display to view the nextor previous image.
REFERENCE• Filming automatically stops when the movie camera capacity
is exceeded.
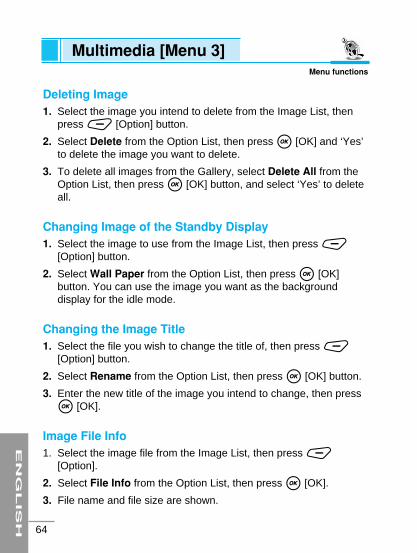
EN
GL
IS
H
64
Multimedia [Menu 3]Menu functions
Deleting Image1. Select the image you intend to delete from the Image List, then
press < [Option] button.
2. Select Delete from the Option List, then press O [OK] and ‘Yes’to delete the image you want to delete.
3. To delete all images from the Gallery, select Delete All from theOption List, then press O [OK] button, and select ‘Yes’ to deleteall.
Changing Image of the Standby Display1. Select the image to use from the Image List, then press <
[Option] button.
2. Select Wall Paper from the Option List, then press O [OK]button. You can use the image you want as the backgrounddisplay for the idle mode.
Changing the Image Title1. Select the file you wish to change the title of, then press <
[Option] button.
2. Select Rename from the Option List, then press O [OK] button.
3. Enter the new title of the image you intend to change, then pressO [OK].
Image File Info1. Select the image file from the Image List, then press <
[Option].
2. Select File Info from the Option List, then press O [OK].
3. File name and file size are shown.
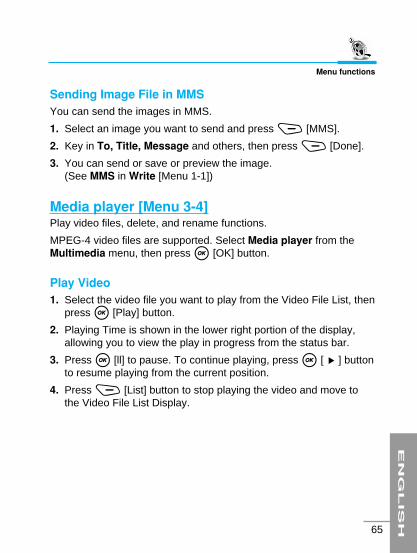
EN
GL
IS
H
65
Menu functions
Sending Image File in MMSYou can send the images in MMS.
1. Select an image you want to send and press > [MMS].
2. Key in To, Title, Message and others, then press > [Done].
3. You can send or save or preview the image.(See MMS in Write [Menu 1-1])
Media player [Menu 3-4]Play video files, delete, and rename functions.
MPEG-4 video files are supported. Select Media player from theMultimedia menu, then press O [OK] button.
Play Video1. Select the video file you want to play from the Video File List, then
press O [Play] button.
2. Playing Time is shown in the lower right portion of the display,allowing you to view the play in progress from the status bar.
3. Press O [ll] to pause. To continue playing, press O [ ] buttonto resume playing from the current position.
4. Press > [List] button to stop playing the video and move tothe Video File List Display.
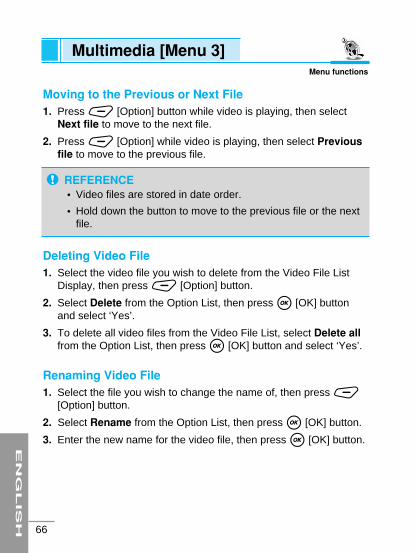
EN
GL
IS
H
66
Multimedia [Menu 3]Menu functions
Moving to the Previous or Next File1. Press < [Option] button while video is playing, then select
Next file to move to the next file.
2. Press < [Option] while video is playing, then select Previousfile to move to the previous file.
Deleting Video File1. Select the video file you wish to delete from the Video File List
Display, then press < [Option] button.
2. Select Delete from the Option List, then press O [OK] buttonand select ‘Yes’.
3. To delete all video files from the Video File List, select Delete allfrom the Option List, then press O [OK] button and select ‘Yes’.
Renaming Video File1. Select the file you wish to change the name of, then press <
[Option] button.
2. Select Rename from the Option List, then press O [OK] button.
3. Enter the new name for the video file, then press O [OK] button.
REFERENCE• Video files are stored in date order.
• Hold down the button to move to the previous file or the nextfile.
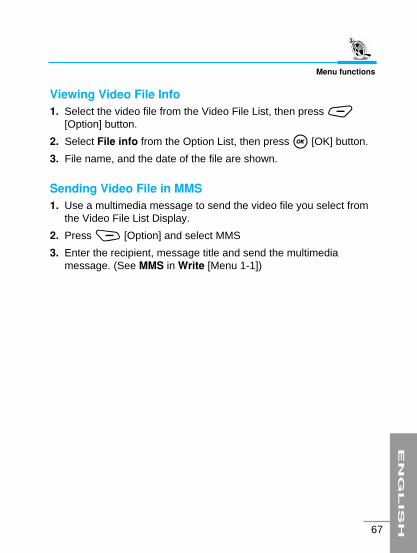
EN
GL
IS
H
67
Menu functions
Viewing Video File Info1. Select the video file from the Video File List, then press <
[Option] button.
2. Select File info from the Option List, then press O [OK] button.
3. File name, and the date of the file are shown.
Sending Video File in MMS1. Use a multimedia message to send the video file you select from
the Video File List Display.
2. Press > [Option] and select MMS
3. Enter the recipient, message title and send the multimediamessage. (See MMS in Write [Menu 1-1])
EN
GL
IS
H
68
Internet [Menu 4]Menu functions
The phone supports WAP (Wireless Application Protocol). PressInternet from Top menu or press Internet Hot Key. Then, pressHome.
Home [Menu 4-1]You can connect the homepage of the activated profile.
Bookmarks [Menu 4-2]Scroll to the required bookmark and press < [Option] key tooperate the following options.
• Edit : Edits the title and address of bookmark.
• Delete : Deletes the selected bookmark.
• Delete all: Deletes all bookmarks.
• Add : Saves a new bookmark manually.
REFERENCEWhat is a Wireless Internet?
• Refers to the wireless access to the Internet. The currentaccess methods include modem and wires, whereas thewireless utilizes the wireless network of mobile phones.With your phone, you could access the Internet to obtaininformation on games, entertainment, club activities,securities, news, weather, and all others any time and anywhere.
EN
GL
IS
H
69
Menu functions
Settings [Menu 4-3]You have to set the following items before connecting the internet.You can make up to 9 profiles.
HomepageThis setting allows you to enter the address (URL) of a site you wantto use as homepage. You do not need to type “http://” at the front ofeach URL the WAP Browser will automatically add it.
IP addressInput the IP address and the gateway which you want to connect to.
Connection modeAllows you to select Connection Oriented or Connectionless.
SecurityThis option can be set None or Secure depending on the gateway. Ifyou want to connect Secure, select Secure. If not, select None. Thegateway should support this option.
REFERENCE• If any bookmarks are not saved, only the “Add new” menu is
available.
EN
GL
IS
H
70
Internet [Menu 4]Menu functions
Idle Time outBy setting the time limit (10~600 sec.), the service will bedisconnected if there is no data transfer.
Bearer
• GPRS APN : Input the Access point name to connect to the
external network.
User ID & Password : Input User ID and password to connect to thegateway.
• CSDDial number : Input the number to connect the gateway.
User ID & Password : Input User ID and password to connect to thegateway.
Baud rate : Select the baud rate, 14400 bps or 9600 bps.
Call type : Select ISDN or Analogue.
Go to URL [Menu 4-4]You can move to the site that you want. You need to type the URLaddress of the site before connection.
Clear cache [Menu 4-5]The contents of Cache memory will be cleared.
EN
GL
IS
H
71
Menu functions
• Ring tone DownloadYou can download up to 10 Ring tones directly through theWAP service if supported. The last ring tone is deleted whendownloaded ringtones are more than 10. You can use them inProfile menu.
When you download Ringtone, the phone asks whether youplay it.
1. If you select [Play], the phone plays the ring tone, you will beasked whether you want to save it.
2. If you don’t select [Play], you will be asked whether you wantto save the ringtone. If not, the ringtone is deleted.
EN
GL
IS
H
72
Organiser [Menu 5]Menu functions
Phone book [Menu 5-1]You can search or add phone numbers and corresponding names.You can also give each person a ring tone and photo image. Speed-dial allows you to dial the numbers directly. You can also access thismenu through Organisers.
Add newYou can add a new entry to the phone book by using this function.
1. Select Add new from the Menu, then press O [OK] key.
2. Move to Name, and then input the name.
3. Move to Number/E-mail, then enter contacts and icons. You canenter more than one contact or e-mail.
4. To designate speed dials, press < [Option] and select “Speeddial”. Select an empty speed-dial and press O [OK]. You couldeither change or cancel speed dials.
5. Move to Group and select one.
6. Move to Memo and write a memo.
7. Move to Image and press > [Setup], you can previously,directly record, or designate a previously saved image.
8. Move to Bell and press > [Setup], then select the ring toneyou require.
9. Move to tab area and press > or < to toggle between thephone and SIM memories.
REFERENCE• To delete all numbers and letters you are entering, hold
down C key.
EN
GL
IS
H
73
Menu functions
SearchAllows you to search by name, contact number, and group.
• Name1. Select Search from the Menu.
2. Press L or R key to select Name, then enter name and pressO [OK] key.
3. All the names in the mobile phone and SIM are displayed.
4. To view the details of the contact, select the name from thesearch result list and press O [OK]. Press O [OK] to return tothe search result list.
Name
Number
Group
Memo
Image
Bell
Icons for Registering Contacts
General
Mobile
Home
Office
Pager
Fax
Icons for Telephone Numbers
EN
GL
IS
H
74
Organiser [Menu 5]Menu functions
• Group1. Select Search from the Menu.
2. Press R or L to select Group, then select a group and press O[OK].
3. All the contact numbers in the mobile phone and SIM aredisplayed.
4. To view the details of a contact, select the name from thesearch result list and press O [OK]. Press O [OK] to return tothe search result list.
• Contact1. Select Search from the Menu.
2. Press R or L to select Contact, then enter contactnumber/emails and press O [OK].
3. All the contact numbers/emails in the mobile phone and SIM aredisplayed.
4. To view the details of a contact, select the name from thesearch result list and press O [OK]. Press O [OK] to return tothe search result list.
• Searching All Contact Numbers1. Select Search from the Menu, then press O [OK].
2. Press R or L to select Name or Contact.
3. Press O .4. All contact numbers are shown.
EN
GL
IS
H
75
Menu functions
• Making a Call with the Searched Number1. Once you have found the required entry, press the S to dial
the number.
• Editing, Sending, Copying, and Moving Contact NumberPress < [Option] for various functions.
1. Edit : Edits details of contact number.
2. Send Message : Sends a drafted multimedia, email, and favoritemessage to the intended contact number.
3. Copy : Copies the selected contact number to SIM orphone.
4. Move : Moves the selected contact number to SIM orphone.
5. Delete : Deletes the selected contact number.
Caller Groups1. Select Caller Groups, and then press O [OK].
2. Add a new group by pressing < [Option].
3. To delete a group, press < [Option], and select Delete.
4. To edit a group, press > [Option], and then select Edit.
5. To set a group ring tone, press < [Option], and then selectGroup ring tone. After you’ve assigned a group a ring tone, youcan remove the ring tone by pressing Unset melody.
EN
GL
IS
H
76
Organiser [Menu 5]Menu functions
Speed dialTo make calls easily, you can designate a speed dial to frequentlyused directory numbers.
• Viewing Details of Speed Dial1. Select Speed dial from the Menu, and press O [OK].
2. To view details of a speed dial, select an item in the speed diallist and press O [OK].
• Assigning Speed dials1. Select Speed dial from the Menu, and press O [OK].
2. Select an available speed dial number and press > [Assign].
3. Select a directory number to assign the speed dial and pressO [OK].
• Deleting and Moving Speed dials1. Select Speed dials from the Menu, and press O [OK].
2. To delete existing speed dials, select the speed dials you wantto delete, then press < [Option] and select Delete.
3. To delete all existing speed dials, select Delete all.
4. To move existing speed dials, select Move and select thenumber to move.
EN
GL
IS
H
77
Menu functions
Clear phonebookAllows you to delete all contacts stored in your mobile phone andSIM card.
1. Select Clear phonebook, then press O [OK].
2. To delete all contacts stored in your mobile phone, select Clearphonebook and SIM. Then enter Phone code.
3. To delete all contacts on your SIM card, select Clear phonebookand SIM. Then enter PIN for the SIM card.
Service dial numberCheck the Service dial numbers set by your service operator.
Copy allAllows you to copy contacts between your mobile phone’s memoryand the SIM card.
1. Select Copy all from the Menu, then press O [OK].
2. Select Phone to SIM or SIM to Phone and enter PIN or Phonecode.
Move allAllows you to move names and numbers from the phone’s memoryto the SIM card’s memory and vice versa.
1. Select Move all from the Menu, then press O [OK].
2. Select Phone to SIM or SIM to Phone and enter PIN or Phonecode.

EN
GL
IS
H
78
Organiser [Menu 5]Menu functions
Schedule [Menu 5-2]Allows organize your schedule, repeat the schedule and set thealarm.
View Schedule1. Select Schedule from Organiser, then press O [OK] button.
2. Press U or D or L and R key to select the required date,and press O [OK] button.
3. Select the schedule you want from the Schedule List for thecorresponding date.
4. You can view the title, time, repetition and alarm setting.
REFERENCE• The selected date is underlined and displays how many
schedules are set for that day.You can also jump to other dates:
• 1 : Previous day
• 3 : Next day
• 4 : Previous month
• 6 : Next month
• 5 : Today
• 7 : Last year
• 9 : Next year
EN
GL
IS
H
79
Menu functions
Add1. Select Schedule from Organiser, then press O [OK].
2. Select the date you want to add a schedule to, then press >[Add].
3. Input Time and Subject.
4. Select Repeat, then select from No repeat, Daily, Weekly,Monthly, and Yearly.
5. Select Alarm, then select from No Alarm, On time, Before 15mins, Before 30 mins, Before 1 hour, Before 1 day, Before 3days, and Before 1 week.
6. Select Ring Tone, then select type of Ring.
7. Press O [OK] key to add the schedule.
Title
Time
Repetition
Alarm
Ring Tone
Date
Scheduler Icons
EN
GL
IS
H
80
Organiser [Menu 5]Menu functions
Monthly schedule1. Select Schedule from Organiser, then select the date you wish
to add a schedule to then, and press < [Option].
2. Today : Views today’s date. Select Today, then press O[OK] key.
3. Go to date : Jumps to a specific date.Enter the desired date, then press O [OK] key.
4. Search : Enter the words you want to search for, then pressO [OK] key.
5. Delete : Select Delete past to delete all the previousschedules. To delete schedules for a specific timeperiod, select Multiple delete. To delete allschedules, select Delete all, then enter Securitycode.
6. Holiday : You can set a temporary holiday to be shown in theschedule.
REFERENCE• For a preset holiday, Holiday will appear as Reset holiday,
while selecting Reset holiday will cancel the holidayscheduled.
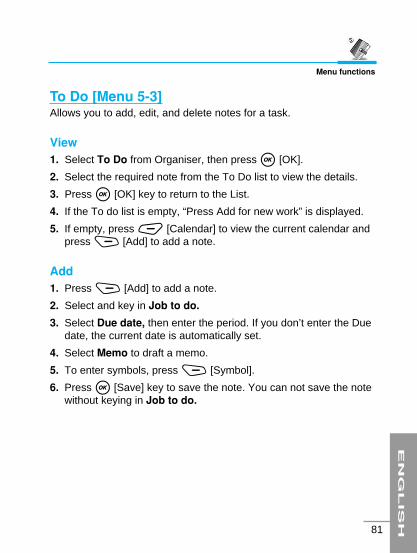
EN
GL
IS
H
81
Menu functions
To Do [Menu 5-3]Allows you to add, edit, and delete notes for a task.
View1. Select To Do from Organiser, then press O [OK].
2. Select the required note from the To Do list to view the details.
3. Press O [OK] key to return to the List.
4. If the To do list is empty, “Press Add for new work” is displayed.
5. If empty, press < [Calendar] to view the current calendar andpress > [Add] to add a note.
Add1. Press > [Add] to add a note.
2. Select and key in Job to do.
3. Select Due date, then enter the period. If you don’t enter the Duedate, the current date is automatically set.
4. Select Memo to draft a memo.
5. To enter symbols, press > [Symbol].
6. Press O [Save] key to save the note. You can not save the notewithout keying in Job to do.
EN
GL
IS
H
82
Organiser [Menu 5]Menu functions
Option1. Select To Do from the To Do List, then press < [Option] key.
2. Delete : Deletes the selected note
3. Delete All : Deletes all the notes.
4. Done/Not yet : Shows whether the task is done. If the task is notDone, an arrow will appear on the note. If the taskis done, Not yet is shown. If you select Not yet, thearrow will disappear.
5. View calendar : Shows the current month calendar.
6. Add : Adds a note.
Memo [Menu 5-4]Allows you to save, delete, and edit a memo.
View 1. Select Memo from Organiser, O [OK].
2. Select the memo you want, then press O [OK].
Add 1. Press > [Add] key from the Memo Box list or select Add from
the Option menu.
2. Write a memo, then press O [Save] key to save the Memo.
REFERENCE• Completed To Dos are not applicable in the Done option.
• Incomplete To Dos are not applicable in the Not yet option.
EN
GL
IS
H
83
Menu functions
Delete1. Select the memo you want to delete, then press < [Option].
2. Select Delete to delete the memo.
3. Select Delete all and input Security code to delete all memos inthe list.
4. Select the displayed memo, press > [Delete].
Edit1. Select the memo you want to edit from the Memo Box list, then
press O [OK] key.
2. Press < [Edit] key to edit the memo you have selected.
Set memo1. Select a memo you want to change and press < [Option].
2. Select Lock to change Memo into a Secret memo.
3. Select Unlock to change a Secret memo into Memo. You need toinput your security code to change a Secret memo into a Memo.
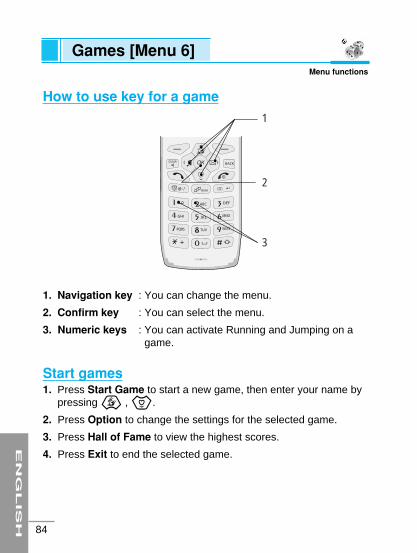
EN
GL
IS
H
84
How to use key for a game
1. Navigation key : You can change the menu.
2. Confirm key : You can select the menu.
3. Numeric keys : You can activate Running and Jumping on agame.
Start games1. Press Start Game to start a new game, then enter your name by
pressing U , D.
2. Press Option to change the settings for the selected game.
3. Press Hall of Fame to view the highest scores.
4. Press Exit to end the selected game.
1
2
3
Games [Menu 6]Menu functions
EN
GL
IS
H
85
Utilities [Menu 7]Menu functions
Offers useful functions such as alarm clock, calculator, world time,unit converter, timer, and preformatted box.
Alarm clock [Menu 7-1]1. Select Alarm clock from Utilities, then press O [OK] button.
2. The current time is shown.
3. Press L or R button, or press > [Setup] button to select‘On’ and ‘Off’ alarm.
4. Enter the Alarm time.
5. Press L or R press > [Setup] button to select from 5different modes.
6. Press L or R press > [Setup] button to select the ringtone.
7. Press O [Save] button to save the alarm settings.
8. When the alarm goes off, you can set the alarm to Off by pressingO [OK] or closing the flip. If you press < [Snooze] or let it goon, Snooze is activated and the alarm will go off in 5 minutes. Ifyou don't set it to Off, snoozed alarm works for 6 times.
EN
GL
IS
H
86
Calculator [Menu 7-2]Allows you to perform addition (+), subtraction (–), multiplication (x),and division (÷).
1. Select Calculator from Utilities, then press O [OK] button.
2. Number : Enter numbers.
3. +, –, *, ÷ : Press, L (+), R (–), U (x), and D (÷).
4. Decimal : Press <[.].
5. Brackets : Press .
6. Positive/Negative number : Press V to convert betweenpositive number and negative number.
7. Result : Press O [=].
8. Clear : Press > [AC] to clear.
9. Previous result : Press O[OK] when the display shows theresult.
10. Using the current result : Press R (+), L (-), U (x), D(÷) when the display shows the result.
World time [Menu 7-3]Allows you to view clocks of the world’s major cities.
1. Select World time from Utilities, then press O [OK] button.
2. Press R, L to view the time clocks of the world’s major cities.
3. To change the default city, select Home.
Utilities [Menu 7]Menu functions
EN
GL
IS
H
87
Menu functions
Unit converter [Menu 7-4]Allows you to convert units of foreign currency exchange rate, length,area, weight, and volume.
Currency1. Select Unit converter from Utilities, then press O [OK] button.
2. Select Currency.
3. Press U or D to select Domestic or Foreign and entervalue.
4. Press > [Rate] button to enter exchange rate.
5. Press O [OK] button to view the conversion value.
6. To re-enter, press < [Reset] button, and enter the item again.
Length, Area, Weight, and Volume1. Select Unit converter from Utilities, then press O [OK] button.
2. Select Length, Area, Weight, or Volume from the Unit ConverterList.
3. Press U or D to select the conversion format, and entervalue.
4. Press > [Rate] button to select the unit you want to convert.
5. Press O [OK] button to view the converted value.
6. To re-enter, press < [Reset] button, and enter the item again.
EN
GL
IS
H
88
Utilities [Menu 7]Menu functions
Timer [Menu 7-5]Allows you to use, D-Day Counter, and Stopwatch.
D-day counterDenotes the number of remaining days for a specific event.
1. Select D-day counter from the Timer List, and press O [OK]key.
2. Select the event you want, and press O [OK] key to view thenumber of remaining days.
3. To delete the corresponding event or all events, press< [Option] key from the D-day Count List, then select Deleteor Delete All.
4. To add an event, press > [Add] key from the D-day CountList.
5. To edit, select the corresponding event from the D-day Count List,then press O [Select] key, and press < [Edit] key to edit thecorresponding event.
StopwatchAllows you to perform a stopwatch function.
1. Select Stopwatch from the Timer list, then press O [OK] key.
2. Press O [Go] key to start the stopwatch.
3. Press < [Lap] key while the stopwatch is in operation torecord time.
4. Press O [Stop] key to pause the stopwatch.
5. Press O [Go] key to resume the stopwatch.
6. Press > [Reset] key to reset the stopwatch.
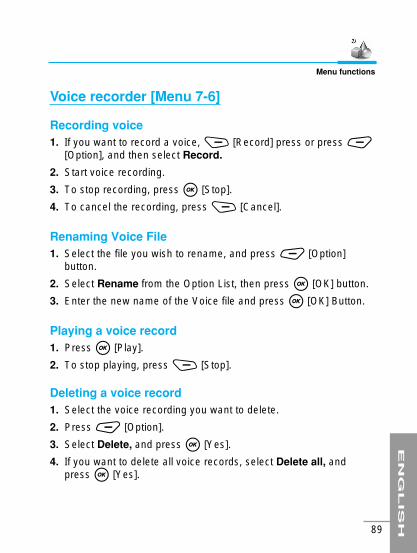
EN
GL
IS
H
89
Menu functions
Voice recorder [Menu 7-6]
Recording voice1. If you want to record a voice, > [Record] press or press <
[Option], and then select Record.
2. Start voice recording.
3. To stop recording, press O [Stop].
4. To cancel the recording, press > [Cancel].
Renaming Voice File1. Select the file you wish to rename, and press < [Option]
button.
2. Select Rename from the Option List, then press O [OK] button.
3. Enter the new name of the Voice file and press O [OK] Button.
Playing a voice record1. Press O [Play].
2. To stop playing, press > [Stop].
Deleting a voice record1. Select the voice recording you want to delete.
2. Press < [Option].
3. Select Delete, and press O [Yes].
4. If you want to delete all voice records, select Delete all, andpress O [Yes].
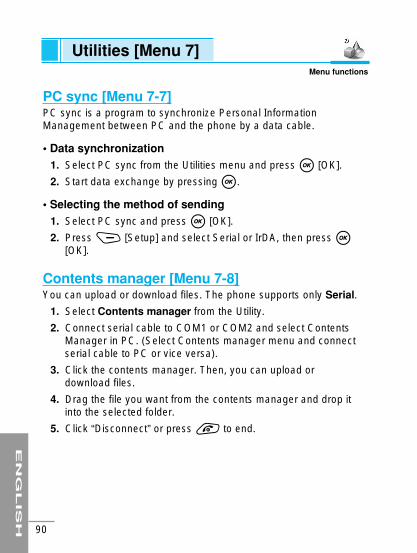
PC sync [Menu 7-7]PC sync is a program to synchronize Personal InformationManagement between PC and the phone by a data cable.
• Data synchronization1. Select PC sync from the Utilities menu and press O [OK].
2. Start data exchange by pressing O.
• Selecting the method of sending1. Select PC sync and press O [OK].
2. Press > [Setup] and select Serial or IrDA, then press O[OK].
Contents manager [Menu 7-8]You can upload or download files. The phone supports only Serial.
1. Select Contents manager from the Utility.
2. Connect serial cable to COM1 or COM2 and select ContentsManager in PC. (Select Contents manager menu and connectserial cable to PC or vice versa).
3. Click the contents manager. Then, you can upload or download files.
4. Drag the file you want from the contents manager and drop itinto the selected folder.
5. Click “Disconnect” or press E to end.
EN
GL
IS
H
90
Utilities [Menu 7]Menu functions
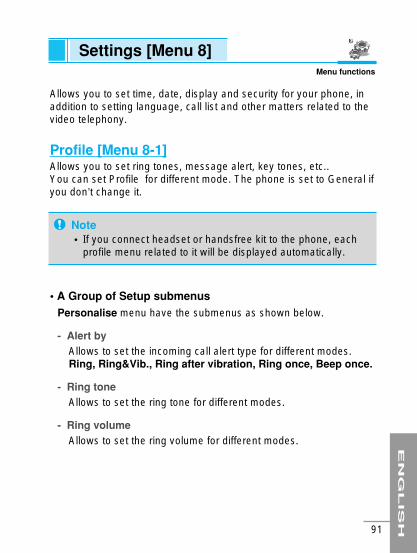
EN
GL
IS
H
91
Settings [Menu 8]Menu functions
Allows you to set time, date, display and security for your phone, inaddition to setting language, call list and other matters related to thevideo telephony.
Profile [Menu 8-1]Allows you to set ring tones, message alert, key tones, etc.. You can set Profile for different mode. The phone is set to General ifyou don’t change it.
• A Group of Setup submenusPersonalise menu have the submenus as shown below.
- Alert byAllows to set the incoming call alert type for different modes.Ring, Ring&Vib., Ring after vibration, Ring once, Beep once.
- Ring toneAllows to set the ring tone for different modes.
- Ring volumeAllows to set the ring volume for different modes.
Note• If you connect headset or handsfree kit to the phone, each
profile menu related to it will be displayed automatically.
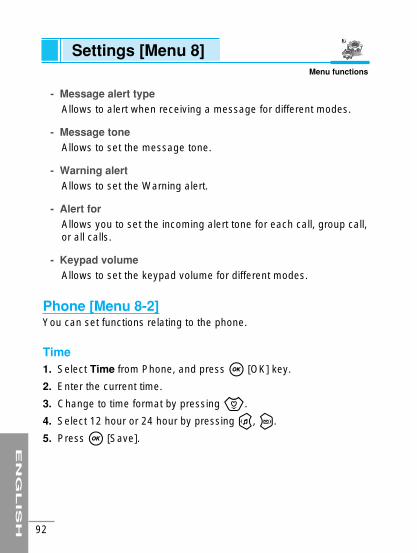
Settings [Menu 8]Menu functions
- Message alert typeAllows to alert when receiving a message for different modes.
- Message toneAllows to set the message tone.
- Warning alertAllows to set the Warning alert.
- Alert forAllows you to set the incoming alert tone for each call, group call,or all calls.
- Keypad volumeAllows to set the keypad volume for different modes.
Phone [Menu 8-2]You can set functions relating to the phone.
Time1. Select Time from Phone, and press O [OK] key.
2. Enter the current time.
3. Change to time format by pressing D.
4. Select 12 hour or 24 hour by pressing L, R.
5. Press O [Save].
EN
GL
IS
H
92

EN
GL
IS
H
93
Menu functions
Date1. Select Date from Phone, then press O [OK] key.
2. Enter the current date.
3. Change to date format by pressing D .
4. Select DD/MM/YYYY, MM/DD/YYYY or YYYY/MM/DD you wantby pressing L, R.
Y: Year
M: Month
D: Day
5. Press O [Save].
Current profile setupYou can change the current profile setup in this menu.For the details, refer to Menu 8-1.
Display [Menu 8-3]Allows you to set features such as backlight, contrast, theme, initialdisplay title etc. To set the display, select Display from the PhoneManagement List, then press O [OK] key
BacklightAllows you to set lighting functions such as backlight and others. Toset lighting, select Backlight from the Display, then press O [OK]key.
• NormalTurns off all the backlights 10 seconds after the last key waspressed.
• SavingTurns off al the backlights 5 seconds after the last key waspressed.
• MinimumTurns off all the backlights.
• Manual setting1. Select Main LCD/Duration/Keypad from the Manual setting,
and press O.
2. Select Duration, enter the amount of time you wish thebacklight to operate for.
3. Select Always On and the backlight is always on.
4. Select Always Off and the backlight is always off.
EN
GL
IS
H
94
Settings [Menu 8]Menu functions
EN
GL
IS
H
95
Menu functions
• BrightnessYou can select level of brightness among Bright, Medium, orDark.
ContrastAllows you to adjust the display contrast.
1. Select LCD contrast from the Display Setting List, then press O[OK] key.
2. Press L, R key to adjust the display contrast.
3. Press O [OK] key to save to the selected display contrast.
Screen theme [Menu 8-3-3]Allows you to set the Display Theme. You can set your display forIdle mode, Power On, and Power Off. Themes are selected fromthe Image Gallery.
1. Select Screen theme from the Display Setting List, and pressO [OK] key.
2. Select the wallpaper for: Idle mode, Power on or Power Off.
3. Press L, R, U and D key to select an image oranimation.
REFERENCE
• Press < [View] to increase the image.
Standby titleYou can set the standby title display or not. If you select On, you canset a message that will be displayed when you are in the idle mode.
Network [Menu 8-4]You can select a network, which will be registered eitherautomatically or manually. Usually, the network selection is set toAutomatic.
AutomaticIf you select Automatic mode, the phone will automatically search forand select a network for you. Once you have selected Automatic,the phone will be set to Automatic even though the power is off andon.
ManualIf you choose Manual, the phone will display the available networklists and attempt to select the network you want. The phone let youselect another network if the phone fails to access the selectednetwork. If you switch off and on the phone, the phone will be resetto Automatic.
EN
GL
IS
H
96
Settings [Menu 8]Menu functions
EN
GL
IS
H
97
Menu functions
Security [Menu 8-5]1. Select PIN code request in the Security menu, and then press O
[OK].
2. Set ON/Off. If you set On, you have to enter the PIN code whenyou switch on the phone.
3. Enter the current PIN code, and the press O [OK].
4. If you enter wrong PIN code more than three times, the phone willlock out. If the PIN is blocked, you have to enter PUK code.
5. You can enter your PUK code up to ten times. If you input wrongPUK code more than 10 times, you can’t unlock your phone. Youwill need to contact your service provider.
Fixed dial numberYou can restrict your outgoing calls to selected phone numbers. Thenumbers are protected by your PIN2 code.
1. If the PIN 2 code is correct, you can view the following submenus.
On : You can restrict your outgoing calls to selectedphone numbers.
Off : you can call to any numbers.
Number list : you can view the fixed dial numbers.
2. If you want to change the Number list or FDN scroll usingU, D and press O [Setup].
EN
GL
IS
H
98
Call barringThe Call barring service prevents your phone from making orreceiving certain category of calls. This function requires the callbarring password. You can view the following submenus.
• All outgoing: The barring service for all outgoing calls.
• InternationalThe barring service for all outgoing international calls.
• International when roamThe barring service for all international outgoing calls except homenetwork.
• All incomingThe barring service for all incoming calls.
• Incoming when roamThe barring service for all incoming calls when roaming.
How to activate or cancel the function1. To activate the function, press O [On].
2. To cancel the function, press > [Off].
How to check the current status and cancel all call barring services1. After selecting the function, press < [Option].
2. You can cancel all the call barring services by pressing the Okey.
Settings [Menu 8]Menu functions
EN
GL
IS
H
99
Menu functions
Closed user group(network dependent)
Use this function to restrict usage of the phone with numbers thatbelong to certain user groups. When this function is used everyoutgoing call is associated with a group index. If a group index isspecified, it is used for all outgoing calls. If no group index isspecified, the network will use the preferential index (a specific indexthat is stored in the network).
A. Standard : Setting the selected CUG Index.
B. On : Set CUG Index.
C. Off : Cancel CUG function.
Change codesAllows you to change PIN Code, PIN2 Code, Security code, andBarring password.
• PIN Code/PIN2 codePIN is an abbreviation of Personal Identification Number, used toprevent use by any unauthorised person.
1. Select Change codes from the Security Setting List, then pressO [OK] key.
2. Enter the current PIN/ PIN2 code. If you input the wrong codemore than 3 times, you must enter PUK/ PUK2 code to unblockthe PIN.
3. If you enter the PUK/PUK2 codes incorrectly more than 10times, the phone will be blocked and you will need to contactsyour service provider.
4. Correct entry of your PIN Code will allow you to change yourexisting PIN Code.

• Security codeUsed to change PIN for your phone. Unlike PIN Code or PIN2Code, there is no limitation on the number of times for incorrectentry of the PIN.
• Barring passwordUsed to change call barring password.
Modem [Menu 8-6]
SpeedIf you use Serial, you should select Speed first.
• GPRSYou can set 115200 baud rate to connect to a modem.
• CSDYou can set 19200 baud rate to connect to a modem.
ConnectionAllows you to use Data Service by IrDA or Serial.
• IrDA1. Select IrDA and install the software supplied by your service
provider for this.
2. Connect IrDA of the phone to the IrDA of PC.
3. Operate the PC program.
EN
GL
IS
H
100
Settings [Menu 8]Menu functions
EN
GL
IS
H
101
Menu functions
• Serial1. Connect the phone to PC with Serial cable.
2. Select Serial by pressing OK.
3. Operate the PC program.
Memory status [Menu 8-7]Allows you to view all used memory.
Select Memory status from the Phone Management List, then press O [OK] key.
Limited itemsYou can check the used memory for voice memo, voice tag, inbox,outbox, phone book, to do, and memo.
Common memoryYou can check the used memory for image, video, animation,downloads such as ring tone, java applications, and EMS contents.When you download tones, you can save up to 10 tones. If thememory is full, the phone will delete the oldest stored tone.
MMS & E-mailYou can check the used memory capacity of MMS and E-mail.
Language [Menu 8-8]Allows you to select the language for your phone.
1. Select Language from the Phone Management List, then pressO [OK] key.
2. Press O [OK] key or numeric keys to select the language youwant.
Phone info [Menu 8-9]1. Select Phone info menu, and then press < [Option].
2. You can check the current software version of the phone.
Reset settings [Menu 8-10]Allows you to initialize all factory defaults.
1. Select Reset settings from the Phone Management List, thenpress O [OK] key.
2. Press O [OK] key to select Yes or No.
3. Enter PIN code if you select Yes, then press O [OK] key toinitialize all factory defaults.
EN
GL
IS
H
102
Settings [Menu 8]Menu functions
EN
GL
IS
H
103
Allows you to take advantage of easy, convenient functions forconnecting to the menu of your choice directly. You can select from 9different types and adjust numbers for My Menu.
1. Press > [Add] key to register menu. The same menu can notbe repeatedly registered, and the set menu will not allowregistration again. Press > [Change] key to change to othermenus.
2. Press < [Option] key to select from among Delete, Delete all,and Information, Add/Change.
3. Select Delete to delete the menu selected.
4. Select Delete All to delete the all menus registered. SelectInformation to view the routes of the menu selected.
Favorites [Menu 9]Menu functions
Your service provider can offer special applications through the SIMcard, such as home banking, stock market, etc. If you are registeredfor one of these services, the service name will appear at the end ofthe Main Menu. For more information contact your service provider.
SIM services [Menu 10]
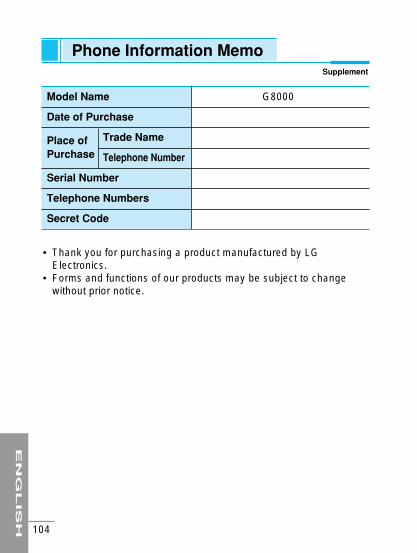
EN
GL
IS
H
104
Model Name G8000
Date of Purchase
Place of Trade Name
Purchase Telephone Number
Serial Number
Telephone Numbers
Secret Code
Phone Information MemoSupplement
• Thank you for purchasing a product manufactured by LGElectronics.
• Forms and functions of our products may be subject to changewithout prior notice.
EN
GL
IS
H
105
When using this unit, basic safety precautions as belowshould be always followed.
• Do not touch the adapter with wet hands.
• Do not disassemble this unit. (Take it to a qualified servicetechnician when repair work is required.)
• Away from electrical appliance such as a TV, radio or personalcomputer.
• The unit should be situated from heat sources such as radiatorsor cookers.
• Do not drop.
• Do not subject this unit to mechanical vibration or shock.
• The coating of the phone may be damaged if covered with wrapor vinyl wrapper.
• Use dry cloth to clean the exterior of the unit. (Do not usesolvent such as benzene, thinner or alcohol.)
• Do not subject this unit to excessive smoke or dust.
• Do not keep the phone next to credit cards or transport tickets;it can be affect the information on the magnetic strips.
• Do not tap the screen with a sharp object; otherwise, it maydamage the phone.
• Do not expose the phone to liquid or moisture.
• Use the accessories like an earphone cautiously. Do not touchthe antenna unnecessarily.
Care and Maintenance

EN
GL
IS
H
106
� Caring for the Battery• You do not need to completely discharge the battery before
recharging. Unlike other battery systems, there is no memoryeffect that could compromise the battery’s performance.
• Use only LG batteries and chargers. LG chargers are designedto maximize the battery life.
• Do not disassemble or short-circuit the battery pack.
• Keep the metal contacts of the battery pack clean.
• Replace the battery when it no longer provides acceptableperformance. The battery pack may be recharged hundreds oftimes until it needs replacing.
• Recharge the battery if it has not been used for a long time tomaximize usability.
• Do not expose the battery charger to direct sunlight or use it inhigh humidity, such as the bathroom.
• Do not leave the battery in hot or cold places, this maydeteriorate the battery performance.
Care and Maintenance
EN
GL
IS
H
107
GeneralProduct Name : G8000
System : GSM 900/DCS 1800
Ambient TemperaturesMax : +55°C
Min : -10°C
Technical Data
EN
GL
IS
H
108