IVECO Daily 3 - aec-srl.com · IV230 IVECO Daily 3.0 Dal 2017 – motore 2998 cc – 4 cilindri –...
7
IV230 IVECO Daily 3.0 Dal 2017 – motore 2998 cc – 4 cilindri – con A/C From 2017 – engine 2998 cc – 4 cylinders – with A/C Istruzioni di montaggio kit innesto elettromagnetico Electromagnetic clutch kit installation instructions • Sollevare il veicolo mediante un adeguato ponte sollevatore • Raise the vehicle by means of a suitable lift bridge
Transcript of IVECO Daily 3 - aec-srl.com · IV230 IVECO Daily 3.0 Dal 2017 – motore 2998 cc – 4 cilindri –...
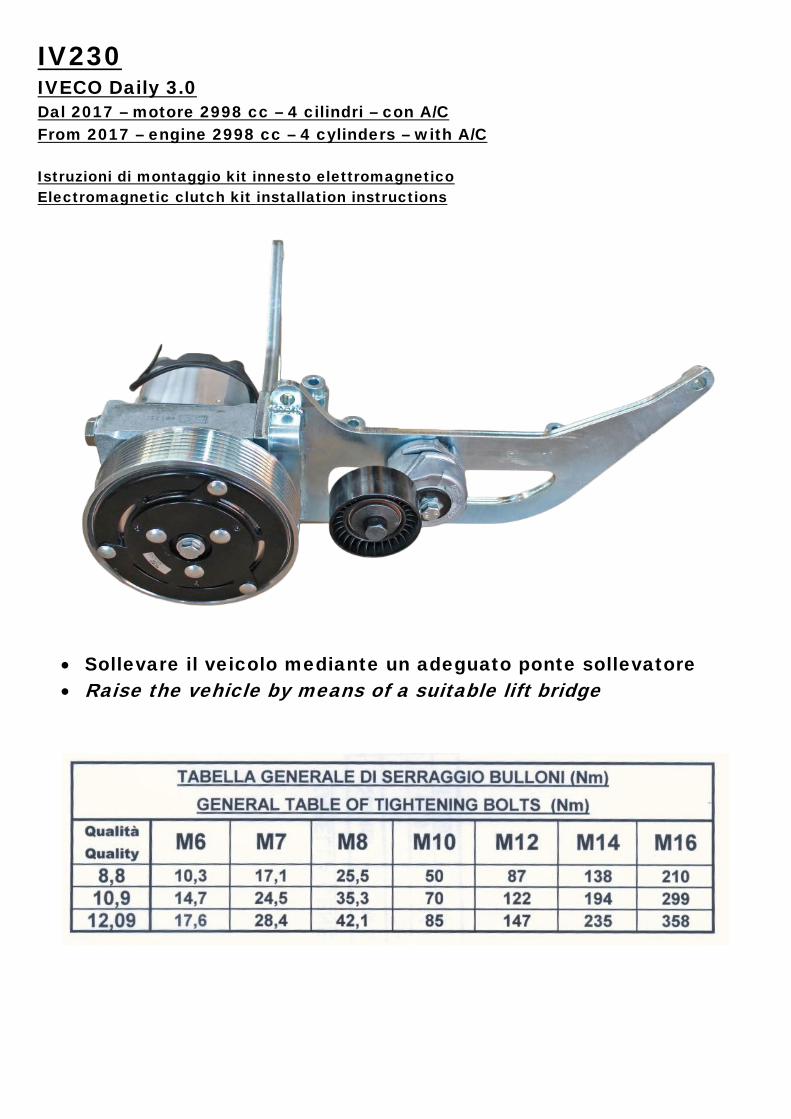
IV230 IVECO Daily 3.0 Dal 2017 – motore 2998 cc – 4 cilindri – con A/C From 2017 – engine 2998 cc – 4 cylinders – with A/C Istruzioni di montaggio kit innesto elettromagnetico Electromagnetic clutch kit installation instructions
• Sollevare il veicolo mediante un adeguato ponte sollevatore • Raise the vehicle by means of a suitable lift bridge
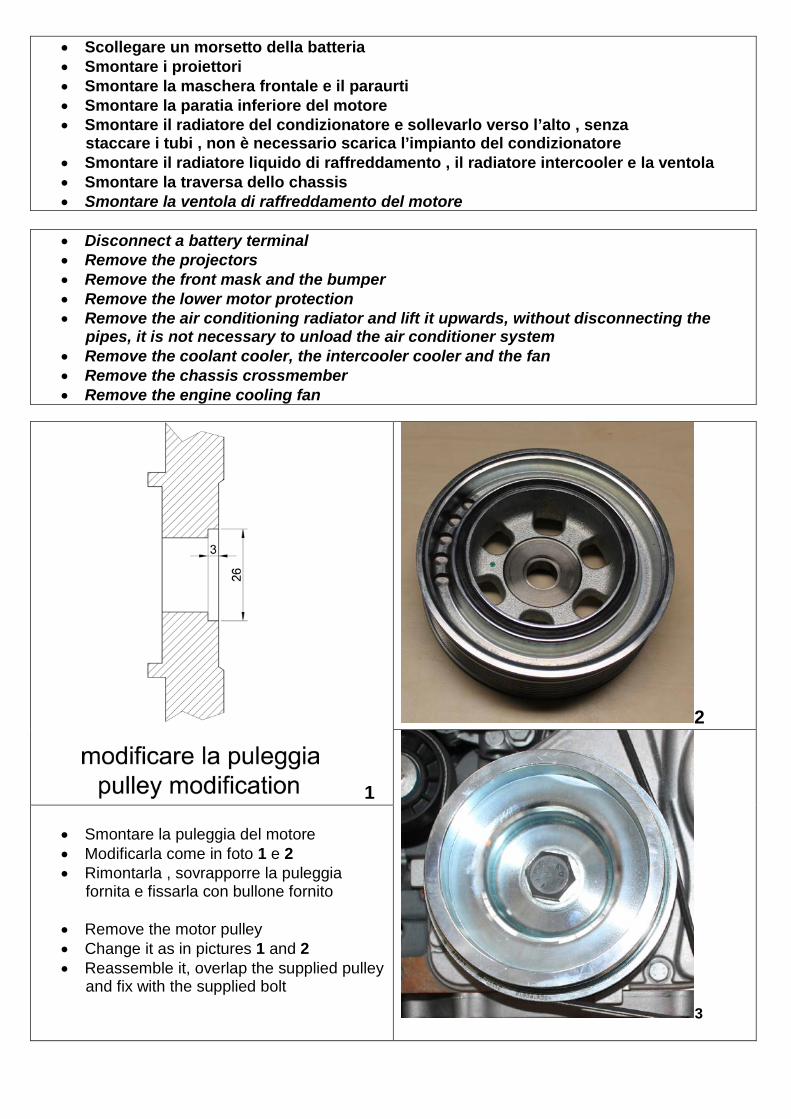
• Scollegare un morsetto della batteria • Smontare i proiettori • Smontare la maschera frontale e il paraurti • Smontare la paratia inferiore del motore • Smontare il radiatore del condizionatore e sollevarlo verso l’alto , senza
staccare i tubi , non è necessario scarica l’impianto del condizionatore • Smontare il radiatore liquido di raffreddamento , il radiatore intercooler e la ventola • Smontare la traversa dello chassis • Smontare la ventola di raffreddamento del motore
• Disconnect a battery terminal • Remove the projectors • Remove the front mask and the bumper • Remove the lower motor protection • Remove the air conditioning radiator and lift it upwards, without disconnecting the
pipes, it is not necessary to unload the air conditioner system • Remove the coolant cooler, the intercooler cooler and the fan • Remove the chassis crossmember • Remove the engine cooling fan
1
2
3
• Smontare la puleggia del motore • Modificarla come in foto 1 e 2 • Rimontarla , sovrapporre la puleggia
fornita e fissarla con bullone fornito
• Remove the motor pulley • Change it as in pictures 1 and 2 • Reassemble it, overlap the supplied pulley
and fix with the supplied bolt
\ 4
5 6
7
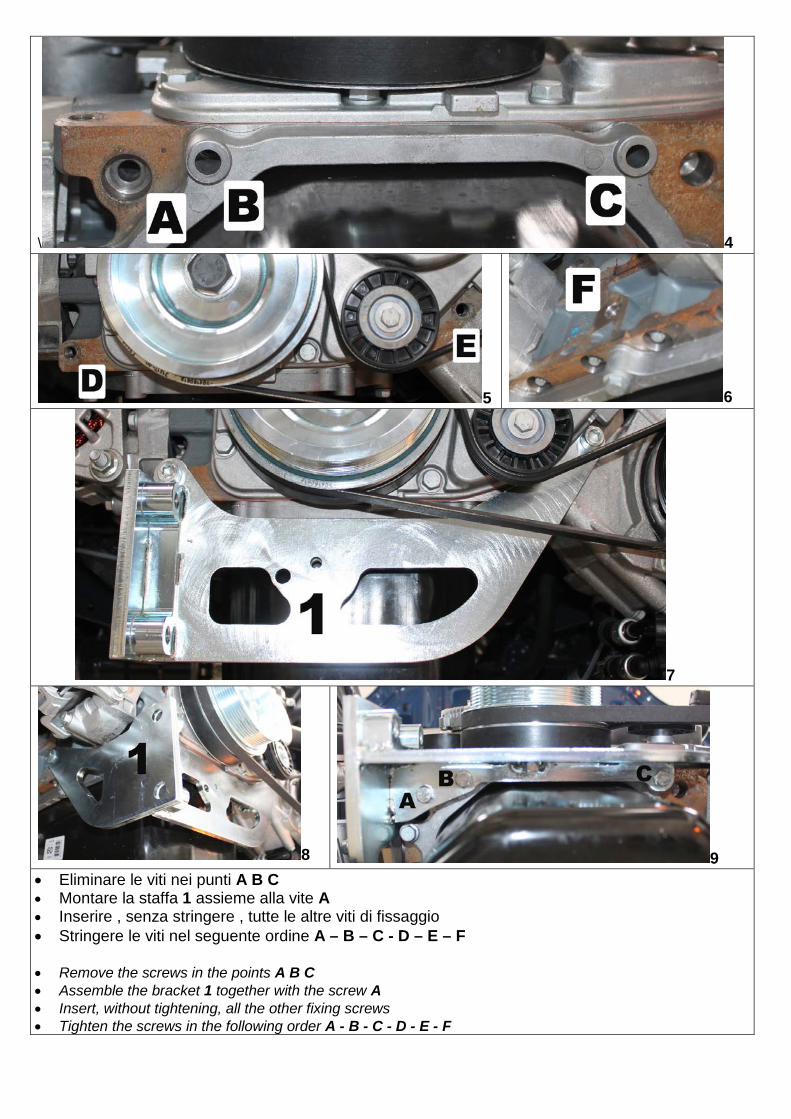
8 9 • Eliminare le viti nei punti A B C • Montare la staffa 1 assieme alla vite A • Inserire , senza stringere , tutte le altre viti di fissaggio • Stringere le viti nel seguente ordine A – B – C - D – E – F
• Remove the screws in the points A B C • Assemble the bracket 1 together with the screw A • Insert, without tightening, all the other fixing screws • Tighten the screws in the following order A - B - C - D - E - F
10
11
12
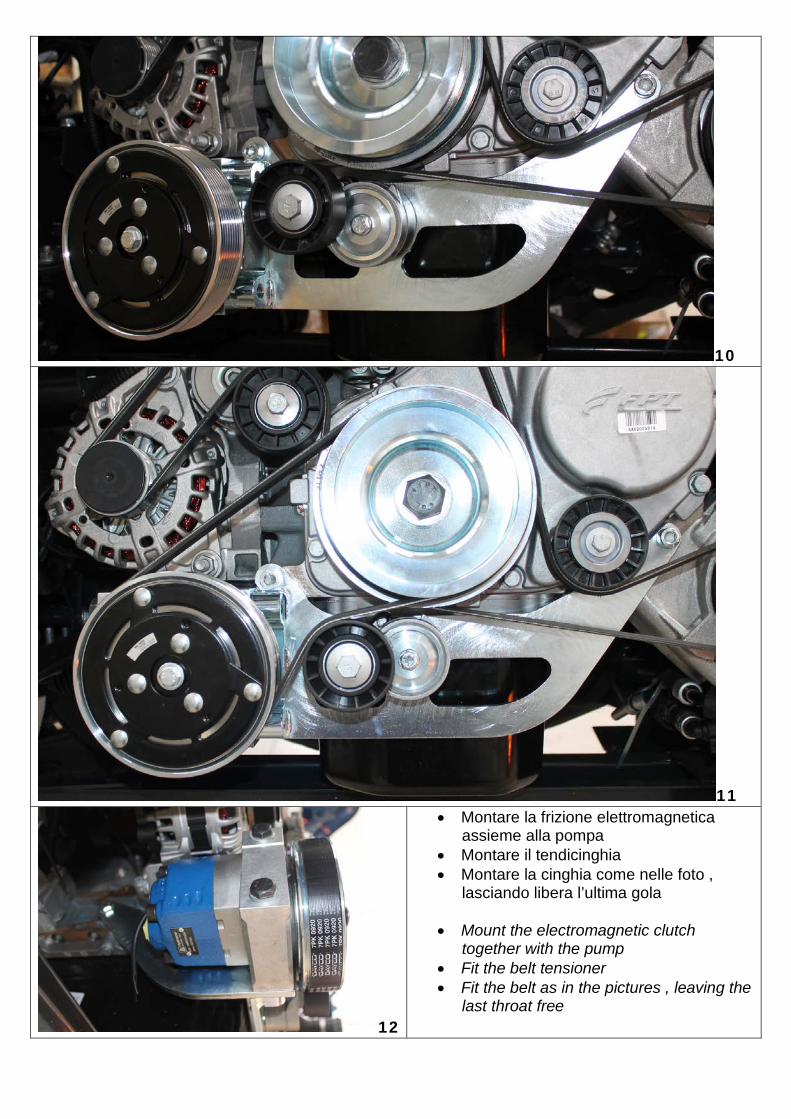
• Montare la frizione elettromagnetica assieme alla pompa
• Montare il tendicinghia • Montare la cinghia come nelle foto ,
lasciando libera l’ultima gola
• Mount the electromagnetic clutch together with the pump
• Fit the belt tensioner • Fit the belt as in the pictures , leaving the
last throat free
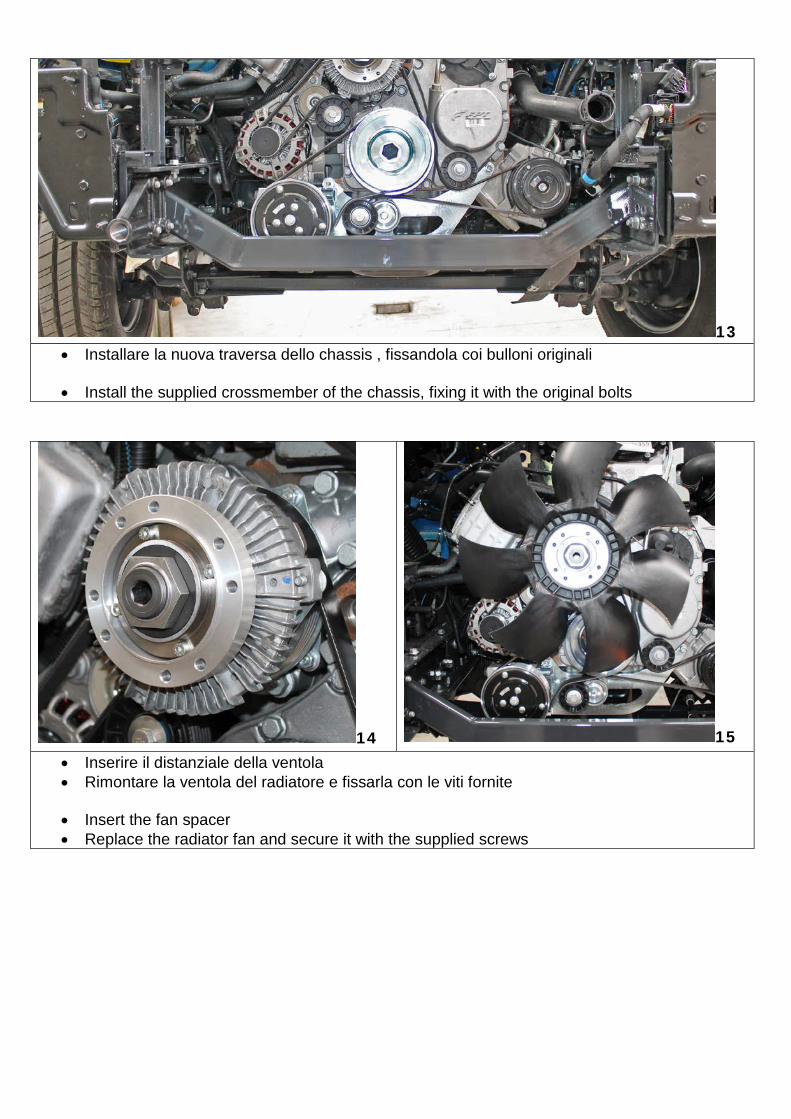
13 • Installare la nuova traversa dello chassis , fissandola coi bulloni originali
• Install the supplied crossmember of the chassis, fixing it with the original bolts
14 15 • Inserire il distanziale della ventola • Rimontare la ventola del radiatore e fissarla con le viti fornite
• Insert the fan spacer • Replace the radiator fan and secure it with the supplied screws

16
• Rimontare il radiatore liquido di raffreddamento e il radiatore intercooler • Riposizionare il radiatore del condizionatore • Rimontare la maschera frontale e il paraurti • Rimontare i proiettori • Rimontare la protezione in plastica inferiore del motore • Ricollegare il morsetto della batteria
• Replace the coolant cooler and the intercooler cooler • Reposition the conditioner radiator • Replace the front mask and the bumper • Replace the projectors • Replace the lower plastic protection of the motor • Reconnect the battery terminal